

Audiences Campaign Overview
What exactly is an Audiences Campaign? A Boingnet Audiences Campaign is a type of redirect campaign that allows you to track the customers that visit a personal URL (pURL) printed on your direct mail piece. When the customer visits their pURL, they hit our server briefly before being directed to the URL of your choice, such as your website. We track the visit and send them to your website/URL with their unique identifier in the query string in addition to information from your campaign’s list that can be used to personalize your website’s pages.
This article is meant to be read along with the Audiences Tracking Code and Audiences Personalization articles.
How to Create Your Audiences Campaign:
- Upload Your Contact List
- Create Your Audiences Campaign
- Add Your Audiences Campaign Tracking Code
Step 1: Upload Your Contact List
Boingnet will generate a pURL for each person on your contact list. Visit our Add a Contact List page for more information.
Step 2: Create Your Audiences Campaign:
From the Home page, click on Campaigns, then select Create New Campaign:
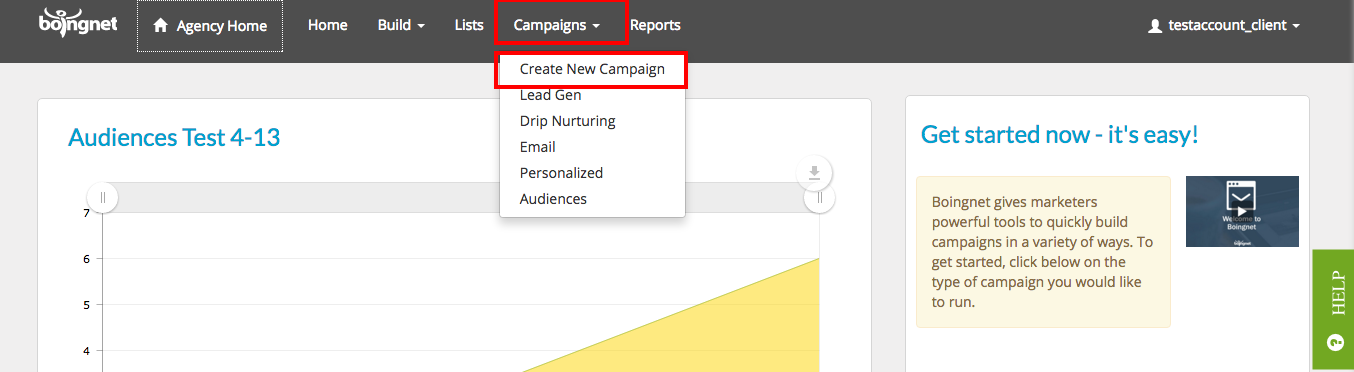
Once on the Campaigns Page, click on Audiences:

You’ll navigate to the following page:

Enter:
- A Campaign Name – this will be used to identify this campaign within Boingnet
- A Starting URL – the URL you would like your customers directed to when they visit their pURL In the example above, we have entered a page on our website.
- Page down and click Next:
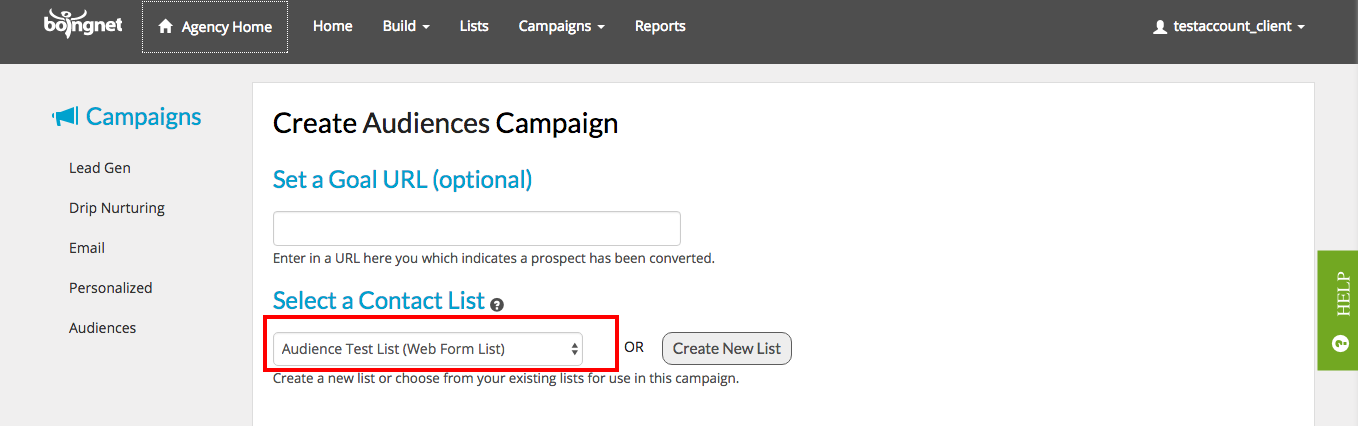
- You may enter a Goal URL (optional) to indicate that a prospect has been converted.
- Select a Contact List from the drop down menu. A pURL will be generated for each person on your contact list.
On the next page, define your pURL structure:
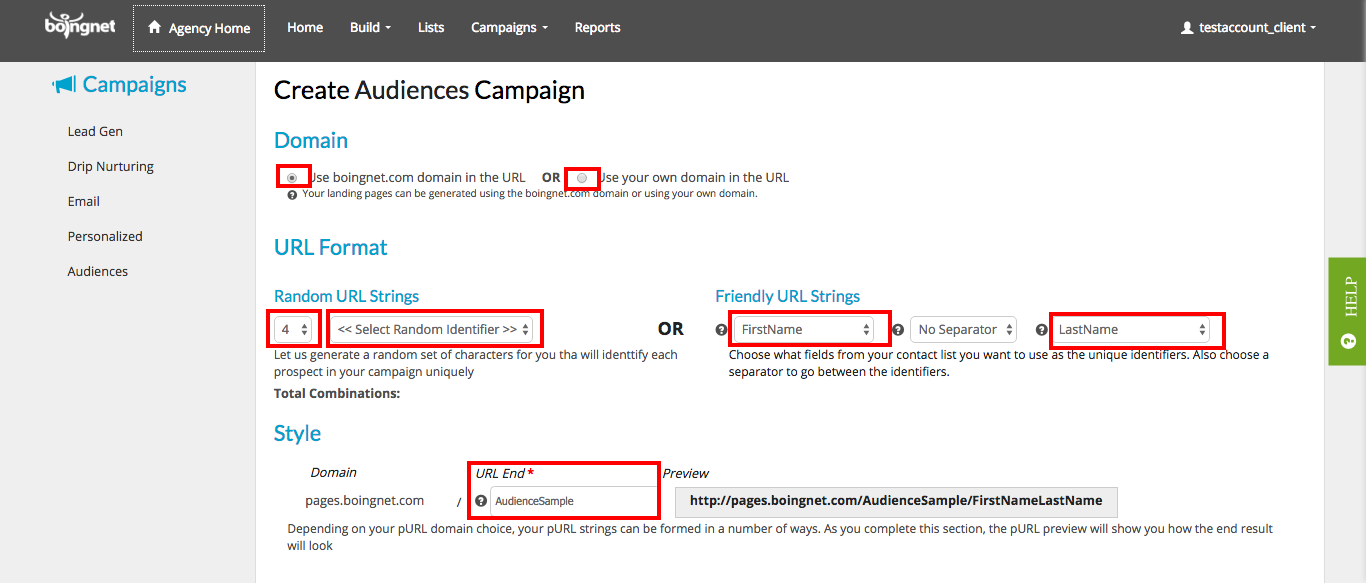
Domain:
Underneath Domain – Choose either the Boingnet sub-domain or your own domain. If you select the Boingnet .com domain, your pURLs will have the following structure:
http://pages.boingnet.com/URLEnd/FirstIdentifierSecondIdentifier
If you select your own domain, your pURLs will have this structure:
http://FirstIdentifierSecondIdentifier.yourdomain.com/URLEnd
Please note: If you choose to use your own domain, you’ll need to point that domain to Boingnet’s IP address so we can host your landing pages. For step by step instructions, visit our page How to Point Your Domain to Boingnet.
URL Format:
Choose either Random URL Strings OR Friendly URL Strings.
Random URL Strings:
If you choose Random URL Strings, the system will generate a random alphanumeric string for each person on your contact list. You’ll need to choose the following:
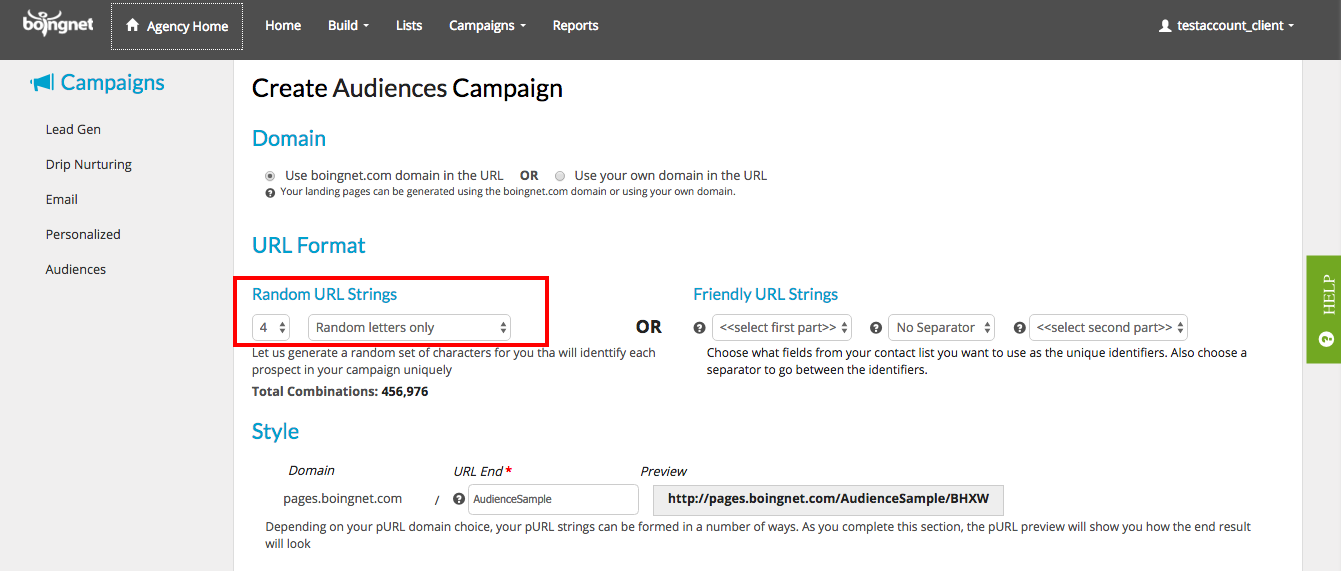
- The number of characters to use from the first drop down list
- The random identifier from the second drop down list – the choices are letters and numbers, letters only or, numbers only.
Once you make these selections, the system will calculate and display the number of possible combinations. In the example above, we have chosen 4 characters of random letters only and the total possible combinations is 456,976.
Friendly URL Strings:
If you choose Friendly URL Strings, the system will generate a pURL using the first and second identifier you specify from your contact list. You’ll need to choose the following:
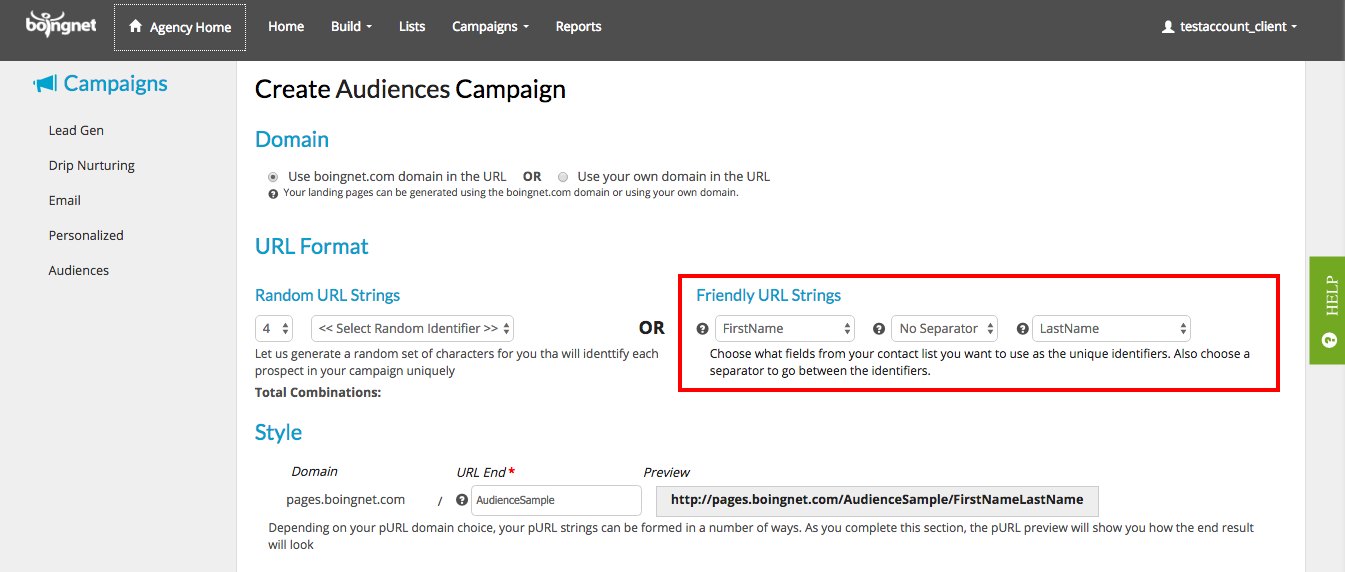
- The first identifier from the first drop down menu – in the example above, we have selected First Name.
- The second identifier from the second drop down menu – in the example above, we have selected Last Name.
Style:
Underneath Style, enter a URL End to distinguish this campaigns pURLs from all other pURL campaigns using this domain and URL format. In the example below, we have entered Audiences Sample:
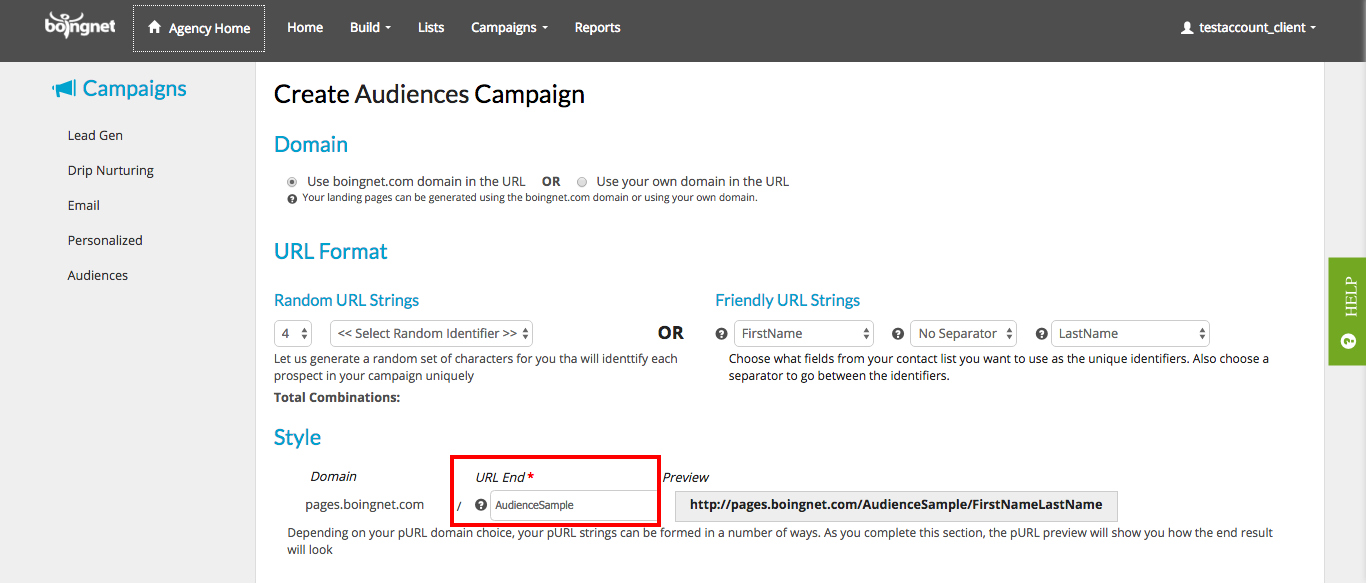
You’ll be able to see what your pURL structure looks like under Preview. When you’re done page down and click Next.
On the next page, you’ll be able to set up Email Notifications:
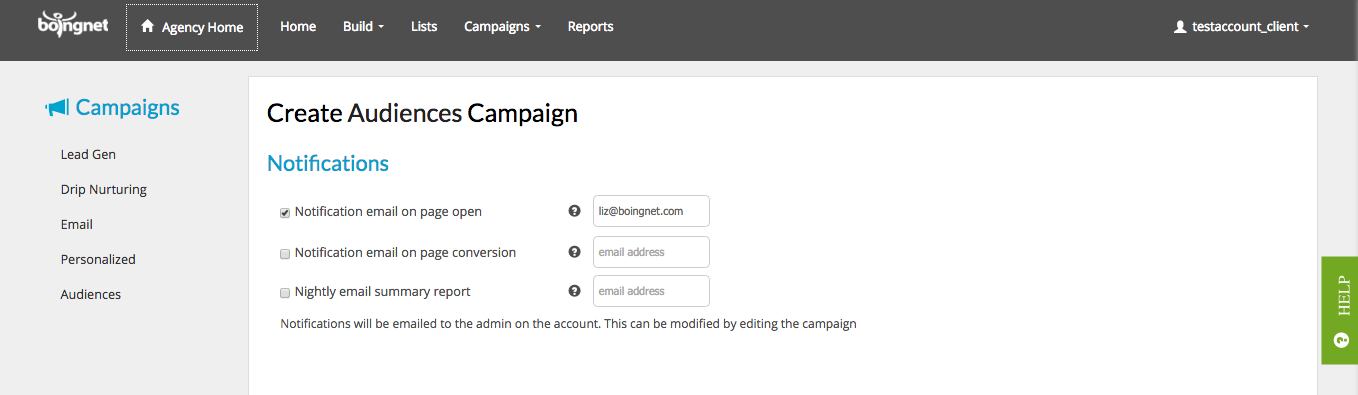
If you wish to have the campaign administrator notified when a person opens or converts his or her pURL, then select the appropriate boxes above and enter the email addresses in the box provided. Page down and click Next to get to the Confirm Details page. Review all your campaign details and then click Create Audiences Campaign Now:
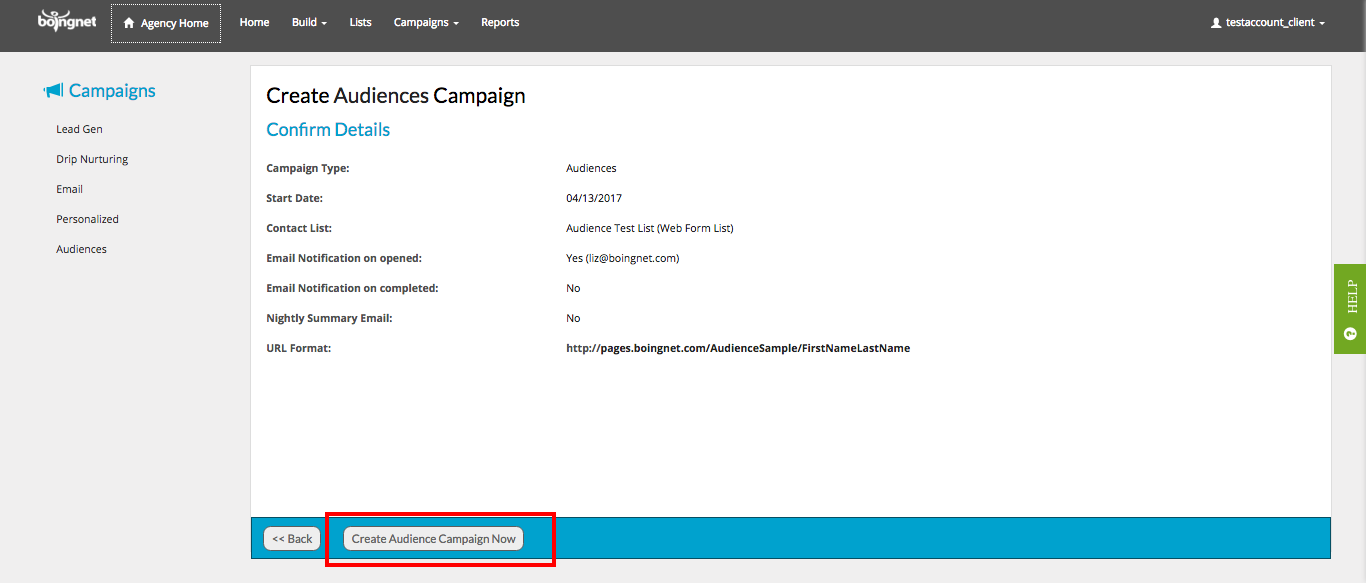
Your Audiences Campaign will be created.
Step 3: Add Audiences Campaign Tracking Code:
Visit our Audiences Tracking Code page for more information.
Contact Our Support Forums for Help
We are perpetually seeking to evolve our product as well as our support process. If you didn't find your answer here take a moment to visit our support forums as well as submit your ideas on how we can bring Boingnet to the next level!
Support Forums