

What exactly is a Drip Nurturing Campaign? Well, drip marketing campaigns are automated campaigns that maintain contact with possible consumers according to an organized, pre-scheduled timeframe. The continued contact that drip campaigns offer is great for branding and elevating a product’s visibility. And the process of creating higher quality leads in the hope of increasing sales is called ‘lead nurturing’.
Boingnet combines the features of drip marketing with the features of lead nurturing into one easy campaign type called the Drip Nurturing Campaign.
Drip Nurturing Campaigns can automate lead follow up processes so that marketers and sales people spend less time trying to figure out what to send to whom and more time working on generating and closing new business. Marketers and agencies are often looking for an easy use and affordable way to automatically send out emails on a planned basis when leads express interest in an offer. For more information on how drip marketing and lead nurturing can work together, check out our bog post – Drip Marketing with Lead Nurturing – The Dynamic Duo.
When you create a Drip Nurturing Campaign in Boingnet, you create a campaign containing a series of steps. For each step, you define the criteria that determines which contacts will receive that step’s email or action. A person’s behavior during a given step – opening an email, clicking on their pURL – determines what type of email they receive from you in the following step. You can even use behavior outside of the drip nurturing campaign – another email campaign – or variable logic to determine the next step for a person.
Here are the basic steps for creating a Drip Nurturing Campaign:
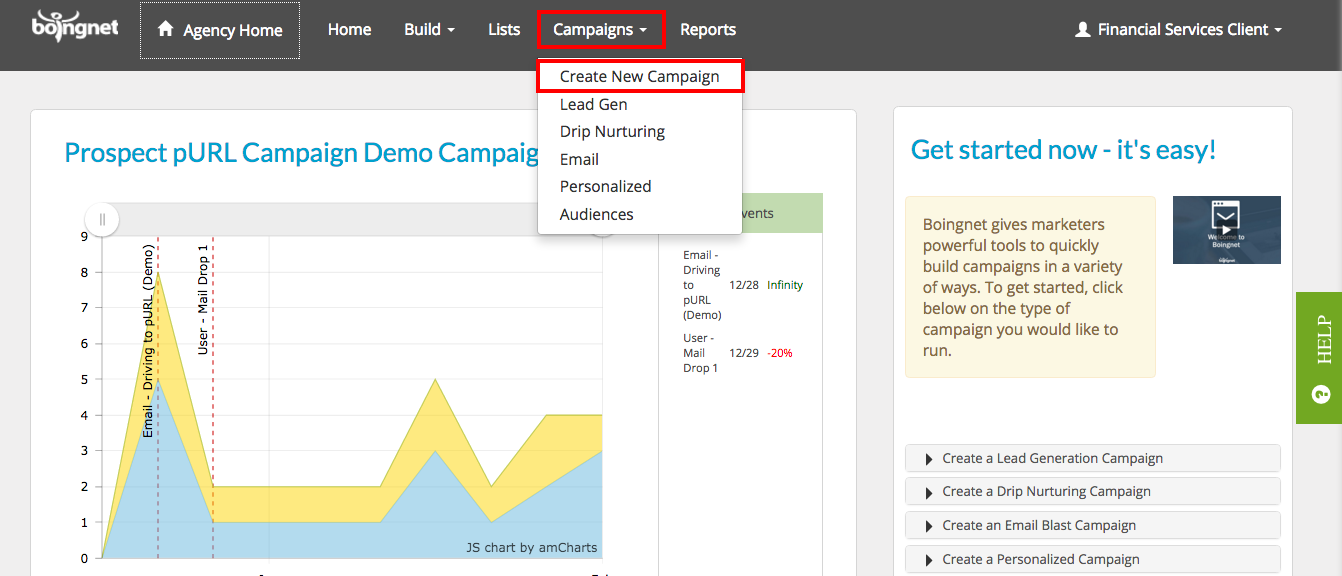
- From the top navigation bar, click Campaigns.
- Select Create New Campaign:
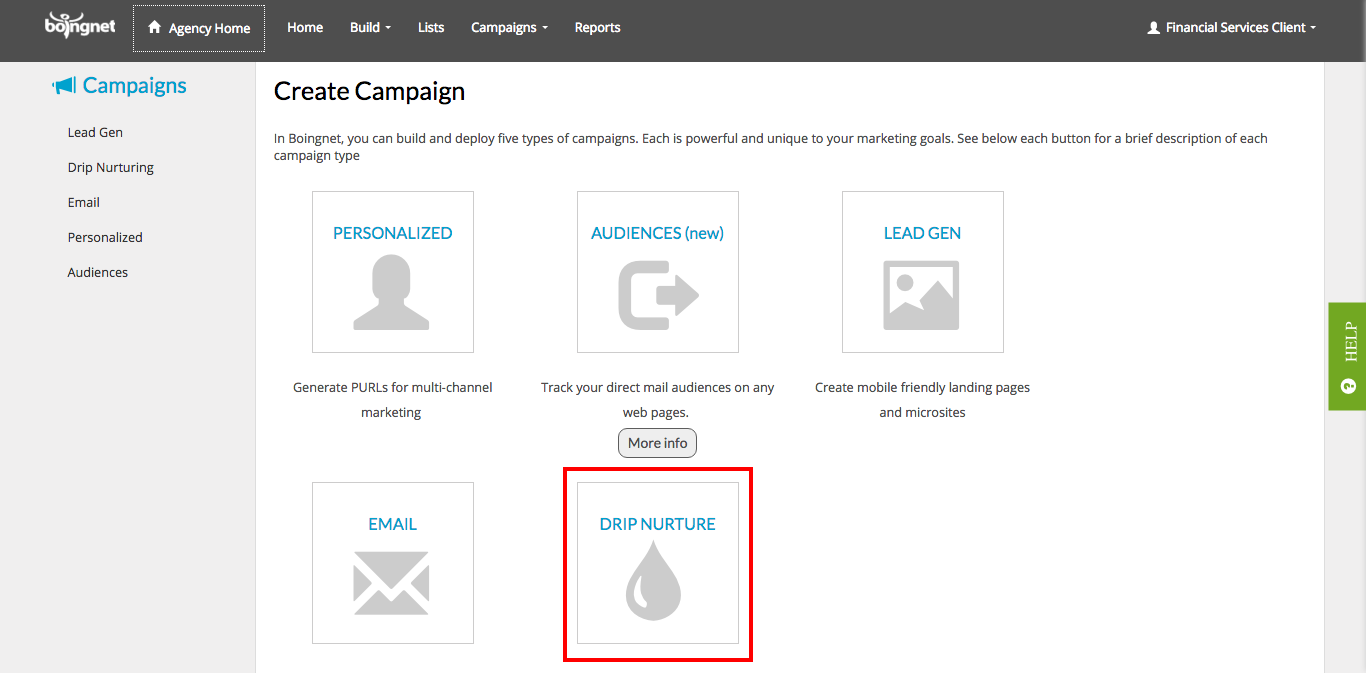
On the next page, select the Drip Nurture option:
You’ll navigate to the page below:
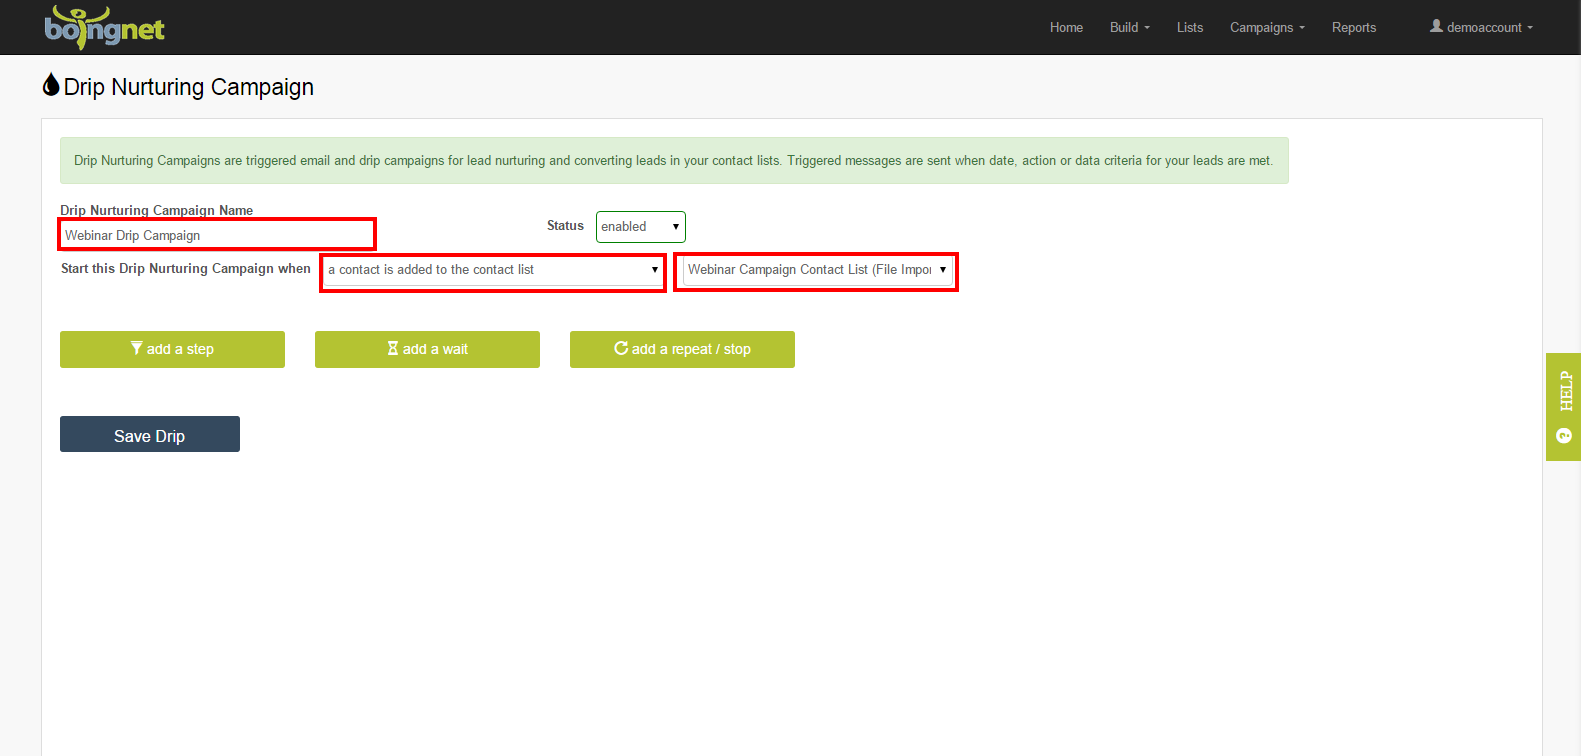
Drip Nurturing Campaigns always begin with a trigger – when a contact is added to a list, or when a person opens or clicks on an email. So enter the following information for your campaign:
Drip Nurturing Campaign Name.
Select a trigger to start this campaign from the dropdown list next to Start this Campaign When – the choices are:
- When a contact is added to the contact list
- When a contact opens an email from a specific email campaign
- When a contact clicks on an email from a specific email campaign
- When a contact opens a pURL from a specific pURL campaign
- When a contact completes a pURL from a specific pURL campaign
In the example above, this Webinar Drip Campaign will start when a Lead Generation Campaign adds a new contact to the Webinar Campaign Contact List.
Next, define the steps for this campaign. Each step sends an email to the contacts that enter that step. For each step, you can define one of four possible triggers:

- Send Email steps send an email to all contacts in this Drip Campaign step.
- Step Triggers send an email only to those contacts that meet the requirements of your IF statement. This choice checks behavior inside of this campaign.
- Campaign Triggers send an email only to those people who meet the criteria you select for the IF statement. This choice checks behavior outside this campaign.
- Variable Logic Triggers send an email only to those contacts whose information on the contact list matches the IF statement you construct.
Send Email steps:
This option sends an email to each person entering this step.

Once you select this option to Send Email – make the following selections:
- Select an email template from the dropdown list next to using the template.
- Enter the from email address in the box next to from.
- Enter the subject line for the email next to with the subject.
- Click save step.
In the example above, Step 1 will send the Weekly Webinar Invitation email to each person when they are added to the contact list Webinar Campaign List.
Step Trigger steps:
This choice sends an email only to those people that meet the criteria you select for the IF statement. The choices are – those contacts that have opened an email from a drip step within this drip campaign, or those contacts who have clicked on an email from a drip step in this campaign. In the example below, this step’s email will be sent only to contacts who have opened the email from Step 1:
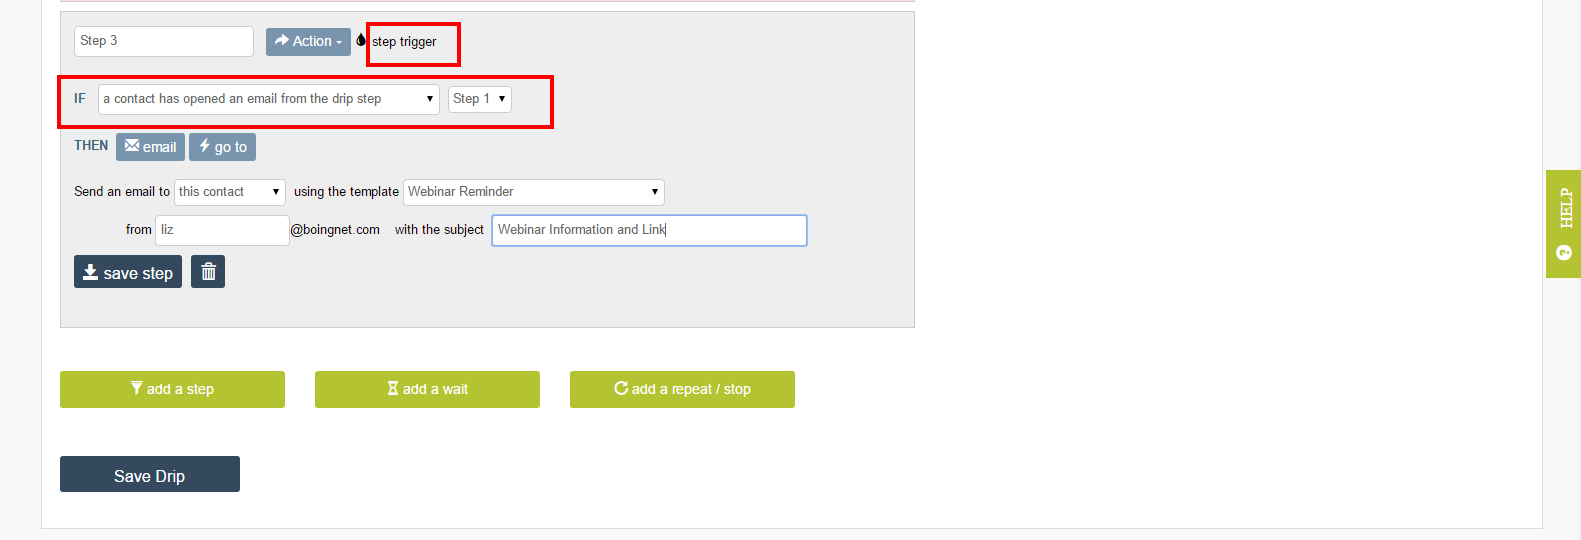
Once you select this action, make the following choices:
- Select the drip step in this campaign for the IF statement to check, in this case we’ve selected Step 1.
- Select the person to send this email to – either this contact or another person (a sales representative for example).
- Select the email template to use in this step. In the example above, we are using the template Webinar Reminder.
- Enter the from address for this email.
- Enter the subject line for this email. In the example above, we are using Webinar Information and Link as our email subject line.
- Click save step.
In the example above, Step 3 will send a Webinar Reminder email to everyone who opened the Weekly Webinar Invitation Email from Step 1.
Campaign Trigger steps:
This choice sends an email only to those people who meet the criteria you select for the IF statement. This choice checks behavior outside of this Drip Nurturing Campaign – in another email campaign. The choices are:
- Those contacts who have opened an email from another email campaign.
- Those contacts who have clicked on an email from another email campaign.
- Those contacts who have opened a pURL from another email campaign.
- Those contacts who have completed a pURL from another email campaign.
In the example below, this step’s email will be sent only to those contacts who opened the email from the New Release campaign:
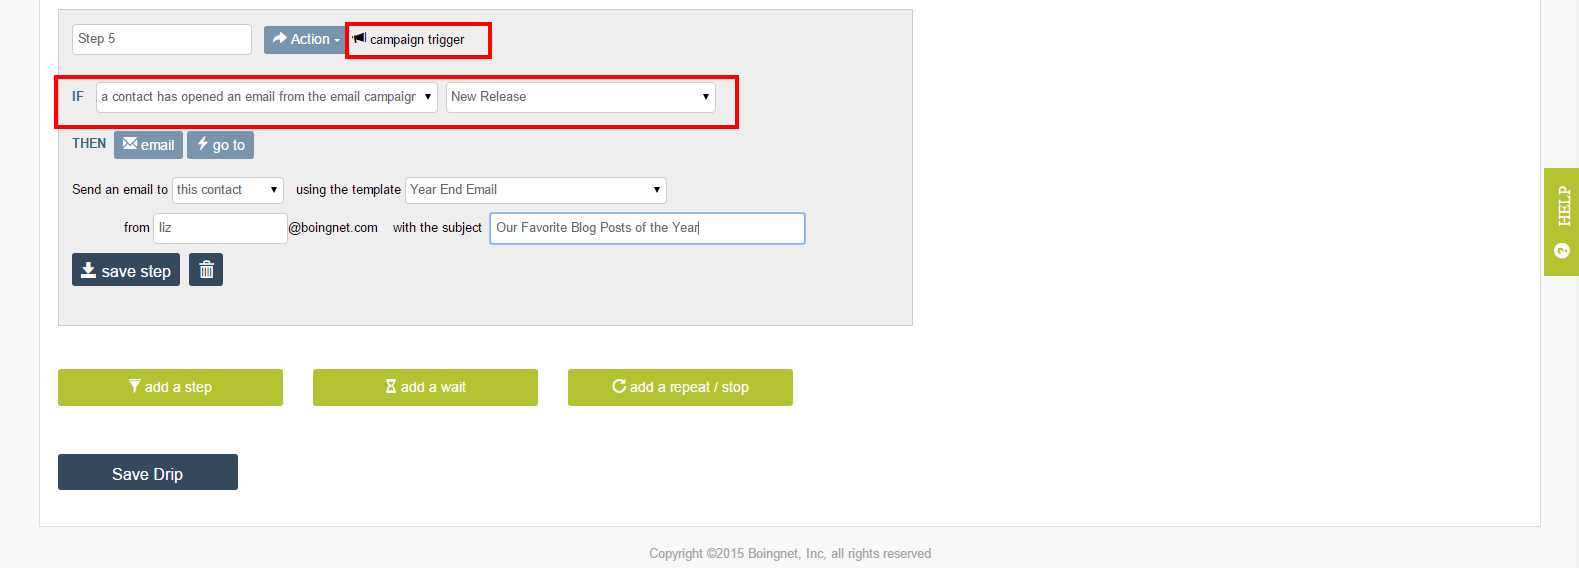
Once you select this choice, make the following selections:
- Select the email campaign you wish to check from the dropdown list, in the case, we’ve selected the New Release email campaign.
- Select the person to send this email to – either this contact or another person.
- Select the email template, in this example, we’ve selected the Year End Email template.
- Enter the from address.
- Enter the email subject line. In this example, we’ve used Our Favorite Blog Posts of the Year as the email subject line.
- Click save step.
In the example above, Step 5 will send an email to everyone who opened their Release Email using the Year End Email template with the subject line ‘Our Favorite Blog Posts of the Year’.
Variable Logic Trigger steps:
This choice sends an email only to those contacts whose information on the contact list matches the IF statement you construct. In the example below, this step’s email will be sent to those contacts with State = MA on the contact list Webinar Campaign Contact List:
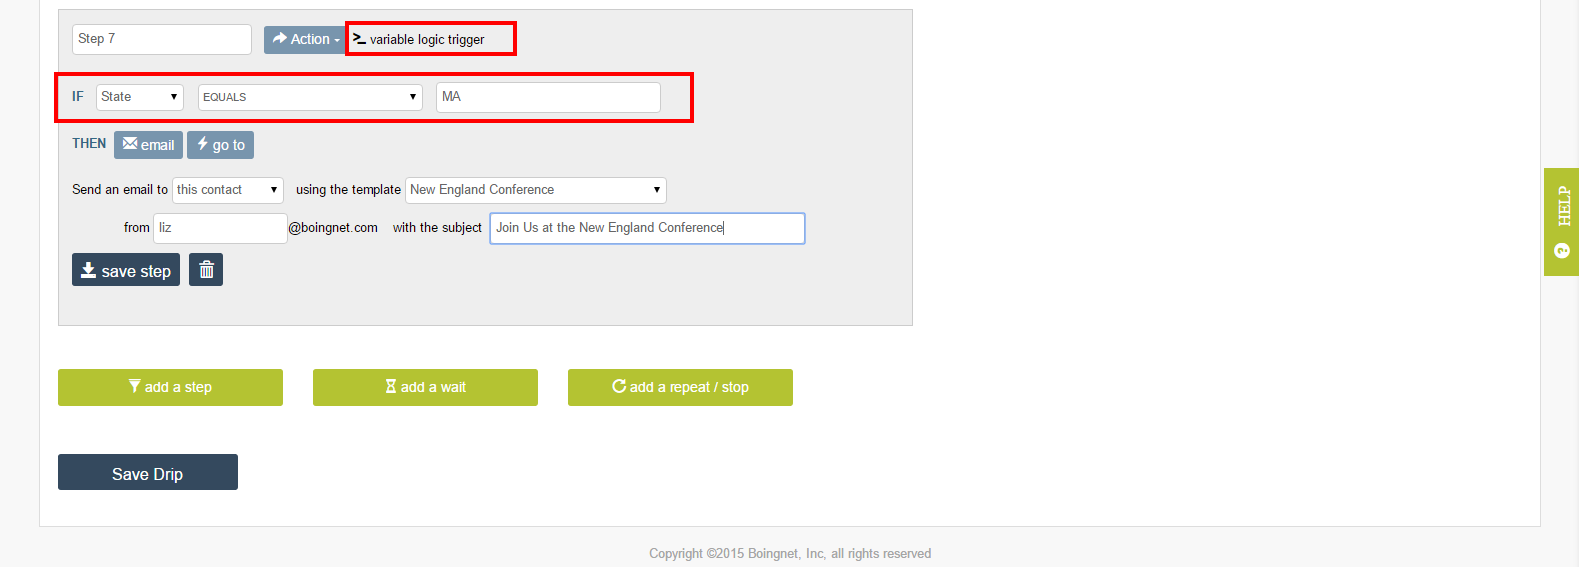
To define a Variable Logic Trigger:
- Select the field, qualifier and value for your IF statement. In this example, State is the field, “=” is the qualifier and ‘MA‘ is the value.
- Select the person to send this email to – this contact or another person.
- Select the email template, in this example we’ve used the New England Conference template.
- Enter a from address.
- Enter an email subject line, in this example, we’ve used ‘Join Us at the New England Conference‘ as the subject line.
- Click save step.
In the example above, Step 7 will send an email to only those contacts who’s State = Massachusetts using the New England Conference Template with the subject line ‘Join Us at the New England Conference’.
Wait Steps:
These steps allow you to define a wait period before the next step is executed. For example, once your contacts have opened their first email, you may want to wait several days before sending them the email from the next step in this campaign. You can use minutes, hours, days or weeks to define your wait period.
To add a Wait Step, click the Add a Wait button:

Next, enter the Wait For period in the box and select the units (minutes, hours, days or weeks) from the dropdown menu:
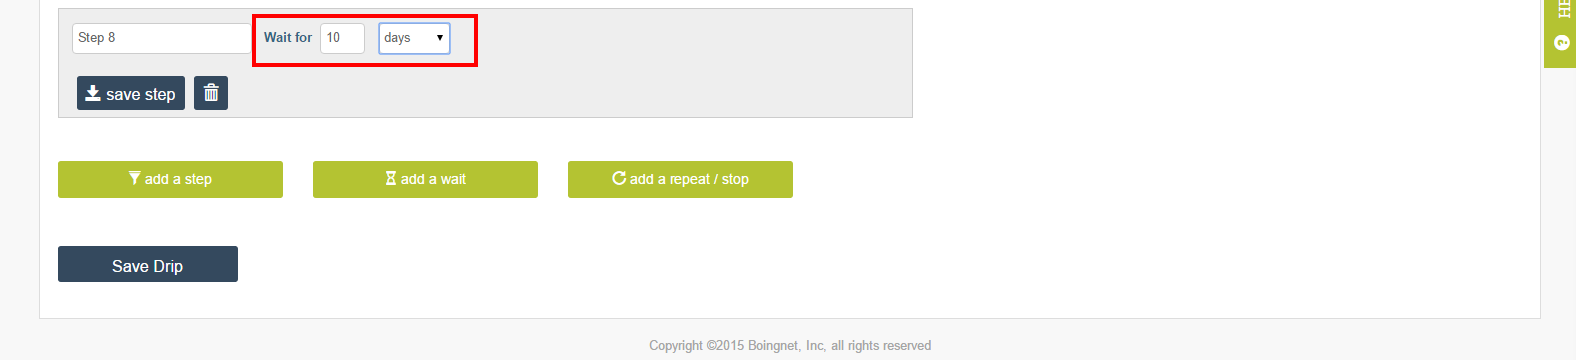
Click save step to save your wait step. In the example above, the system will wait 10 days before proceeding to Step 9.
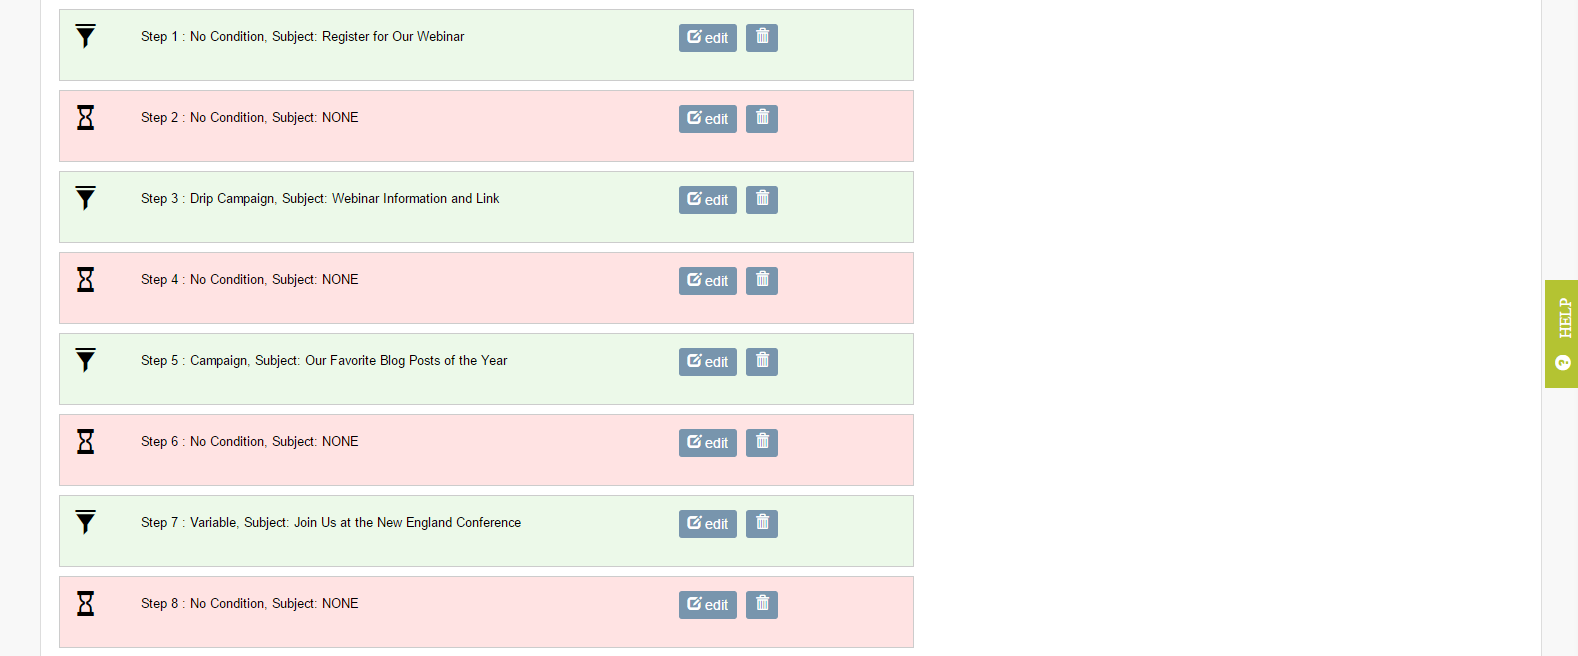
In our example Drip Nurture Campaign, we have added wait steps after each step that sends an email. So, Step 2, Step 4, Step 6, and Step 8 have all be added to wait a period of time before the next step’s email is sent:
Repeat / Stop Steps:
These steps allow you to repeat a step or a series of steps in the Drip Nurture Campaign a specified number of times, or until a specific condition, or a date is met.
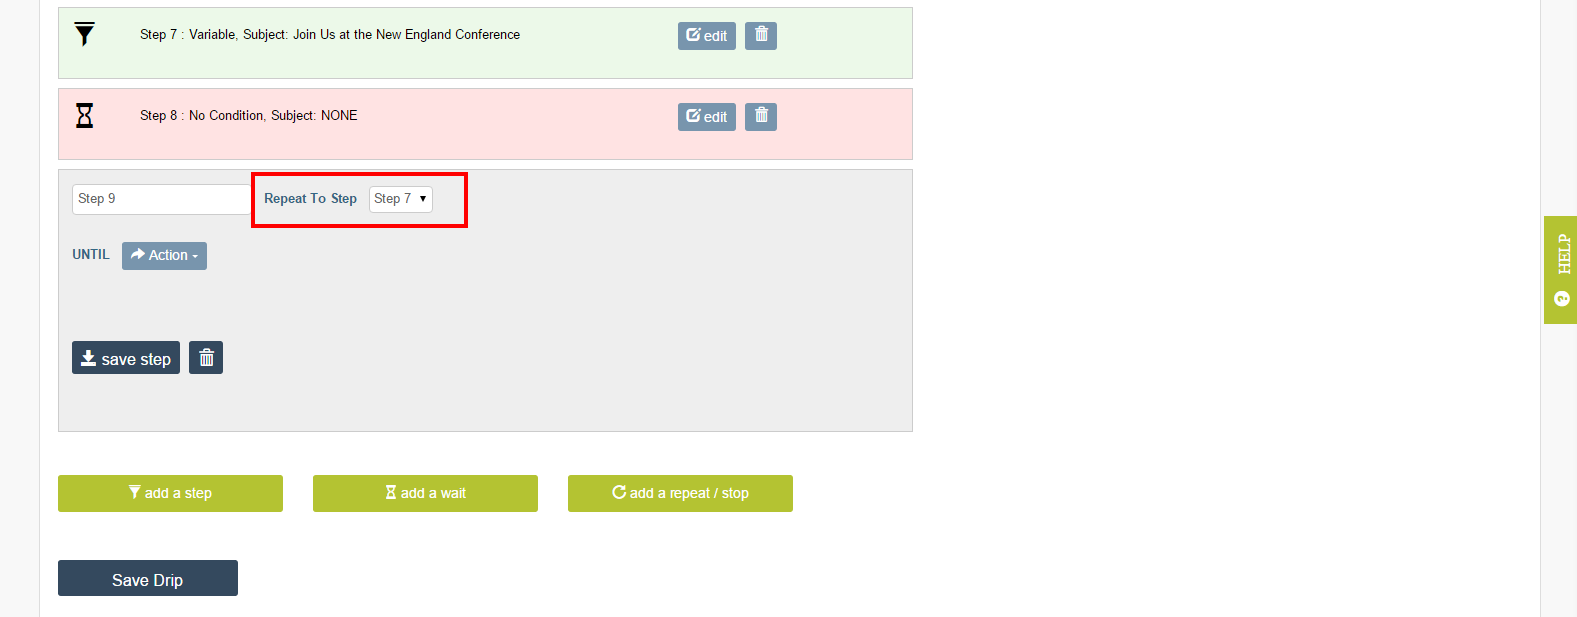
To add a Repeat / Stop step, click the Add a Repeat / Stop button:

Next, define which steps you’d like repeated. In the example below, we are repeating Steps 7 – 9.
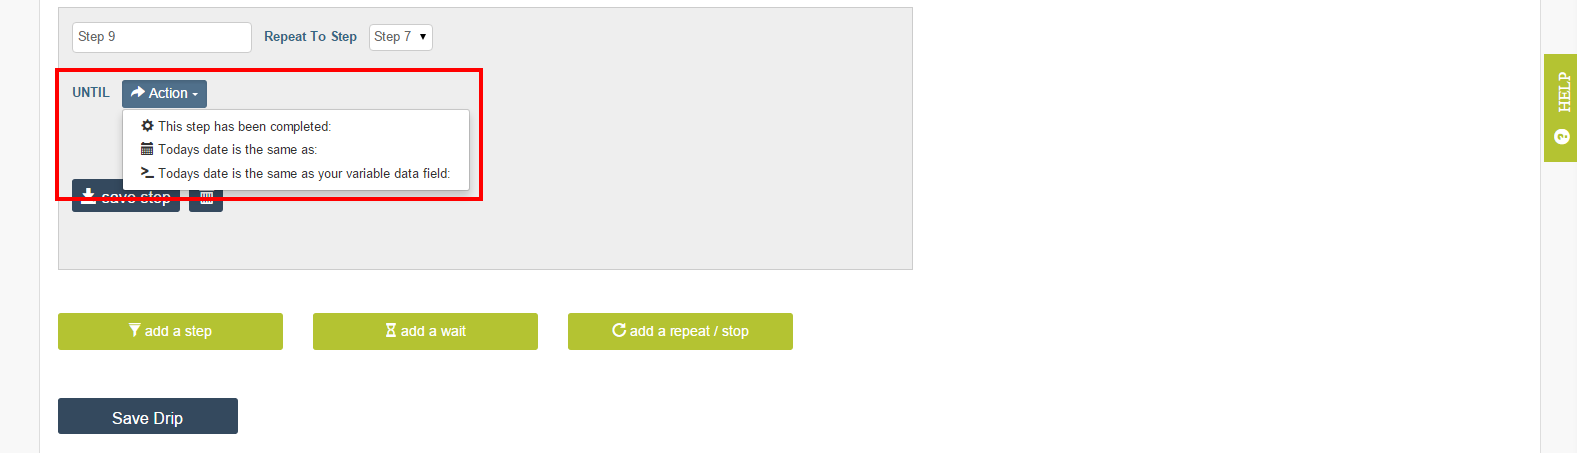
Finally, define the stop condition for this step by clicking on the Action button and selecting one of the following choices:
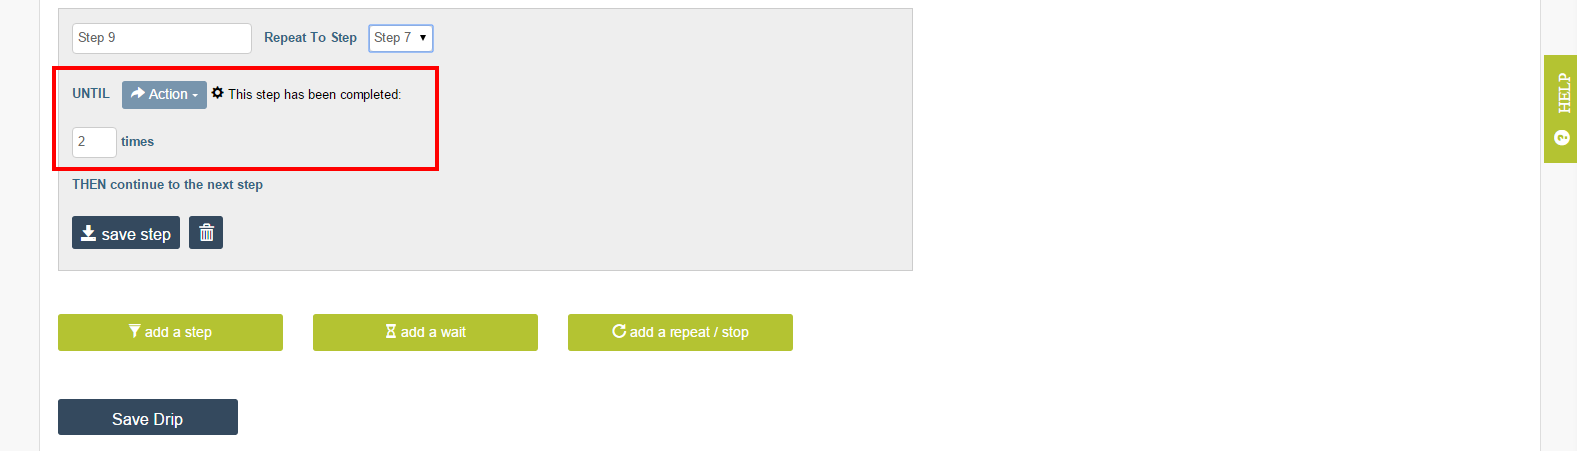
Click This step has been completed: to define a specified number of times to complete these steps OR
Click Today’s date is the same as: to define a specific end date OR
Click Today’s date is the same as your variable data field: to use a date field on your contact list – for example a birthdate or anniversary.
In the example above, we are repeating Steps 7 – 9 for a total of 2 times:
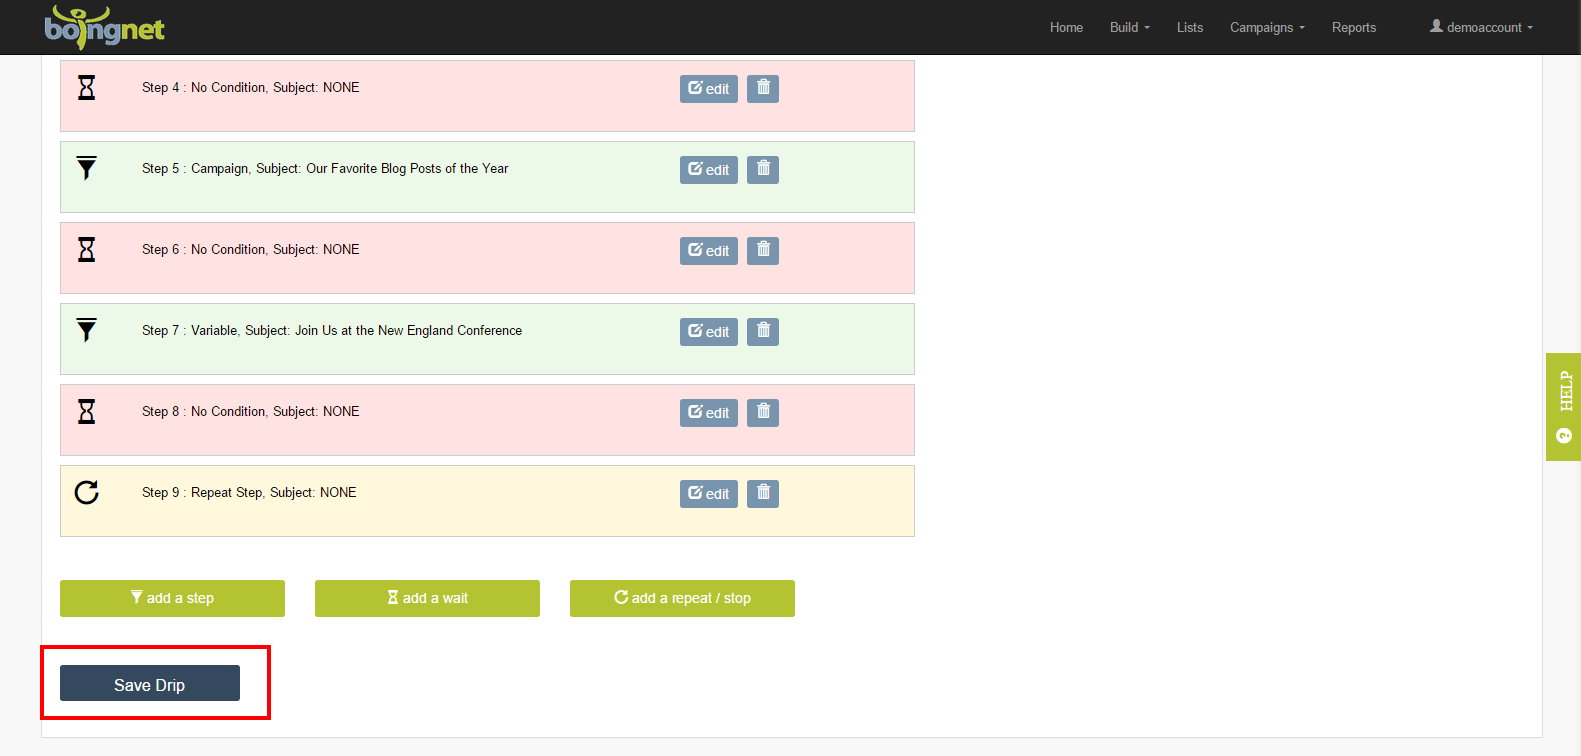
Once you are done creating all the steps for your campaign, click Save Drip to save your Drip Nurturing Campaign:
Contact Our Support Forums for Help
We are perpetually seeking to evolve our product as well as our support process. If you didn't find your answer here take a moment to visit our support forums as well as submit your ideas on how we can bring Boingnet to the next level!
Support Forums