

The link feature of our editor is a powerful option that lets you add clickable hyperlinks or email addresses to your template. To insert a link into your template, click the link button of the toolbar. If you want the link to be assigned to a text fragment, select it first. If no text is selected, the link URL or email address will appear in the template as is.
The link dialog box that will open lets you choose the link type and configuration options pertaining to your choice. It contains two or four tabs that group link options, depending on your link type:
Link Info:
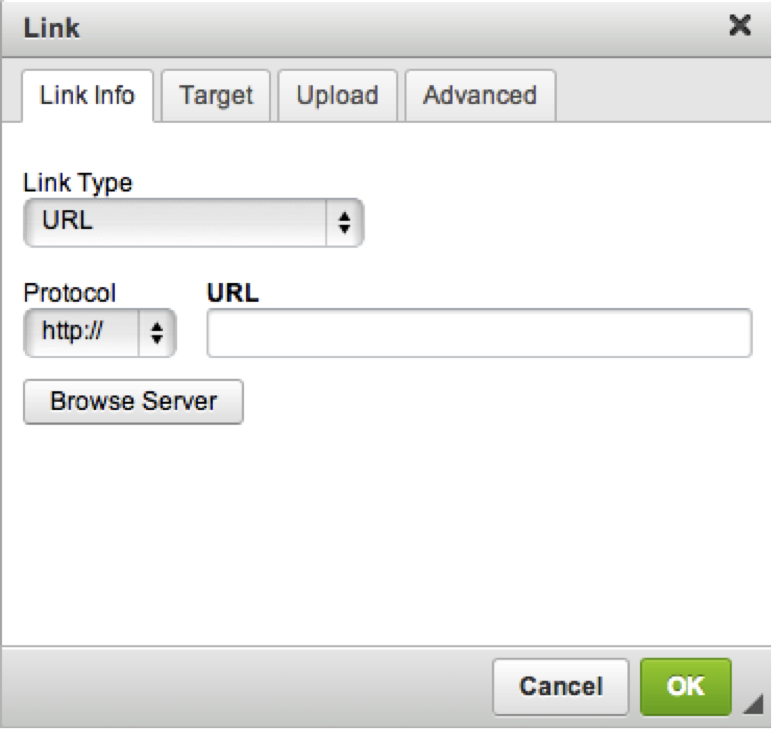
The Link Info Tab is the default tab that opens after you click the link button on the toolbar. It allows you to choose the link type and set the link protocol and URL.
Target (This tab is only available for URL link type)
Upload (This tab is only available for URL link type)
Advanced
Link Type – The category of the link that will be inserted into the template. You can choose between the following options:
Link Type: URL
URL is the default link type that lets you add a website address to your template. For this sort of link, all four tabs of the Link dialog window are available.
Link to anchor in the text – An internal link pointing the reader to a designated point in your template.
Email – An email address.
Protocol: The communication protocol used with the web address. You can choose between the following options: http://, https://, ftp://, news:// or <other>.
URL: The web address of the resource that the link is pointing to. It may be located on the same server as the website you are currently in, or on an external server.
Target:
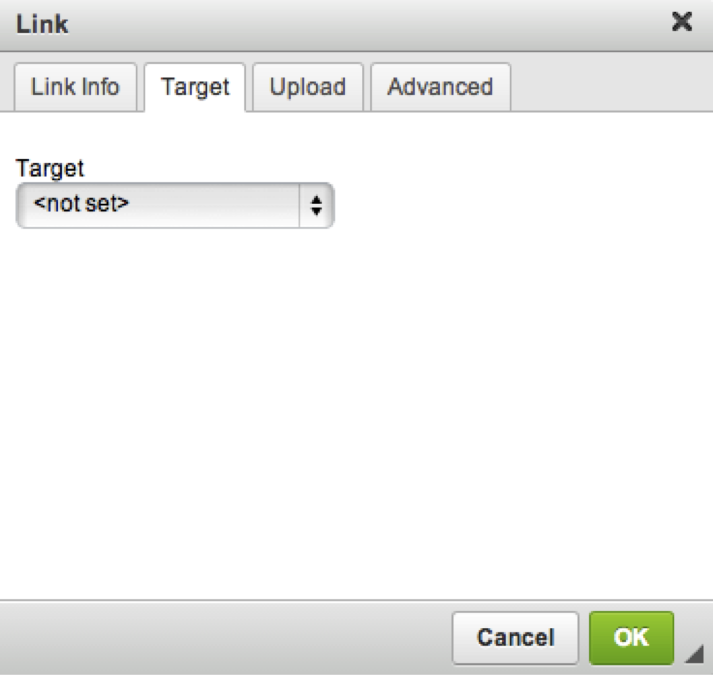
The Target Tab is only available for the URL link type. It specifies the location where the link will open after you click on it. By default, the target of the URL is not set and the link will open in the same browser window or tab as the template.
This tab contains only one element, a drop-down Target list that lets you choose the location where the link will open. The list contains the following options:
<not set> – the default setting that opens the link in the same browser window or tab as the template.
<frame> – the setting that opens the link in the frame specified in the Target Frame Name text box. The text box is only visible after you choose <frame> as the target.
<popup window> – the setting that opens the link in the pop-up window specified in the Popup Window Name text box. This text box is only visible after you choose <popup window> as the target.
If you choose to open the link in a pop-up window, you may configure some further options that control the appearance of the pop-up. Note however that the user’s browser settings might override these options and make the pop-up window appear in a standard new browser tab or window instead. The following options are available:
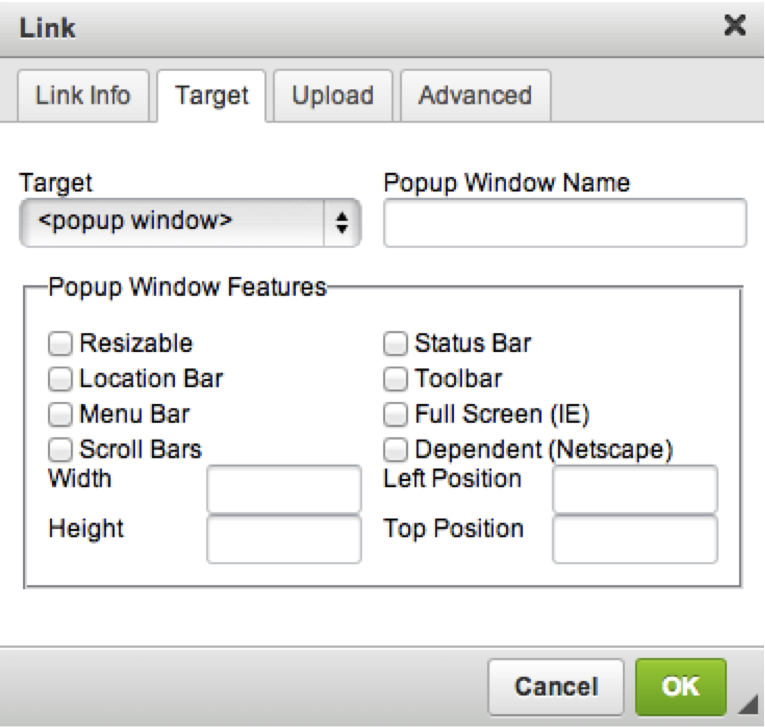
Resizable – This parameter controls whether the pop-up window may be resized.
Status Bar – This parameter controls whether the pop-up window will contain the status bar.
Location Bar – This parameter controls whether the pop-up window will contain the location bar.
Toolbar – This parameter controls whether the pop-up window will contain the toolbar.
Menu Bar – This parameter controls whether the pop-up window will contain the menu bar.
Full Screen – This parameter controls whether the pop-up window will be maximized (full screen).
Scroll Bars – This parameter controls whether the pop-up window will contain the scroll bars.
Dependent – This parameter controls whether the pop-up window will close when the window that opens it closes.
Width – The width of the pop-up window.
Height – The height of the pop-up window.
Left Position – The offset of the pop-up window from the left side of the screen.
Top Position – The offset of the pop-up window from the top of the screen.
New Window (_blank) – The setting that opens the link in a new window.
Topmost Window (_top) – The setting that opens the link in a window that is positioned on the top.
Same Window (_self) – The setting that opens the link in the same window as the template.
Parent Window (_parent) – The setting that opens the link in the window that the document window is nested in.
Upload:
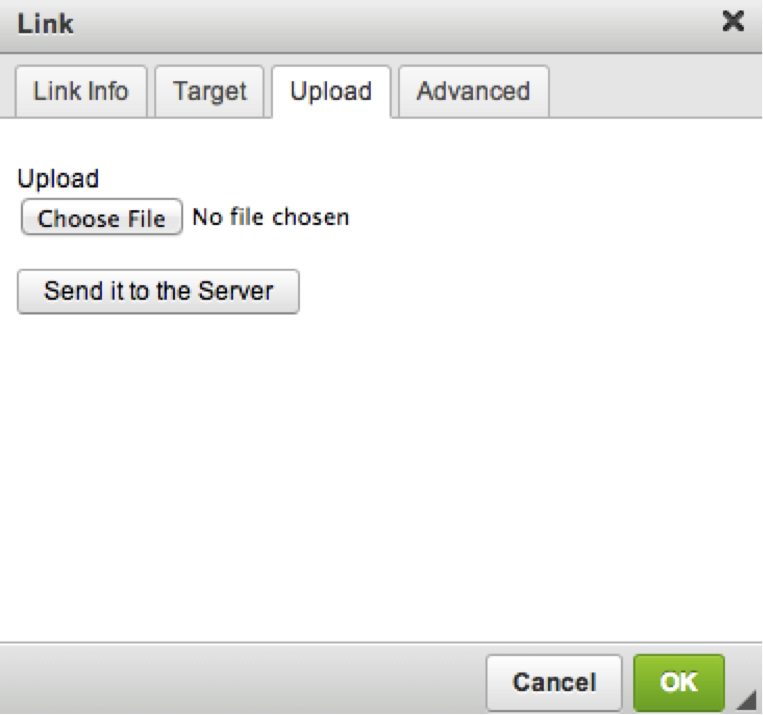
The Upload Tab of the Link dialog window allows you to send your own resource to the server. It is only visible if the server accepts files uploaded by the users. It is only available for the URL link type.
To upload a file, click the file input field or the Browse button next to it. When the file browser of your operating system opens, navigate to the appropriate folder to choose a file by double clicking it or using the Open button. To send the file to the server, click the Send it to the Server button. The Link Info tab will open and the URL of the uploaded file will automatically appear in the URL field.
Advanced:
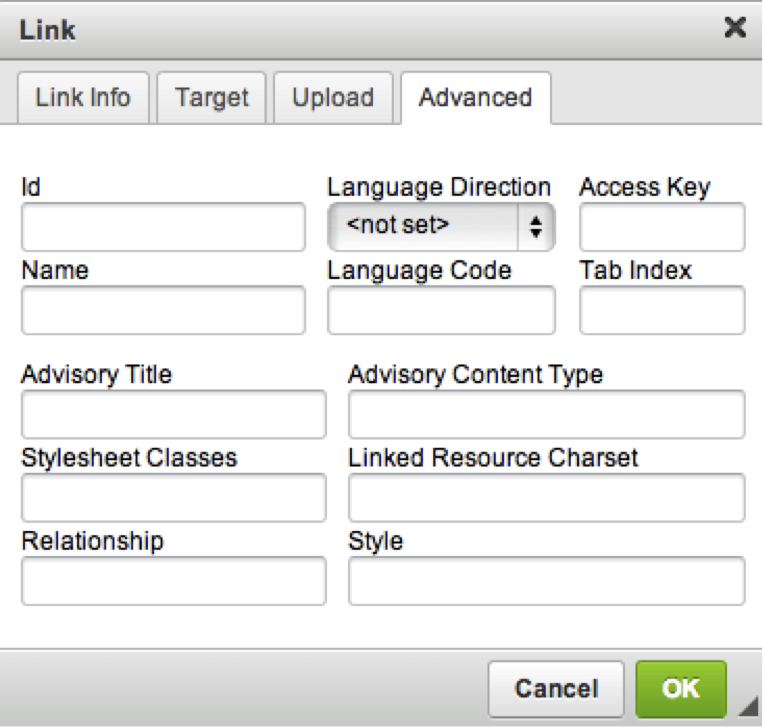
The Advanced Tab lets you configure additional link options such as assigning it and ID, a class, a tab index, a tooltip, or CSS style properties. It is meant for advanced users with knowledge of HTML and CSS and gives nearly endless possibilities as far as the presentation of the link.
Below is an overview of the Advanced Tab elements:
Id – A unique identifier for the link element in the document (id attribute)
Language Direction – The direction of the text left-to-right (LTR) or
right-to-left (RTL) (dir attribute)
Access Key – A keyboard shortcut to access the link element (accesskey attribute)
Name – The name of the link element (name attribute)
Language Code – The language of the link element specified according to RFC 1766 (lang attribute)
Tab Index – The tab order of the link element (tabindex attribute)
Advisory Title – The text of the tooltip that is shown when the mouse cursor hovers over the link (title attribute)
Stylesheet Classes – The class of the link element (class attribute). Note that a link element might be assigned more than one class. If this is the case, separate class names with spaces.
Linked Resource Charset – The character set of the linked resource (charset attribute)
Relationship – The relationship between the current document and the link target (rel attribute)
Style – CSS style definitions (style attribute). Note that each value must end with a semi-colon and individual properties should be separated with spaces.
Link Type: Link to Anchor in the Text:
If you want to point to an anchor previously set in the template, select Link to Anchor in the Text from the Link Type drop-down list. When you choose this link type, two Link dialog window tabs will become available: the Link Info Tab and the Advanced Tab.
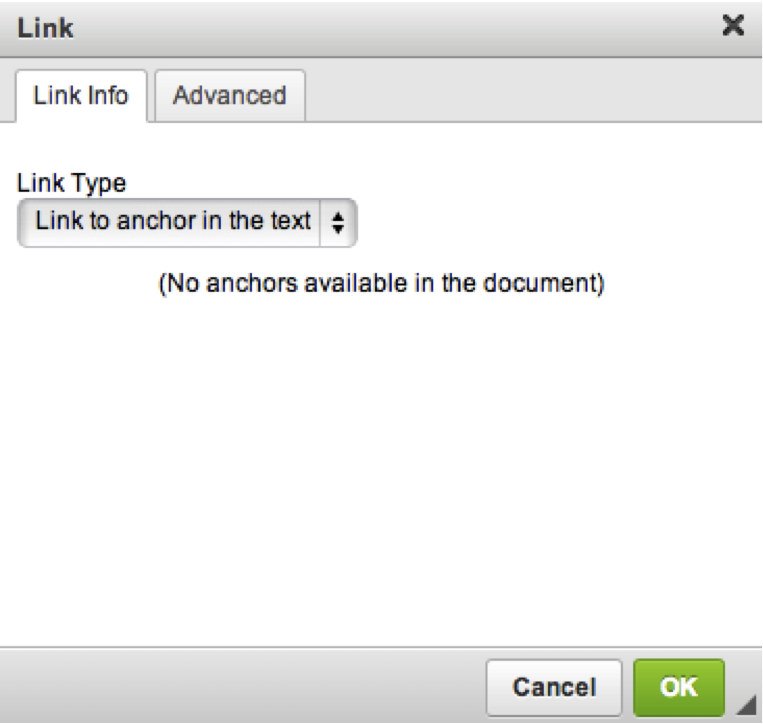
Please note that if you do not have any anchors defined in your document, a message telling you so will be displayed in the Link Info Tab.
When you add an anchor to your template, you will be able to select it from the drop-down lists of the Link Info Tab.
The Link Info Tab contains the following options that make selecting an anchor an easy task.
By Anchor Name – A drop-down list containing the names of all the anchors established in the document.
By Element Id – A drop-down list containing the identifiers of all anchors established in the document that contain the id attribute. Note, in order to add an id to an anchor, you need to modify the document source.
Link Type: Email
Our editor makes it easy to insert clickable email addresses into your templates and even add a subject and body of the email message that will be created when you click to link. If you want to add a hyperlinked email address to your template, select E-mail from the Link Type drop-down list.
When you choose this link type, two link dialog window tabs will become available:
The Link Info Tab and the Advanced Tab.
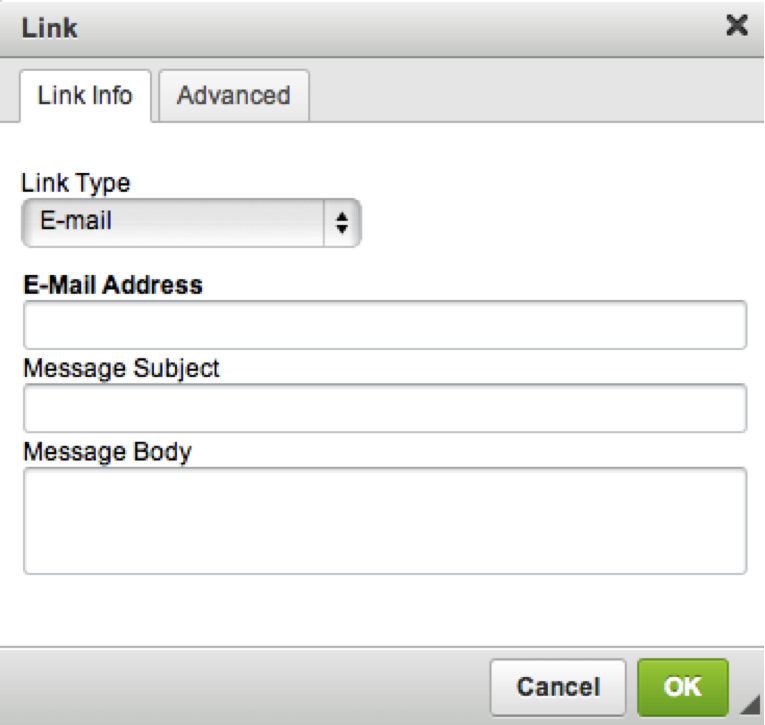
The Link Info Tab contains the following fields that let you configure the recipient and the message content:
E-Mail Address – The address of the recipient of the email message. This field is required.
Message Subject – The default text that will be pasted into the subject line of the email message.
Message Body – The default text that will be pasted into the email message as it content.
Removing a Link:
Removing a link is just as easy as adding it. When the cursor is placed on a link, the link button on the toolbar becomes active. Clicking the button removes the link and leaves plain text.
Contact Our Support Forums for Help
We are perpetually seeking to evolve our product as well as our support process. If you didn't find your answer here take a moment to visit our support forums as well as submit your ideas on how we can bring Boingnet to the next level!
Support Forums