

Boingnet offers an easy way to append new contact records to an existing contact list on your account so you can manage your list library. Please note that the contact records you wish to add to your list must contain the same data fields, and the same mapping as the contact list you’re adding to. This will ensure that all your contact records on this list have the same layout. The append feature adds additional contact records to a list, it does not add additional data fields to the list. Do not append new records to a list if there is an active campaign using that list. Boingnet will de-duplicate your append file using first name, last name and email address to ensure that you don’t send duplicate emails during a blast. Any duplicates found will be emailed to you in a report at the end of the append process. Your append file must be a .csv (comma delimited) or excel file in order to be uploaded. For more information on how to prepare a file for upload, please visit our Contact List Tips page.
- From the Home Page main navigation bar, click Lists to go to the Contact Lists Page.
- From here, you can edit, delete or append data to your lists.
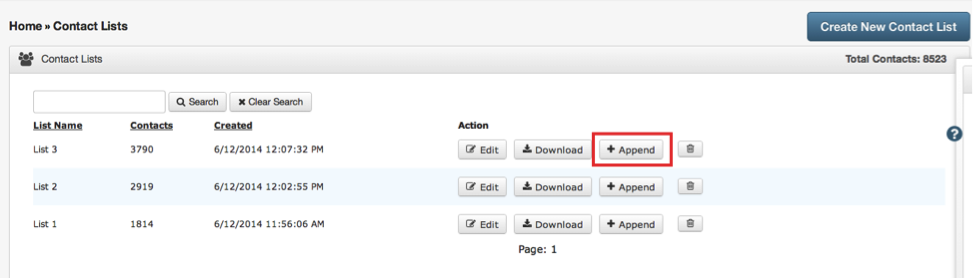
- Locate the list you’d like to add contacts to and click the +Append button to the right.
- You’ll navigate to the screen below:
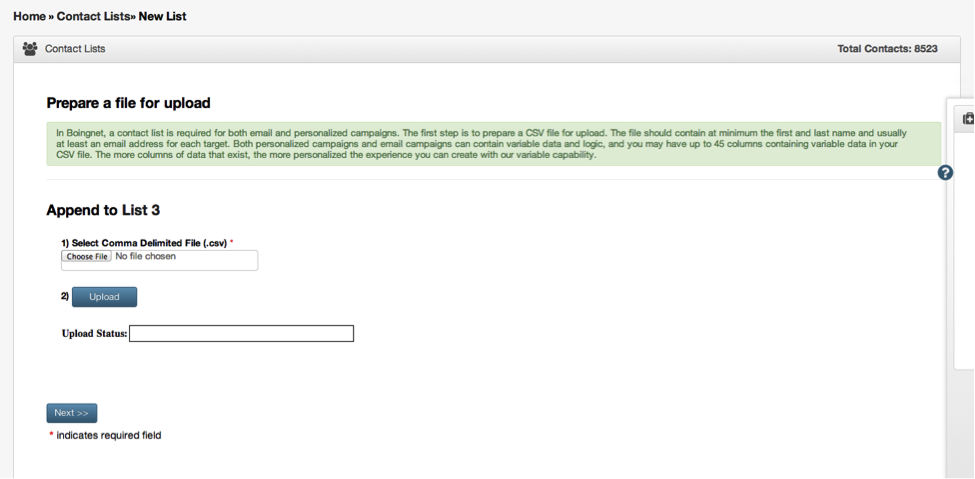
Click on the Choose File button and select the file you wish you append to the list you’ve selected:
- Once you have selected the file, click the Upload button.
- When the upload is complete, a message will be displayed in the status box indicating the size of your file.
- Click Next to continue to the Mapping Page:
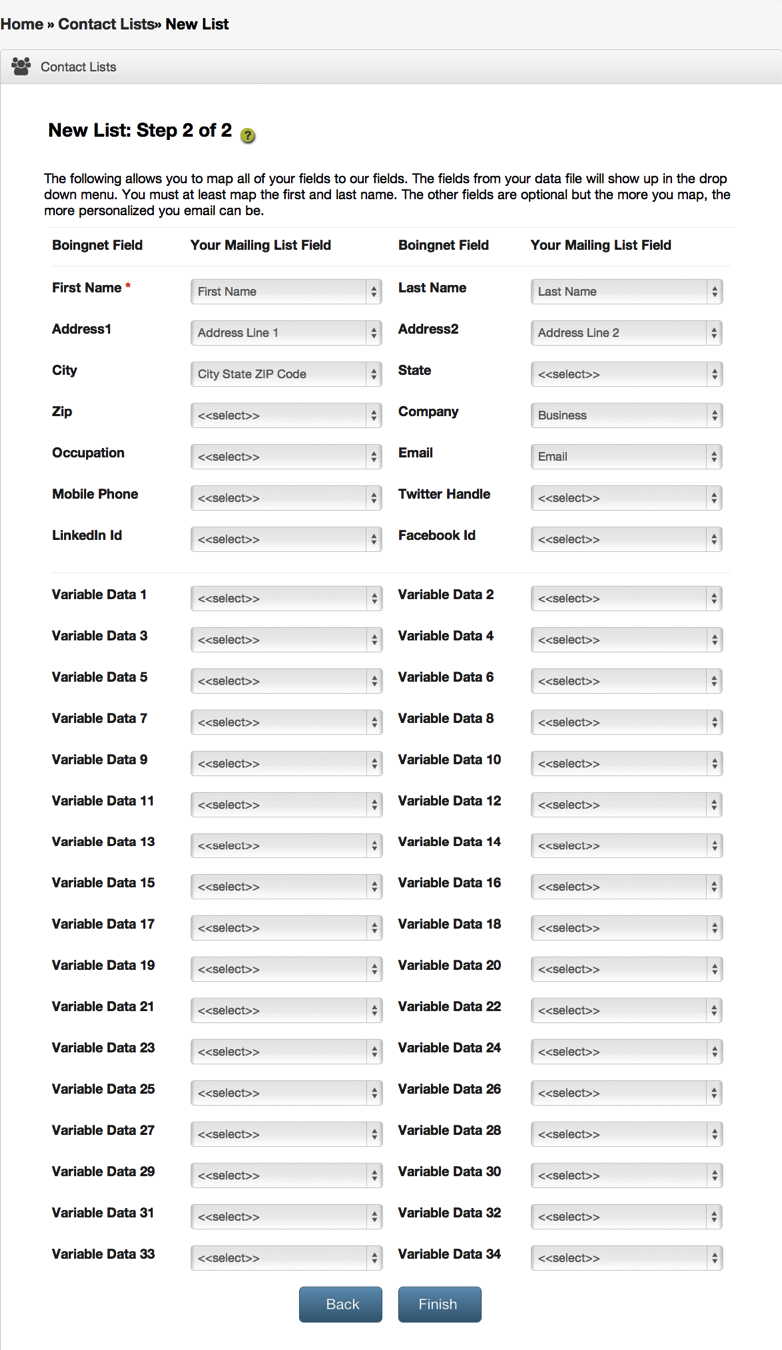
- The Mapping Page will allow you to map all the data from your . csv or excel file to your contact list.
- The fields from your .csv file will appear in the drop down menus displayed under Your Mailing List Field. Make sure you map these fields the same way you mapped the fields on your original list so all contact records will have the same layout.
- Choose a field to map to the Boingnet Field First Name by clicking on the menu to the right and selecting the appropriate field to be used.
- For an email campaign, you must map first name, last name and email address. For an SMS campaign, you must map first name, last name and mobile phone number. Keep in mind that the more fields you map to the Boingnet file, the more personalized your message(s) to your customer can become.
- Click Finish when done to append records to your contact list. This process may take a few minutes.
- You will receive a Contact List Complete message when the process has completed.
Contact Our Support Forums for Help
We are perpetually seeking to evolve our product as well as our support process. If you didn't find your answer here take a moment to visit our support forums as well as submit your ideas on how we can bring Boingnet to the next level!
Support Forums