

How To Create a Microsite for your next Marketing Campaign
Marketers will create a microsite to give a significant boost to just about any marketing campaign in ways that primary brand websites and other marketing tools can’t. Microsites are typically built outside of a brand’s primary website with a unique domain, eliminating the need for IT involvement. As separate mini-sites that are dedicated to a single purpose, microsites provide marketers with more creative freedom to deeply engage visitors without the clutter and distraction associated with a brand’s full website. Great Microsites deliver focused, high quality, personalized experiences and can be used across several marketing channels simultaneously.
When you create a microsite in Boingnet, you get a campaign specific mini-website that acts as a hub for the campaign. You can create a microsite in Boingnet to be 1 page or 20 pages with our microsite templates. We make it fast & easy to:
- Assemble mobile friendly microsite templates together for a specific campaign objective
- Manage domains and URLs for the campaign
- Track campaign performance & analytics
- Modify/swap out pages “on the fly” while the campaign is live
- Set up tracking codes and remarketing codes for Google & Facebook
(To learn more about Boingnet Microsite Features – CLICK HERE)
Microsites are ideal for promoting the following campaign types:
- Content Marketing – Microsites are ideal vehicles to launch new whitepapers, e-books, videos & more
- Contests & Sweepstakes – Quickly deploy fun, interactive content to build reach
- Product Launch– A powerful way to build an online presence to support new products or services
- Loyalty Campaigns – Use microsites with integrated drip marketing to reward your best customers
- Direct Mail Campaigns – generate pURLs to drive direct mail recipients to personalized microsites
Create a Microsite Using Page Templates
You create a microsite from page, or microsite templates that are stored in your Boingnet Template Library. Page templates are built in Boingnet’s Editor, an easy to use tool that generates mobile responsive HTML for you. Once you have created your campaign’s templates, you’re ready to build your campaign’s microsite.
From the main navigation bar, click on Build and then select Microsites:

You’ll navigate to your Microsites Page:

Click Create New Microsite button to build a new one.
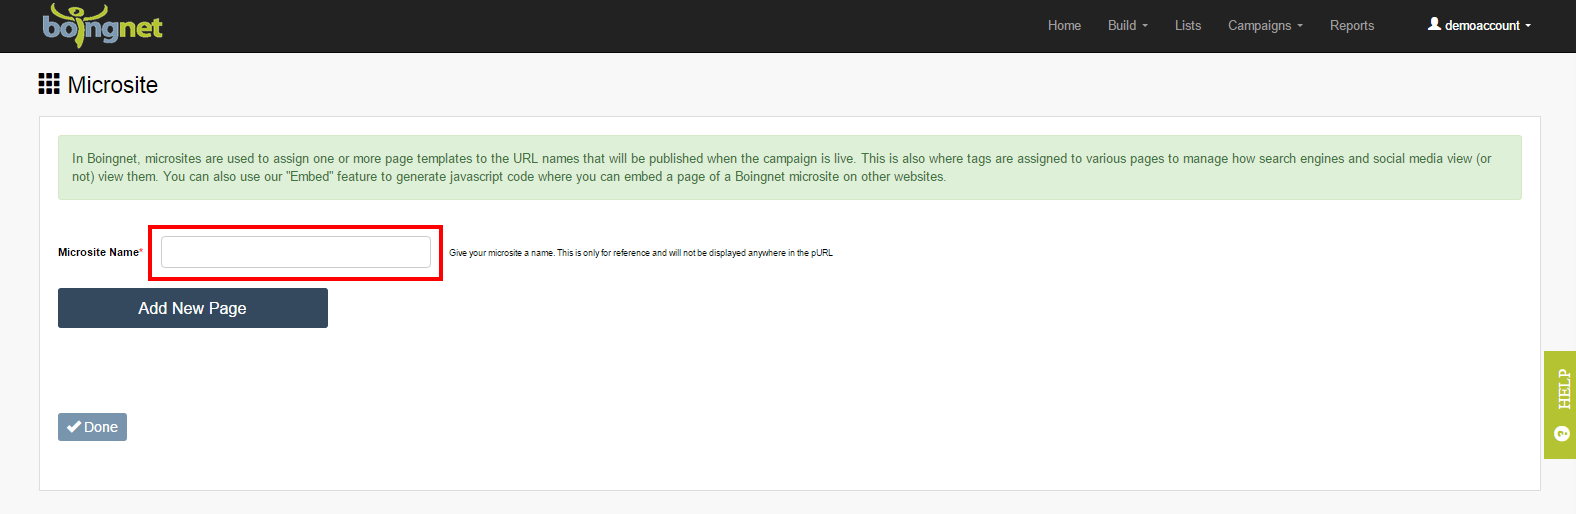
- Enter a unique name for your Microsite in the box provided. This name just identifies your Microsite within Boingnet and will not be visible to your users.
- Click Add New Page to add a page to your microsite. All microsites must contain at least one microsite template. Once you’ve added the first page, you can add as many additional pages as you’d like.
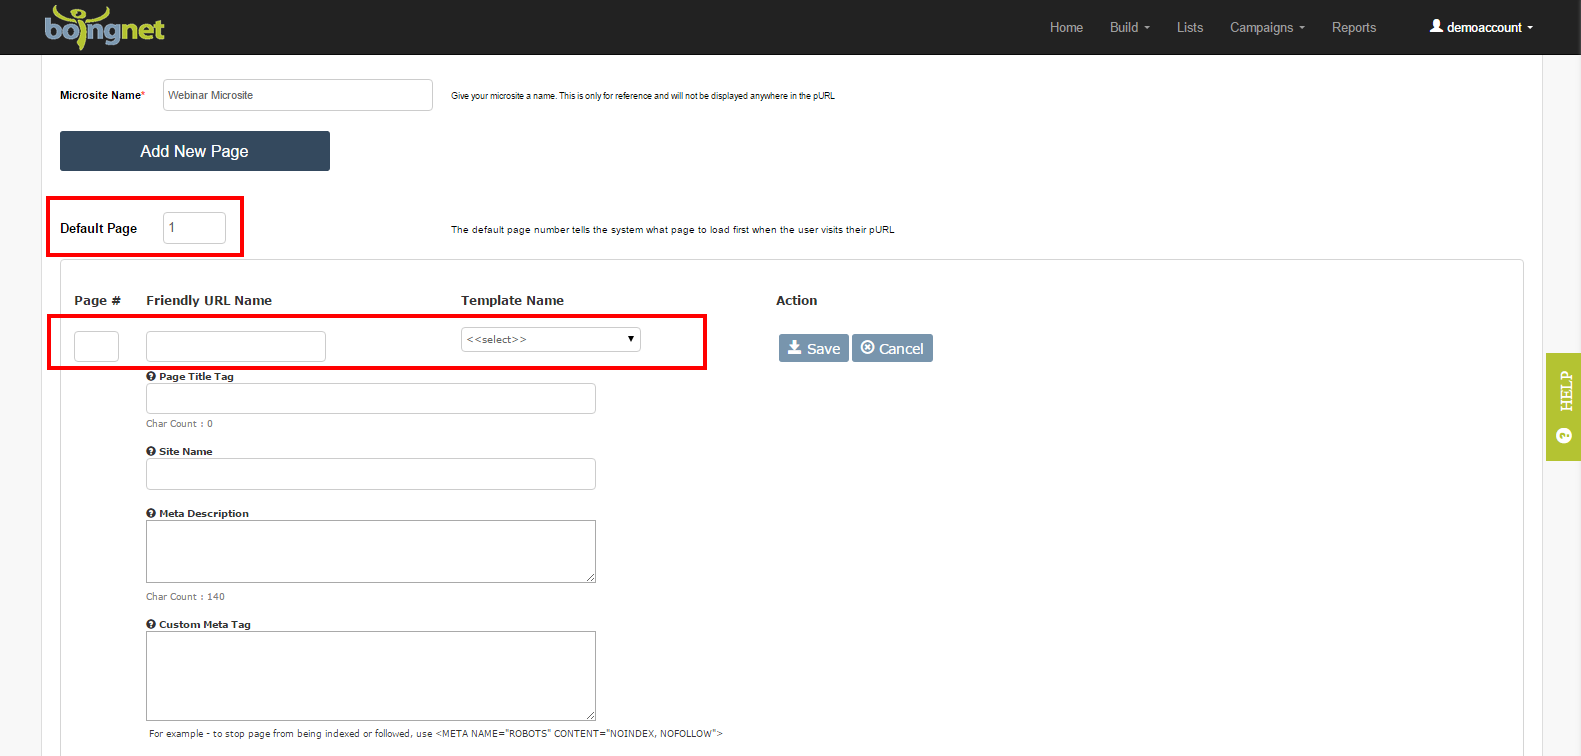
- Enter a Default Page in the box provided. This tells Boingnet which page to load first when a user visits this URL or pURL.
- Enter the Page Number and Friendly URL Name in the boxes provided. Note that the Friendly URL Name will become part of the URL and will be visible to your user when they’re on this page.
- Next, select the template you wish to use for this page from the dropdown list. You can easily swap out templates at any time, making it easy to setup simple A/B tests. Also, you can use the same template in multiple microsites.
- Click the Save button underneath Action to save this page to your microsite. Click the Cancel button to remove this page.
To add another page, click the Add New Page button and repeat the process:
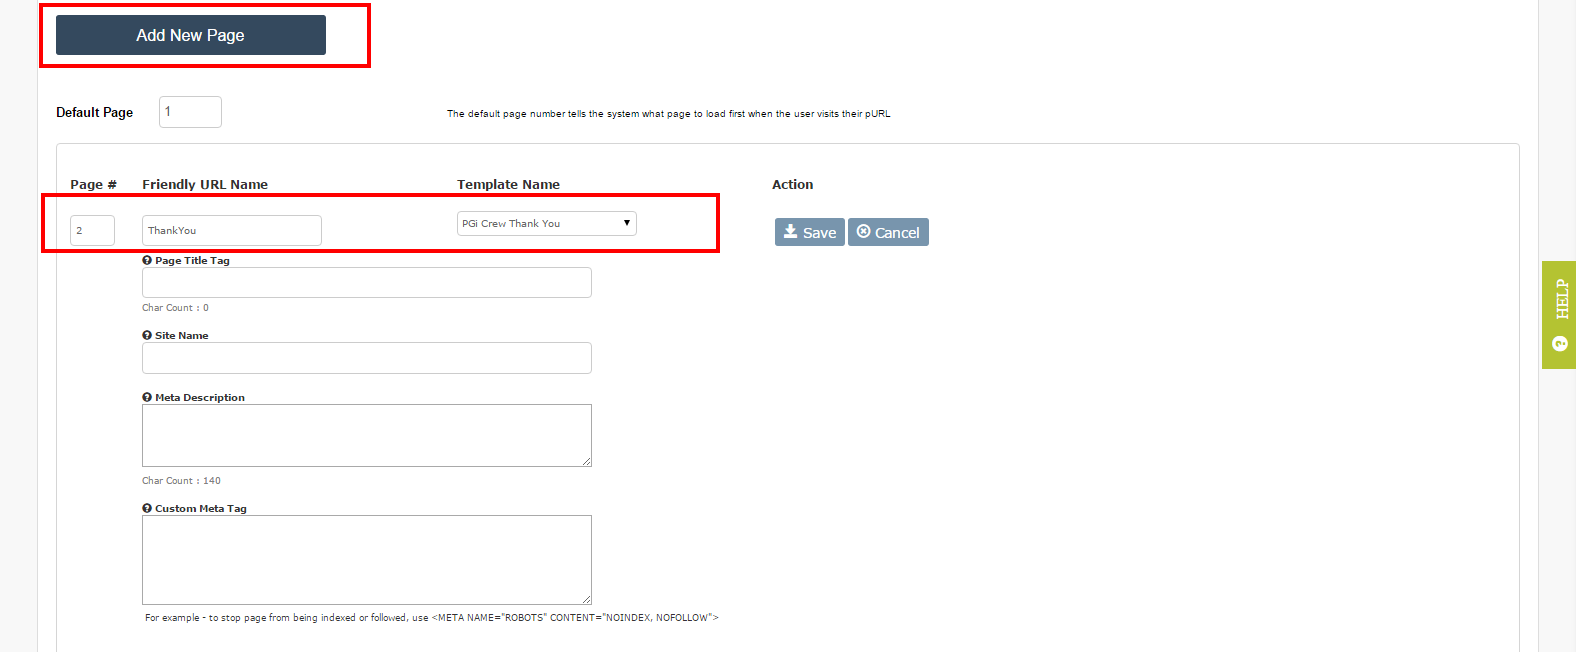
Each time you add a page to your Microsite, you have the option to define a Page Title, a Site Name, a Meta Description or a Custom Meta Tag for that page. This metadata tells browsers, search engines, social networks, crawlers, robots and other software systems – such as Google and AdWords – how to interpret the page.
Page Title Tag: The Page Title of a web page is meant to be an accurate and concise description of the page’s content. This element is critical to both user experience and search engine optimization. It both describes the page to search engines like Google, and it’s what displays at the top of the browser when the user is on the page. Creating a compelling title tag will pull in more visits from the search results.
To optimize your Page Title, consider the following:
- Length – Google typically displays the first 50-60 characters of a title tag. If you keep your titles under 55 characters, you can expect at least 95% of your titles to display properly.
- Format – Primary keyword – Secondary keyword – Brand Name.
Site Name: The site name will create a tag for Facebook Open Graph to help with social sharing.
To optimize your Site Name, consider a length of approximately 30-35 characters.
Meta Descriptions: The Meta Description provides a concise explanation of the contents of a web page. Meta descriptions are commonly used on search engine results pages (SERPs) to display preview snippets for a given page. While not important to search engine rankings meta descriptions are important in gaining user click-throughs from SERPs and can be very useful especially for lead generation landing pages. These short paragraphs are a webmaster’s opportunity to advertise content to viewers and to let them know whether the given page contains the information they’re looking for or not.
To optimize your Meta Description, consider a length of approximately 140 characters. A character count will display underneath the meta description box as you enter your text.
Custom Meta Tag – This enables you to enter additional meta tags that you may want to embed in the page, including tracking codes for things like Google Analytics or the noindex/ nofollow tags to keep search engines from searching your pURL pages. You can enter multiple tags per page, or no tags, it’s your decision. Here are some common uses:
1 – If you are building a microsite using pURLs and personalized information or offers, and you don’t want robots to index or follow the pages, tags you might want to consider using include:
<META NAME="ROBOTS" CONTENT="NOINDEX, NOFOLLOW">
OR
<META NAME="ROBOTS" CONTENT="NOINDEX, FOLLOW">
OR
<META NAME="ROBOTS CONTENT="INDEX, NOFOLLOW">
2. If you want to use Google Analytics or another reporting tool to track the usage metrics of a page, simply copy and paste the “Tracking Code” from the other system. Here’s a Google Analytics example:
<script> (function(i,s,o,g,r,a,m){i['
(i[r].q=i[r].q||[]).push(
m=s.getElementsByTagName(o)[0]
})(window,document,'script','/
ga('create', 'UA-46321660-1', 'yourdomain.com');
ga('send', 'pageview');
</script>
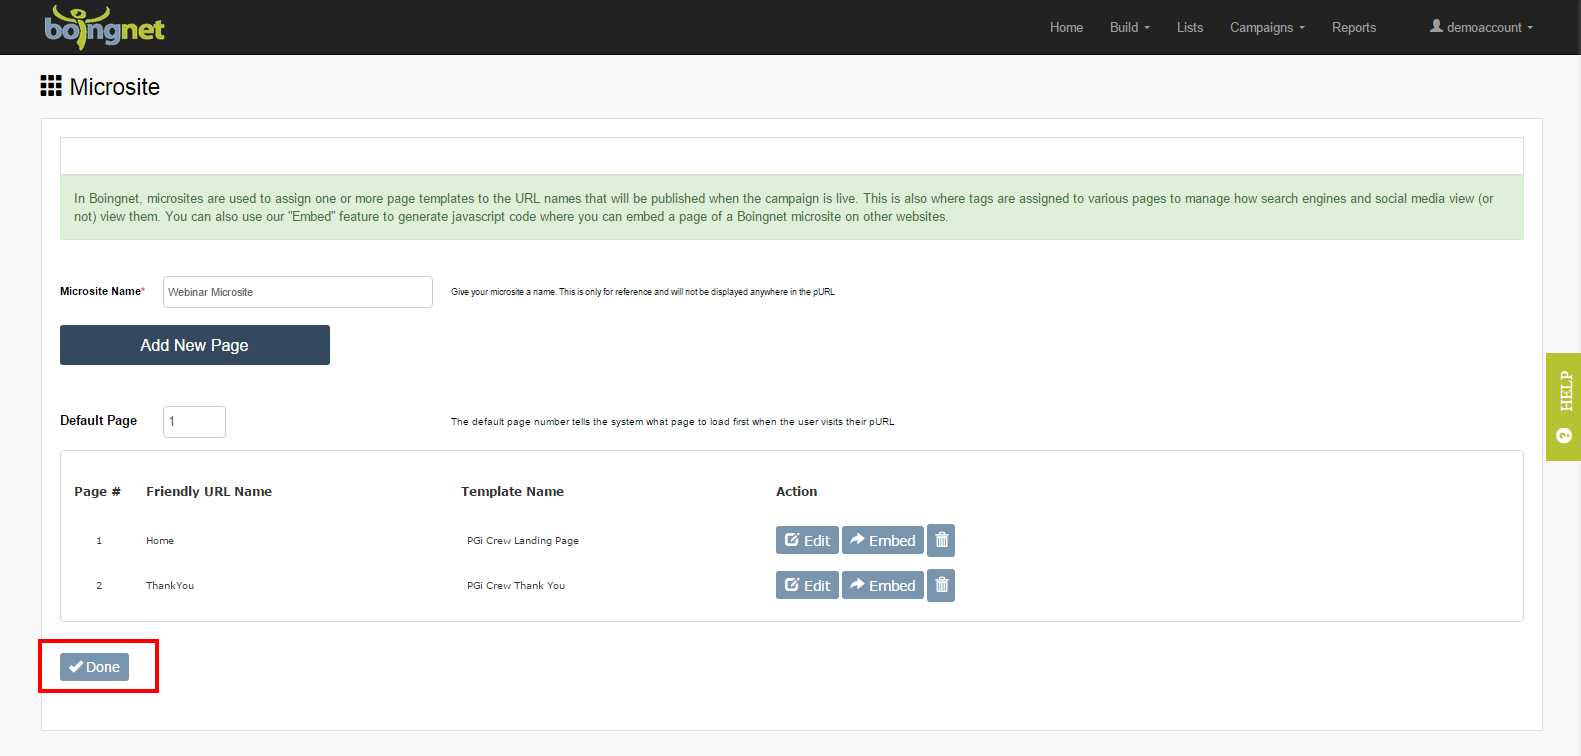
<link rel=”author” href=”https://plus.google.com/Click the Save button when done defining Page Title Tags, Site Names, Meta Descriptions or Custom Meta Tags for your microsite page.
Contact Our Support Forums for Help
We are perpetually seeking to evolve our product as well as our support process. If you didn't find your answer here take a moment to visit our support forums as well as submit your ideas on how we can bring Boingnet to the next level!
Support Forums