

Many direct marketers want to create a PURL redirect campaign to quickly and easily launch a way to track direct mail responses and send out instant alerts when leads respond to their direct mail. Boingnet’s Lightweight Marketing Automation Platform includes PURL redirect campaigns and a PURL redirect template editor at no extra charge.
PURL Redirect Campaign Basics
In Boingnet, a pURL, or Personalized URL, is a URL that contains information that has been uploaded into a Boingnet Contact List, such as an individual’s first and last name with the following structure: http://JaneDoe.domain.com. The landing page associated with each pURL typically contains some type of personalized information. When you create a Personalized / pURL Campaign in Boingnet, you generate a pURL and a custom landing page for each person on your contact list. When a contact clicks on their pURL, they navigate to their personalized landing page.
A PURL Redirect Campaign in Boingnet, allows you to generate a PURL for each of your contacts, but also allows you to direct those contacts to the URL of your choice. As with other Boingnet Campaigns that feature landing pages, your Redirect Campaign will also contain a landing page for each person on your contact list – but this landing page will redirect the viewer to the URL you specify on your landing page template. For example, there may be circumstance when you’d like to generate pURLs for direct mail tracking, but you’d also like your contacts directed to a website URL instead of a personalized landing page. You might want to direct your viewers to a previously built landing page, or to one of your social media pages. A PURL redirect campaign gives you the direct mail tracking that you need very quickly and easily, without having to build out a new landing page or microsite. In the example below, we’ll create a Personalized Campaign that directs the viewer to the Boingnet website’s Home page instead of a landing page. You can even pass variables from the Boingnet Contact List to the external landing page by inserting variables into the URL string. The external landing page would need to be set up to accept variables in order for this to work. If you have questions about how to do this – Contact Us.
How To Create a PURL Redirect Campaign:
To create a PURL Redirect Campaign, you’ll need to complete the following steps:
- Upload Your Contact List.
- Create a Redirect Landing Page Template.
- Create a Microsite.
- Create a Personalized Campaign.
Step 1: Upload Your Contact List:
Boingnet will generate a pURL for each person on your contact list. Visit our Add a Contact List page for more information.
Step 2: Create a Redirect Campaign Landing Page Template:
From the home page, or main navigation bar, click on Build, then select Templates. Next, click on Create New Template in the upper right corner – you’ll navigate to the following page:
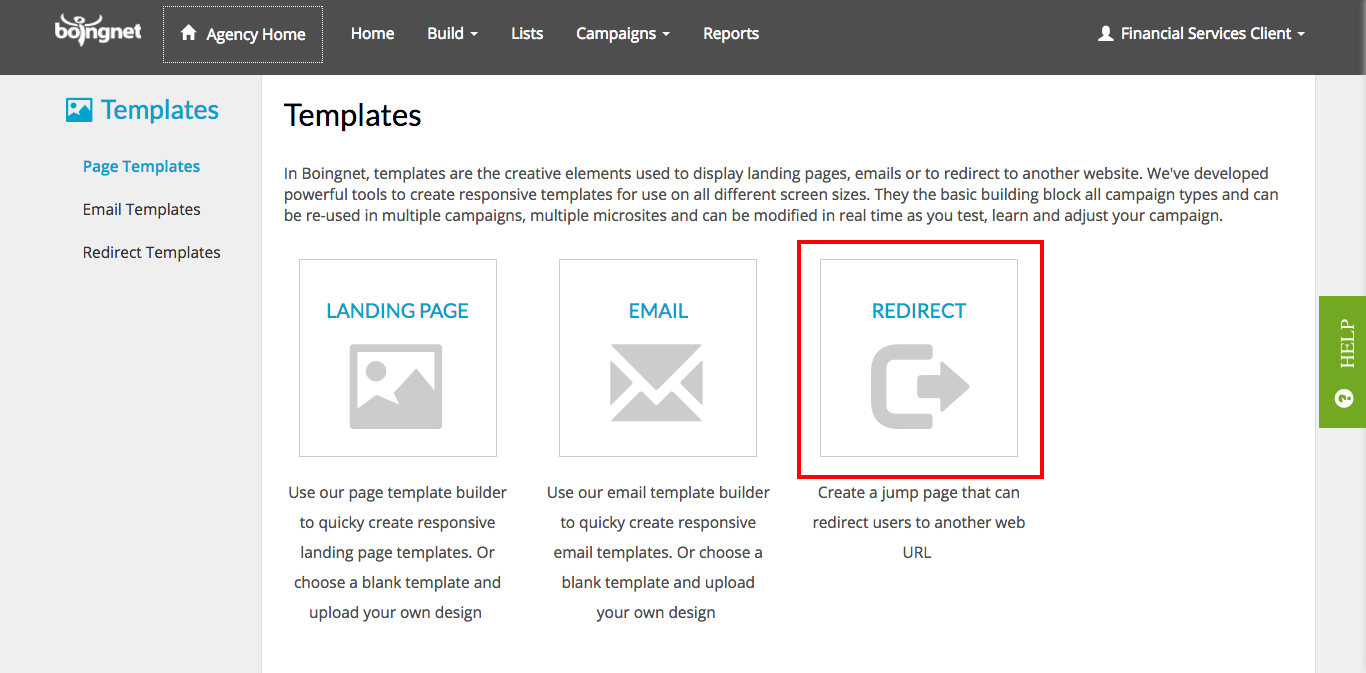
Click the Redirect option:
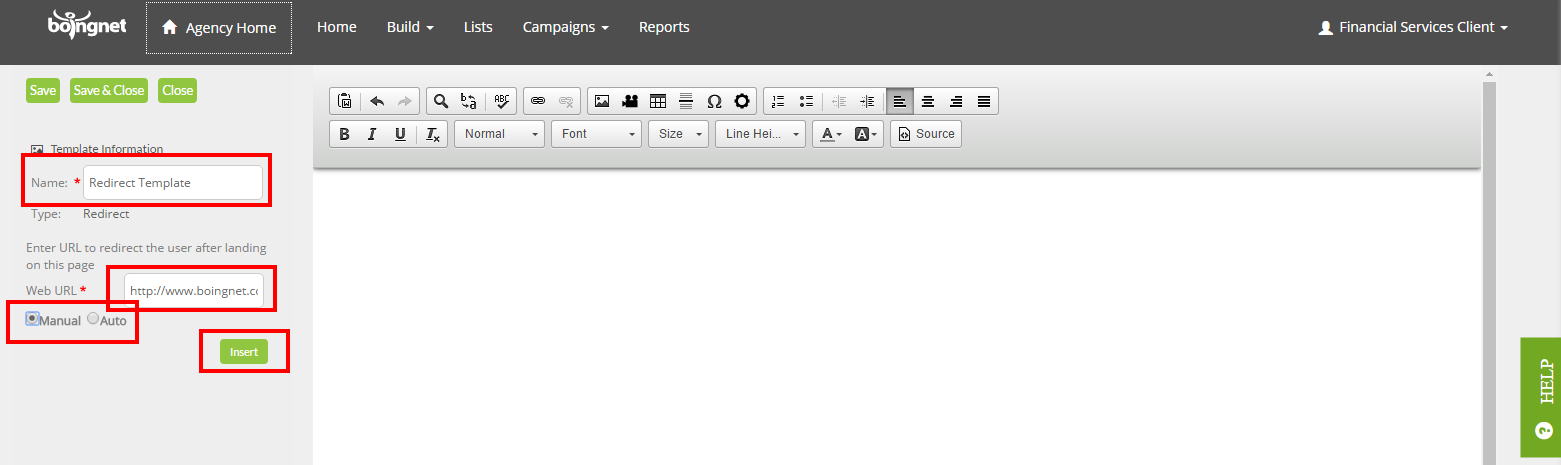
On the next page, enter the following information:
- Name – Enter a name for your template. If you don’t name your template, the system will name it for you using a generic date and time stamp.
- Web URL – Enter the URL you’d like your viewers to navigate to.
- Select Manual or Auto – If you select Manual, your viewer will need to click on the URL link. Often, marketers will use this setting to test out the redirect. After everything is working properly, they’ll typically switch the setting to Auto. If you select Auto, your viewer will automatically navigate to the URL specified.
- Click Insert.
- Click Save to save your template.
In the example above we’ve entered the URL for the Boingnet Home page and we’ve selected Auto. So, when a contact opens their pURL, they’ll navigate to the Boingnet Home page instead of a personalized landing page. But, unlike a typical generic URL on a printed direct mail piece, Boingnet is recording the specific list members that are visiting the page and how often they visit.
Step 3: Create a Microsite
All Boingnet campaigns that contain landing pages – even a redirect landing page – require a microsite. From the main navigation bar, click Build and then select Microsites. Next, click the Create New Microsite button in the top right corner:
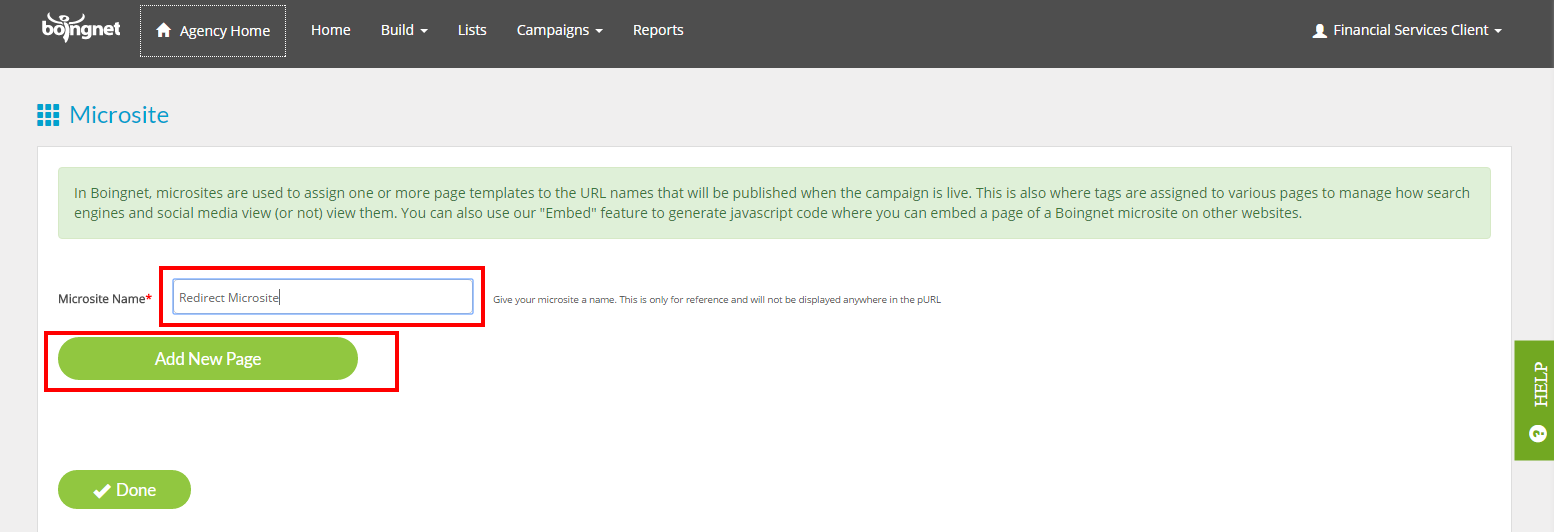
In the box provided, enter a name for your microsite and then click Add New Page:
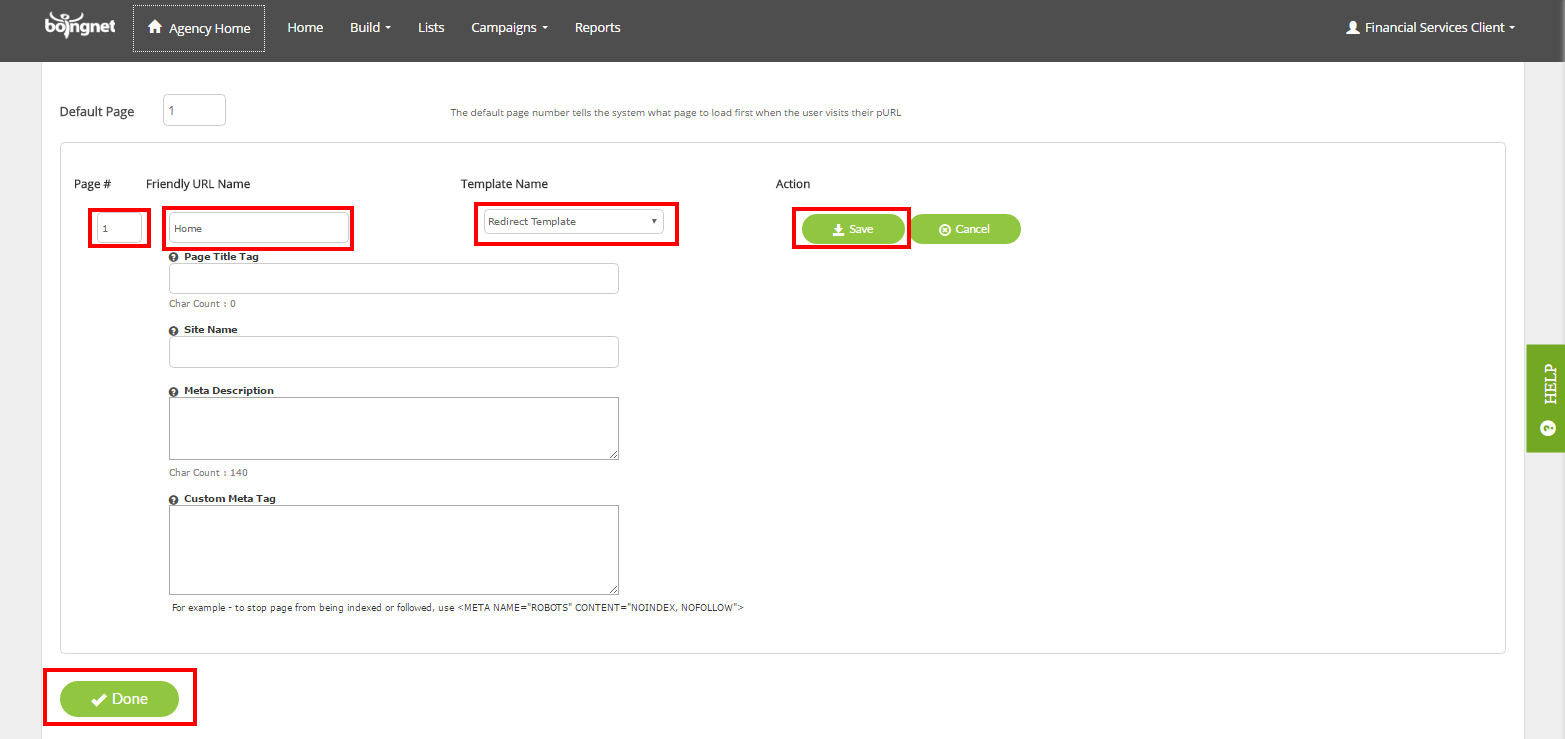
Enter the following information to add your redirect template from Step 2 to your microsite:
- Page # – Since this microsite will only contain 1 page, enter a ‘1’.
- Friendly URL Name – Enter a name for your page. In the example above, we’ve entered ‘Home’.
- Under Template Name, select your redirect template from the drop-down menu.
- Click Save to add this page to your microsite.
- Click Done to save your microsite.
Step 4: Create Your Personalized Campaign:
Now that you have uploaded your contact list and created your redirect template and microsite, you’re ready to create the Personalized Campaign to generate your pURLs.
From the main navigation bar, click on Campaigns, then select Create New Campaigns:
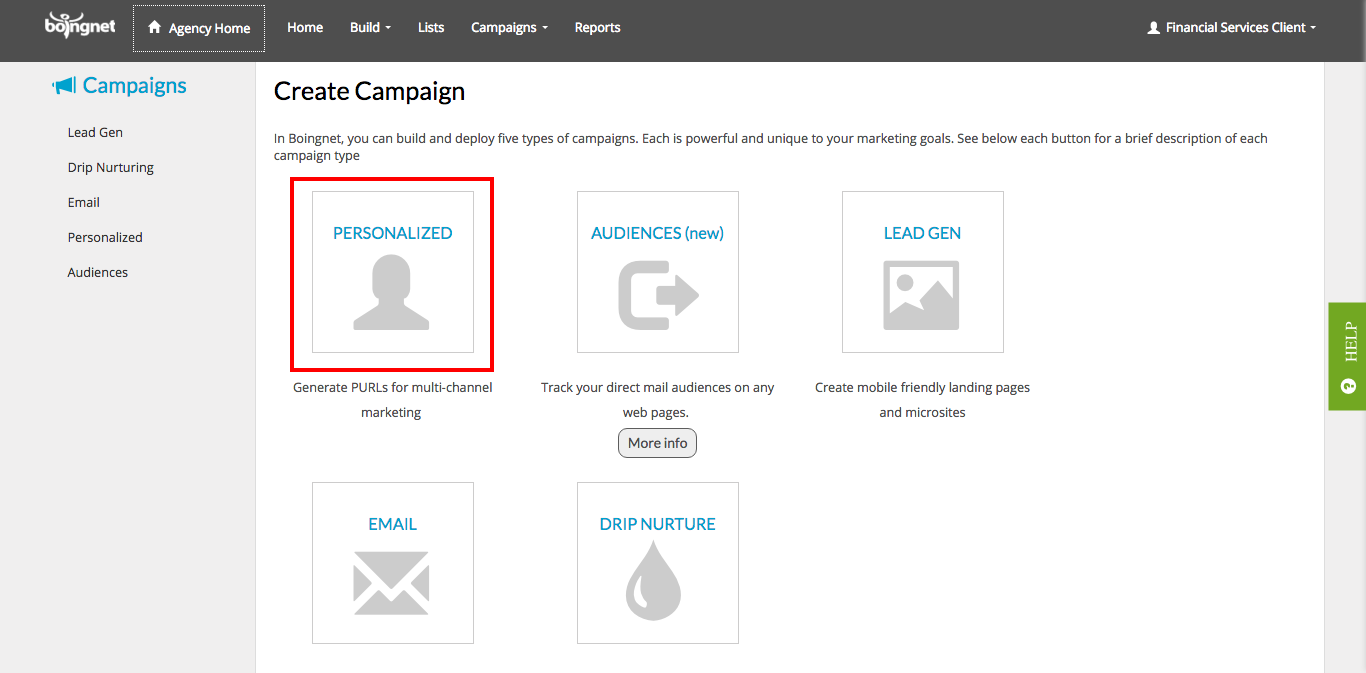
Next, click on the Personalized option and you’ll navigate to the page below:
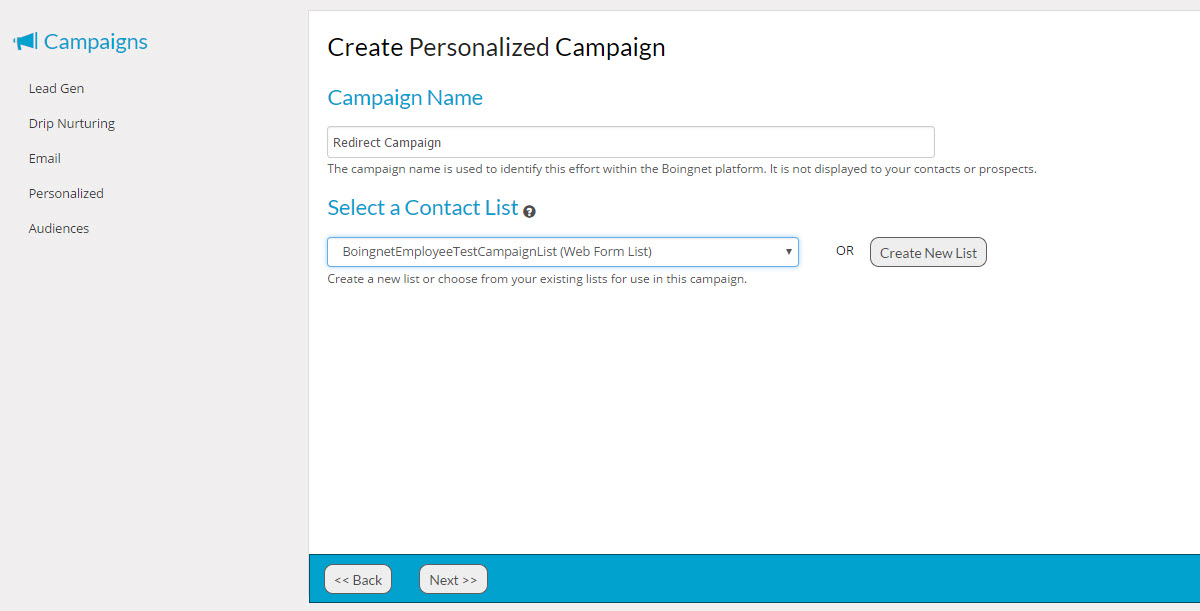
- Enter a Name for this campaign in the box provided.
- Select the Contact List you uploaded in Step 1 from the drop-down list.
On the next page, you’ll define the structure of the pURLs your campaign will generate. To create a redirect campaign, you need to have a plan for your domain and full URL structure. Want to talk best practices? Give us a shout!:
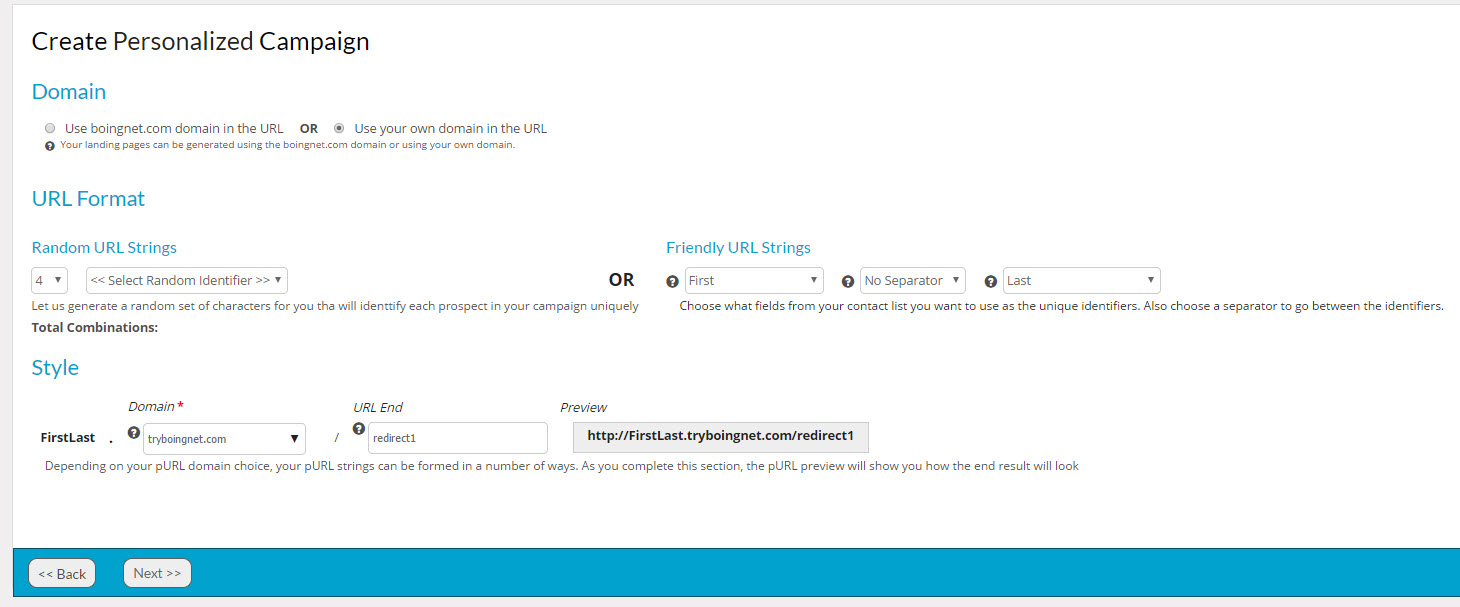
Domain: Select the Domain you will be using for your campaign. You may use the pages.boingnet.com domain or your own domain in your pURLs. If you want to use your own domain you’ll need to add it to your Boingnet account. Visit the following page for more information: Configuring a Domain.
URL Format:
Boingnet offers two very different pURL formats – Random and Friendly URL Strings.
Random URL Strings will generate randomly selected letters, numbers or both for you. You choose the length of the character string. Use Random Strings when data privacy or fixed domain length are primary concerns.
Friendly URL Strings are chosen from the data fields in the contact list you’ve chosen for the campaign. In order to create uniqueness, you’ll need to choose two data fields. Most clients choose First Name/Last Name, in order to maximize the personalization of the creative. The length of the URL will vary based on the data in the contact list. The separator between first and last identifier is optional. If you choose first name and last name as your identifiers, then your pURLs will have the following format: FirstNameLastName.yourdomain.com
Style: Enter the URL end you wish to use in the URL end box. For example, you might want to use the name of the promotion or the date as the URL end. Any combination of letters and numbers will work, just don’t use special characters or symbols in your URL name. Using a URL end will prevent you from creating duplicate pURLs if you plan to use your domain for multiple campaigns. A preview of your pURL format will be displayed to the right.
After your URL is formed, Click Next to continue.
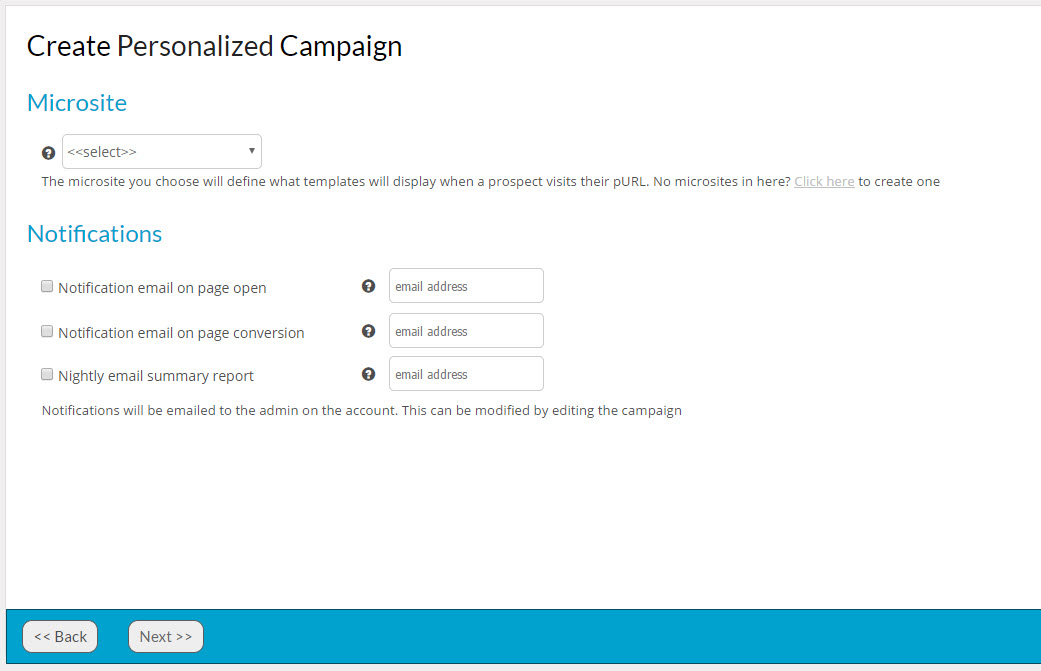
Microsite: Enter the microsite for your campaign, this will determine which template displays when your contact visits his or her pURL. If you have not yet created one, visit our Create a Microsite page to learn more.
Notifications If you wish to have the campaign administrator notified when a contact opens his or her pURL, then click on the notification boxes. This is a great way to alert those who need to know that there is a hot lead expressing interest.
Click Next to get to Confirm Landing Page Details. Review all your campaign details to make sure everything is accurate and complete:
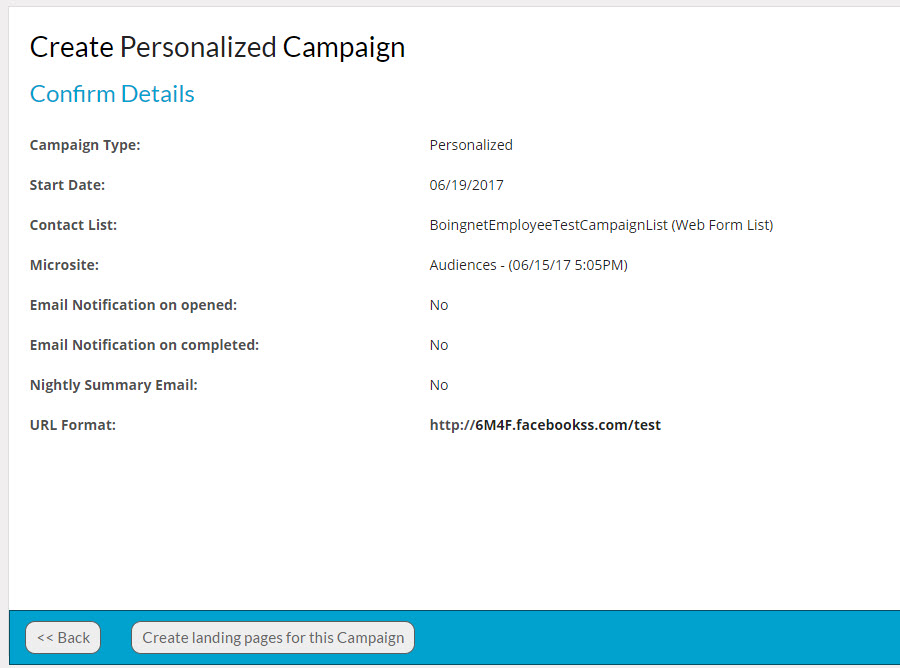
Click Create landing pages for this Campaign to generate your landing pages. This may take a few minutes depending on the size of your list. Once your pURLs have been created, you’ll see the following page:
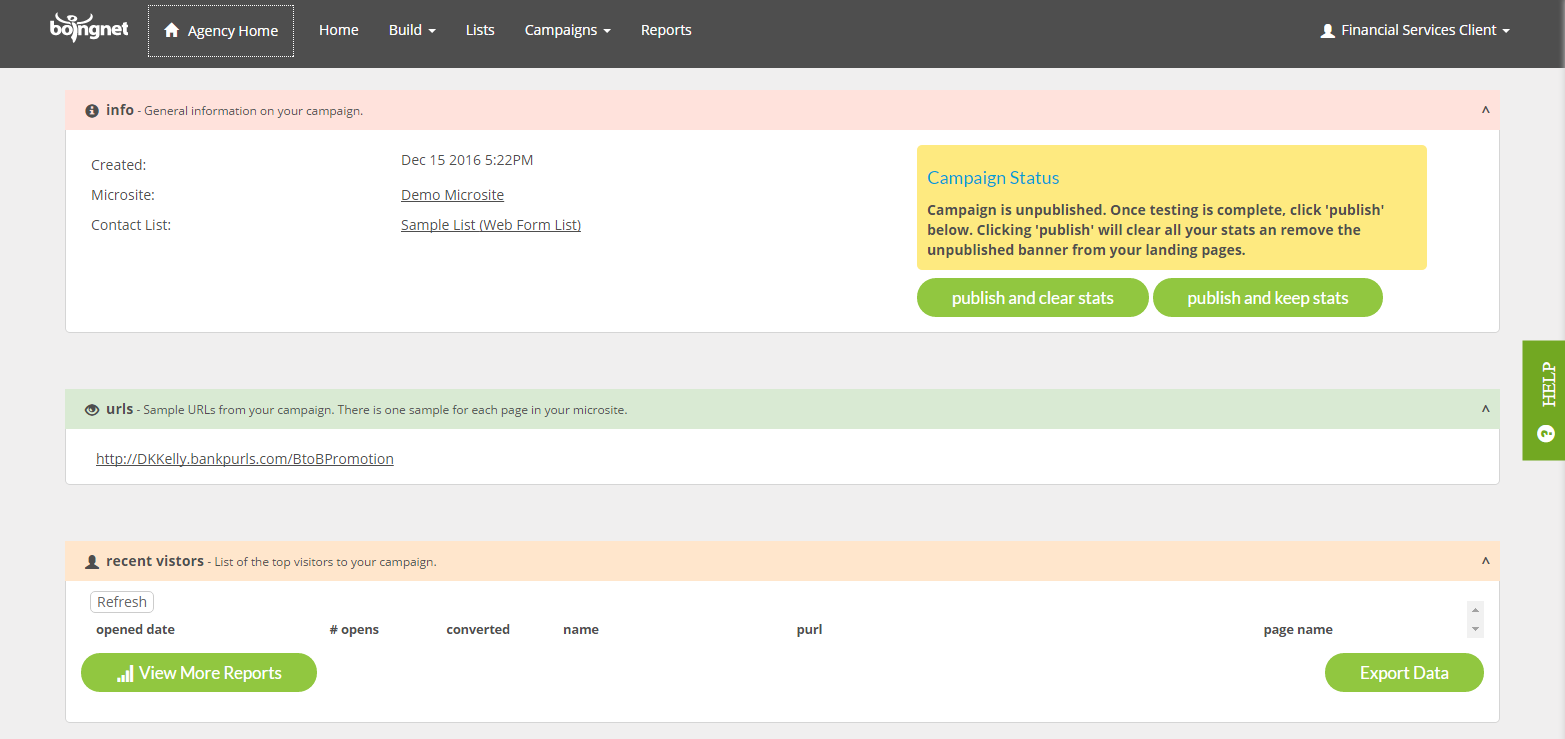
Your new campaign will be created in Unpublished mode to allow you to test your landing pages, reports and email notifications. While in Unpublished mode, a message “Landing Page is not published” will appear at the top of the campaign’s landing pages. Once you are done testing, you can click the one of the Publish buttons to launch the campaign. When published, the message on the landing pages will be removed. You have the option to keep or clear your test statistics when you publish your campaign. To keep your test statistics, click publish and keep stats, to clear your test statistics, click publish and clear stats. Your Campaigns page will display an indicator that lets you know which campaigns are Published and which are Unpublished:
The pURL for the first contact on your list will be displayed underneath urls. When this link is clicked, we navigate to the Boingnet Home page – which is the URL we entered on the redirect template in Step 2:
To Set Up Email Notifications:
Scroll down to the Email Notifications Section:
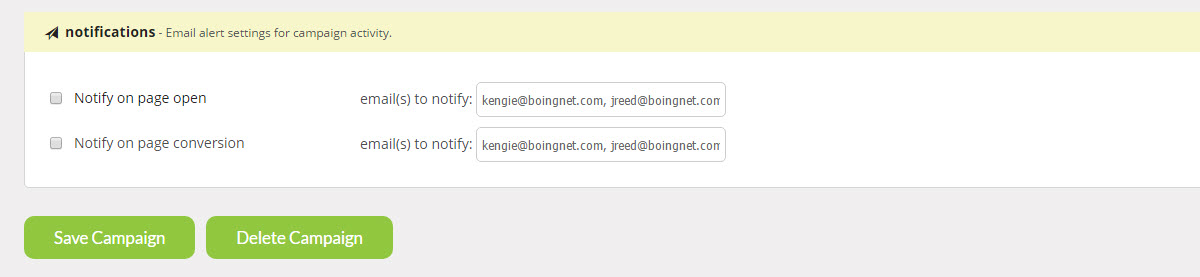
Check the box next to the type of notification you’d like to send and enter the email address in the box provided.
There are two types of notifications to select:
Notify on page open – Checking this box will send the admin an alert when a user clicks on or types in their pURL. It will only send one alert per pURL so multiple hits to the same pURL do not continue to alert the admin.
Notify on pURL Complete – Checking this box will send the admin an alert when a user completes a web form or completes a redirect. It will only send one alert per pURL so multiple hits to the same pURL do not continue to alert the admin.
You can enter multiple email addresses to receive each type of notification by separating each email address with a comma.
Note – you can reset your Alerts by publishing your campaign and choosing the “clear stats” option. This will clear all campaign stats.
Remember to click Save Campaign Effort to save any changes you have entered. You can also Delete you campaign here.
Creating a PURL redirect campaign is a great way for clients to start using PURLs to track direct mail campaigns, gather stats and analytics, but continue to use existing landing pages. If you’re interested in learning more:
Contact Our Support Forums for Help
We are perpetually seeking to evolve our product as well as our support process. If you didn't find your answer here take a moment to visit our support forums as well as submit your ideas on how we can bring Boingnet to the next level!
Support Forums