

Create Lead Forms and stay organized!
Marketers often struggle to keep on top of all of the leads that can be generated by different types of campaigns. Multiple types of forms that marketers deploy to websites, landing pages and microsites collect important lead information about potential customers, but that lead data can end up in multiple systems that don’t work together easily. Boingnet Lead Forms that are deployed in Lead Generation Campaigns automatically route new lead information to a Boingnet list, where they can be used in Email Marketing, Drip Nurturing or Personalized Campaigns.
A Lead Form in Boingnet is a type of web form that dynamically adds new contacts to an existing Boingnet list, or even creates a new contact list using information submitted through a Boingnet Lead Generation Campaign. You can set up a Boingnet Drip Nurturing Campaign to send an email to a new contact when it’s added to your contact list. In this way, using Lead Forms in conjunction with Boingnet’s new Drip Nurturing Campaigns streamlines the whole process of identifying leads, capturing their information and adding them to your sales and marketing campaigns.
To create a new Lead Form:
- From the main navigation bar, click Build
- Click Web Forms
- Select Create New Web Form
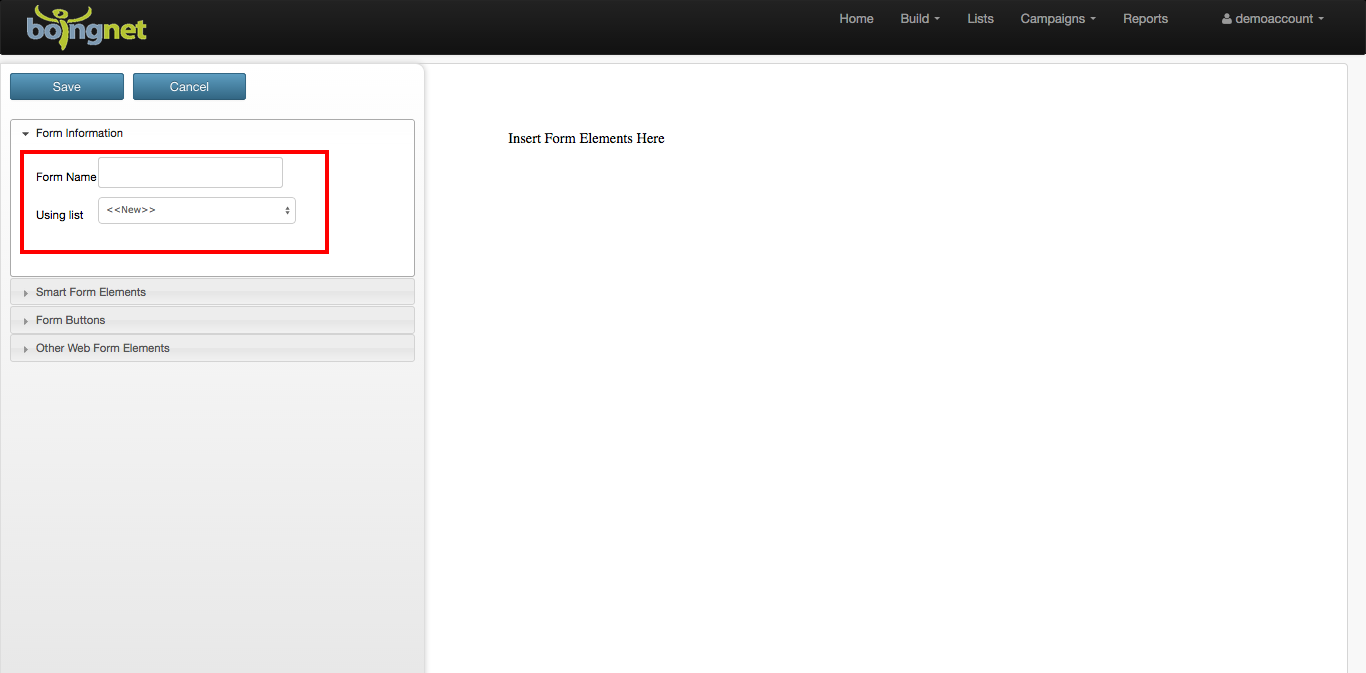
On the template sidebar, underneath Form Information:
- Enter a name for your Lead Form
- Select an existing contact list to add new contacts to, or select New to create a new contact list.
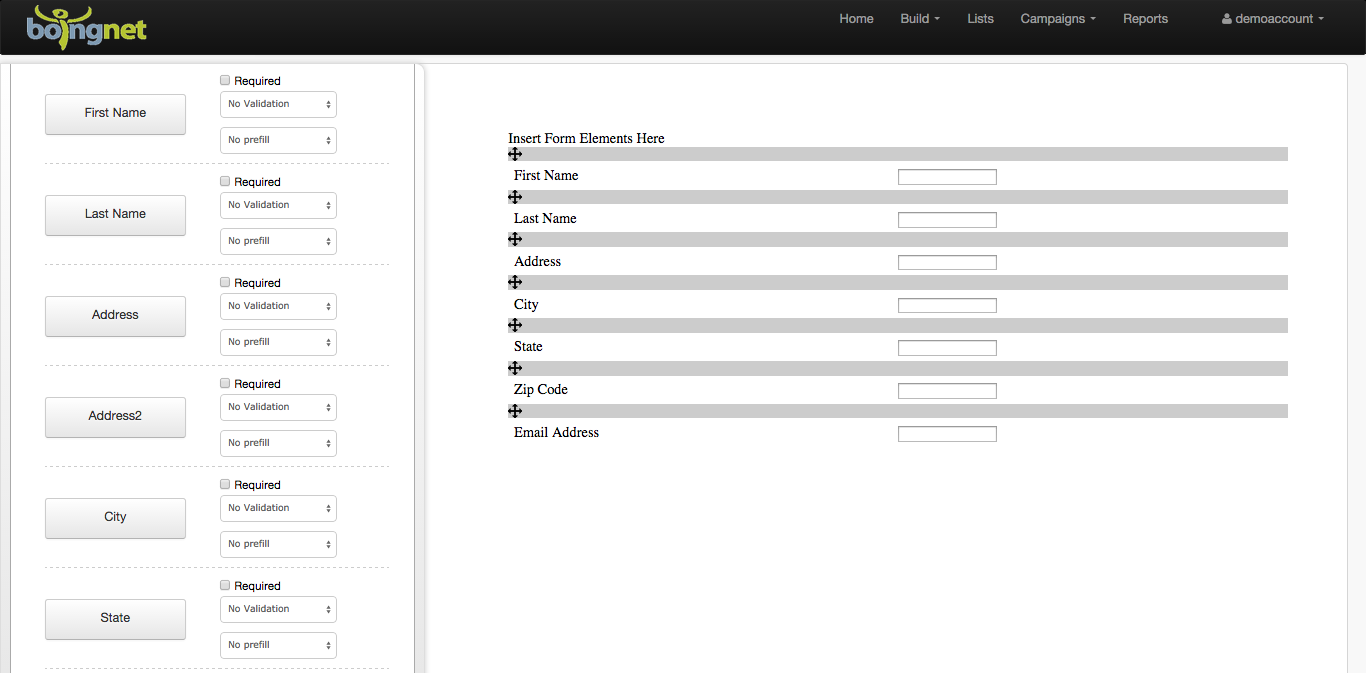
Click on Lead Form Elements to select fields to include in your form. Boingnet allows you to include the following fields on your Lead Forms:
- First Name
- Last Name
- Address
- Address 2
- City
- State
- Zip
- Email Address
- Company
- Occupation
- Variable Data 1 – 5
Click on each field you’d like to include in your Lead Form. For each field inserted, you have the option of making that field a required entry, and you can select your validation criteria.
Variable Data 1 – 5 can be customized to contain additional contact information. If you choose an existing Boingnet list for the form, those fields have already been mapped. If you are creating a new list, you can label the variable data fields that will be captured here.
When you are done inserting your fields, click on Lead Form Elements again to collapse the box.
To create a submit button for your form, click on Form Buttons and enter the information below:
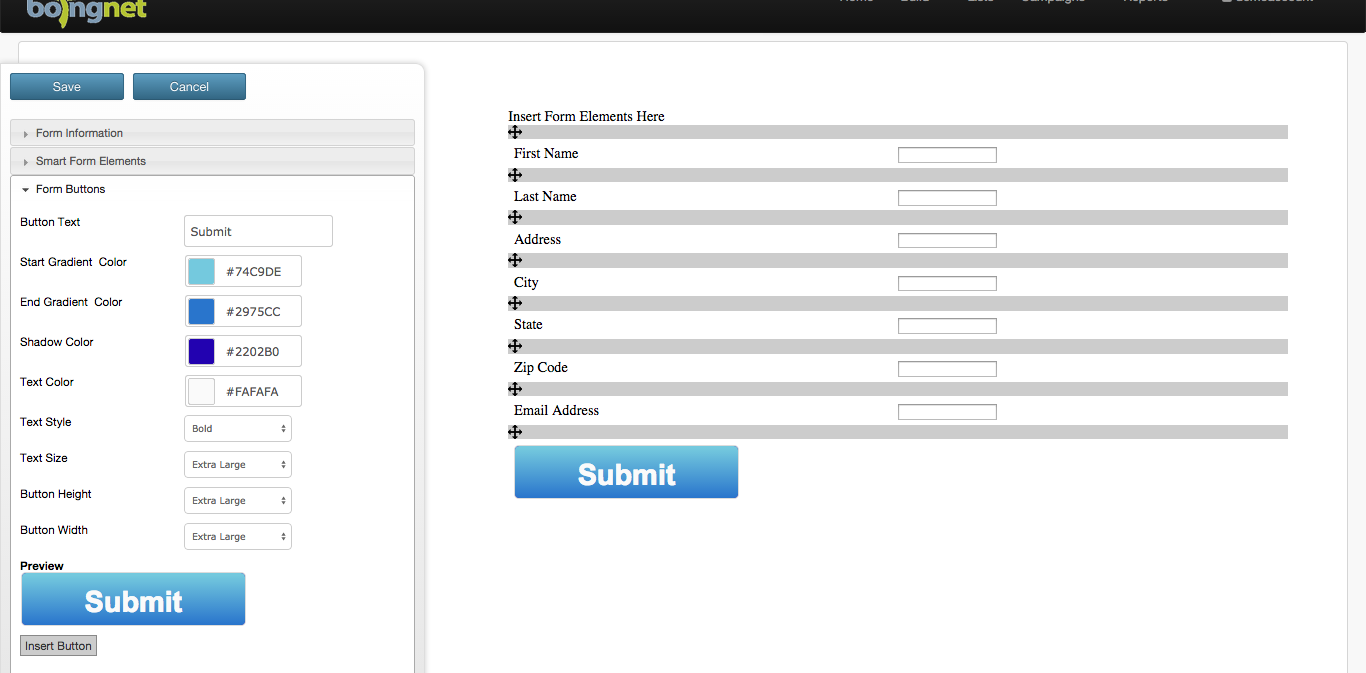
Button Text – Enter the text for your submit button.
Boingnet will build a shaded button once you enter the following three colors:
- Start Gradient Color: Click on the box to display the color-picker. Choose a color from the right side of the box and a shade from the left side.
- End Gradient Color: Repeat the process to select an end gradient color.
- Shadow Color: Repeat the process.
- You can see what your button will look like under preview at the bottom of the sidebar.
Text Color: Repeat the process to select a text color.
Text Size: Choose Normal or Bold.
Button Height: Choose Small, Medium, Large or Extra Large.
Button Width: Choose Small, Medium, Large or Extra Large.
Click Insert Button when you are done.
In order to use your new Lead Form in a Lead Generation Campaign, you’ll need to do the following:
- Insert the Lead Form into a Landing Page Template.
- Create a Microsite for the Landing Page.
- Create a Lead Generation Campaign using your new Microsite.
Please visit our Knowledgebase for more information on Lead Generation Campaigns and Drip Nurturing Campaigns.
Contact Our Support Forums for Help
We are perpetually seeking to evolve our product as well as our support process. If you didn't find your answer here take a moment to visit our support forums as well as submit your ideas on how we can bring Boingnet to the next level!
Support Forums