

Web Forms allow you to collect information from your viewers and are an important component of your landing pages. Boingnet allows you to create two distinct types of forms – List Web Forms and Other Web Forms. Our List Web Forms are used to dynamically add new contacts to a Boingnet Contact List or to update contact information on an integrated CRM system such as Salesforce.com Contacts, Microsoft Dynamics, HubSpot and ADF XML (Auto Industry CRM Data Standard Format.) Our Other Web Forms capture additional contact information – such as address, mobile phone or answers to survey questions. This data can then be exported using the Web Form Report and used in future marketing campaigns. It’s important to note that data collected using our Other Web Forms does not get added to the Contact List associated with the campaign. Only List Web Forms add new information or update existing information on a Contact List.
If you’re creating a Personalized or pURL Campaign and you’d like to use a form to capture information about the contacts already on your Boingnet list, use our Other Web Forms. If you’re creating a Lead Generation Campaign or Personalized Campaign and you’d like to add new contacts to a Boingnet list or update existing information for those contacts then use our List Web Forms. If your contacts were imported from an integrated CRM and you’d like to update their information using form data, then use a List Web Form.
This article describes how to create a List Web Form – for more information about our Other Web Forms, visit our Other Web Forms page.
To Create a List Web Form to insert into a landing page:
- From the main navigation bar, click Build:

On the next page, click Create New Web Form:
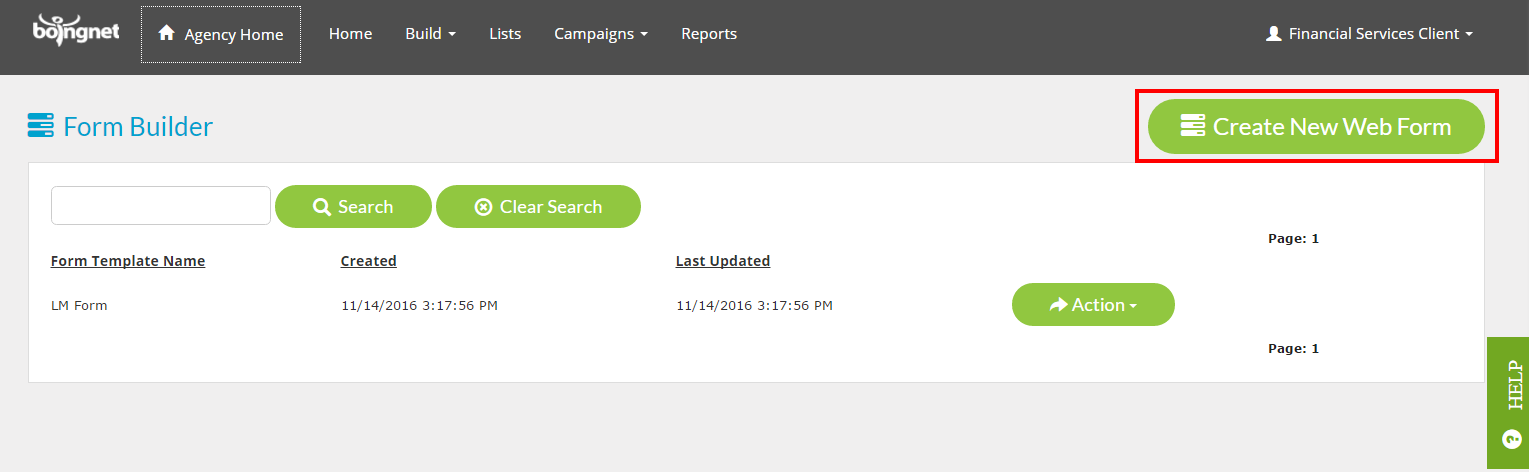
You’ll navigate to the Form Builder:
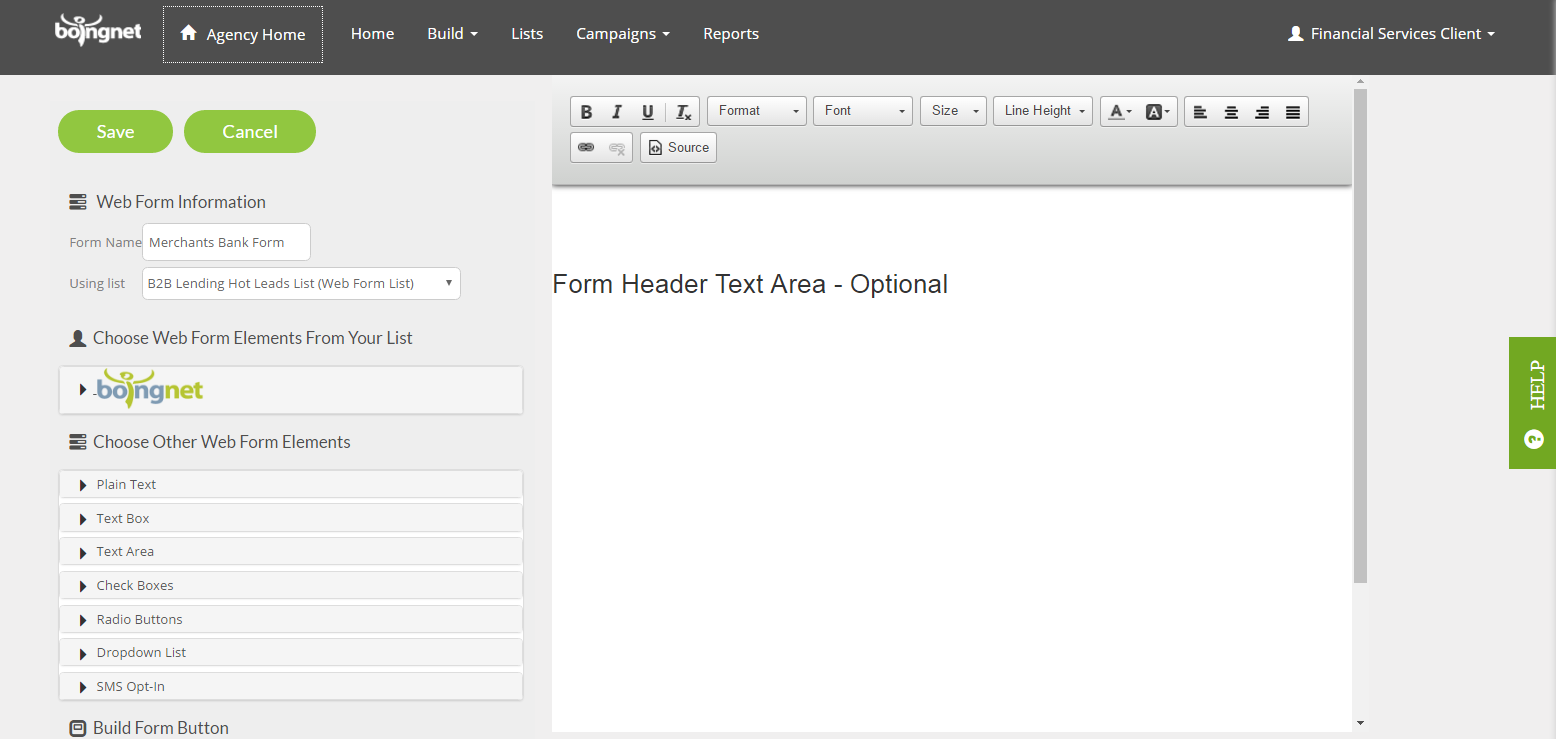
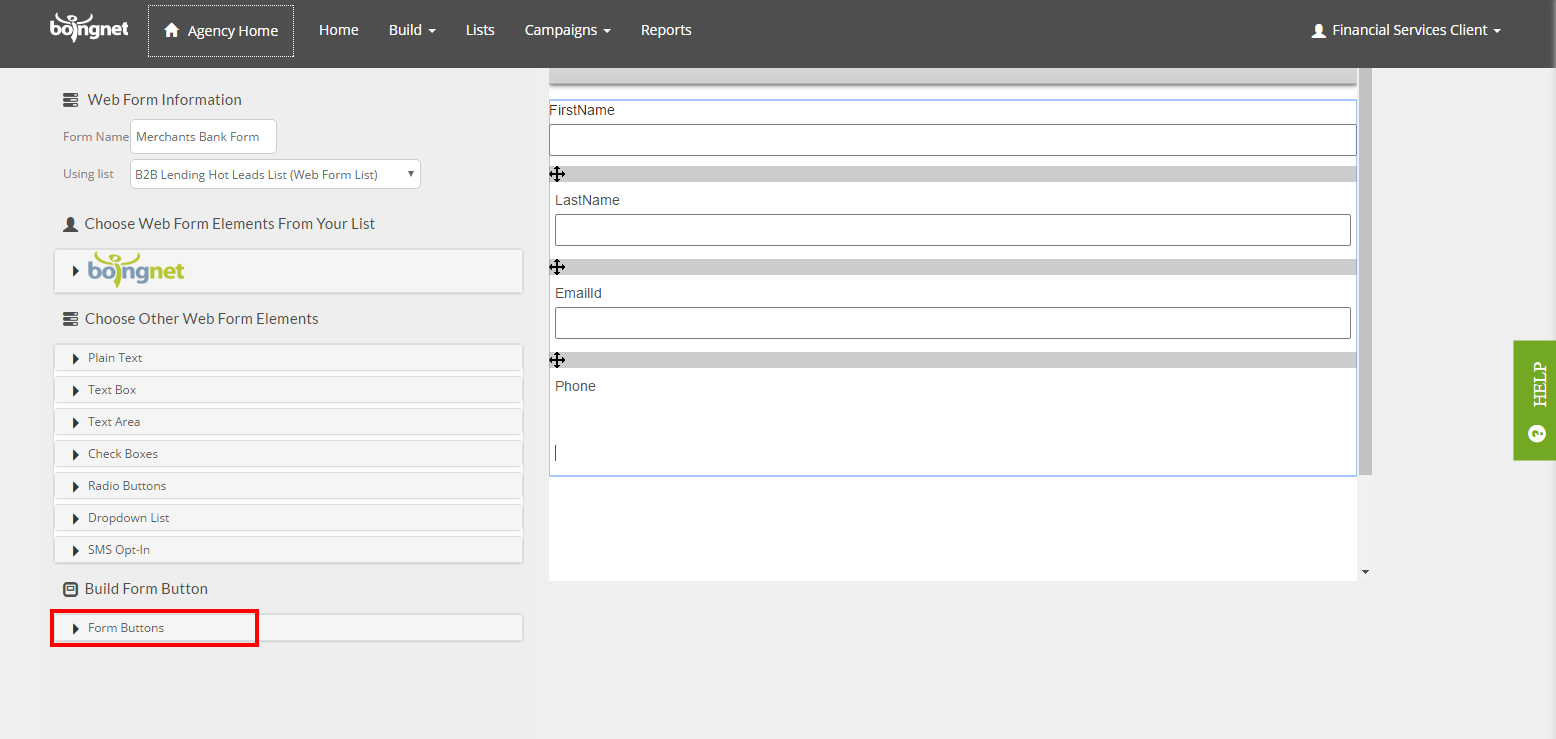
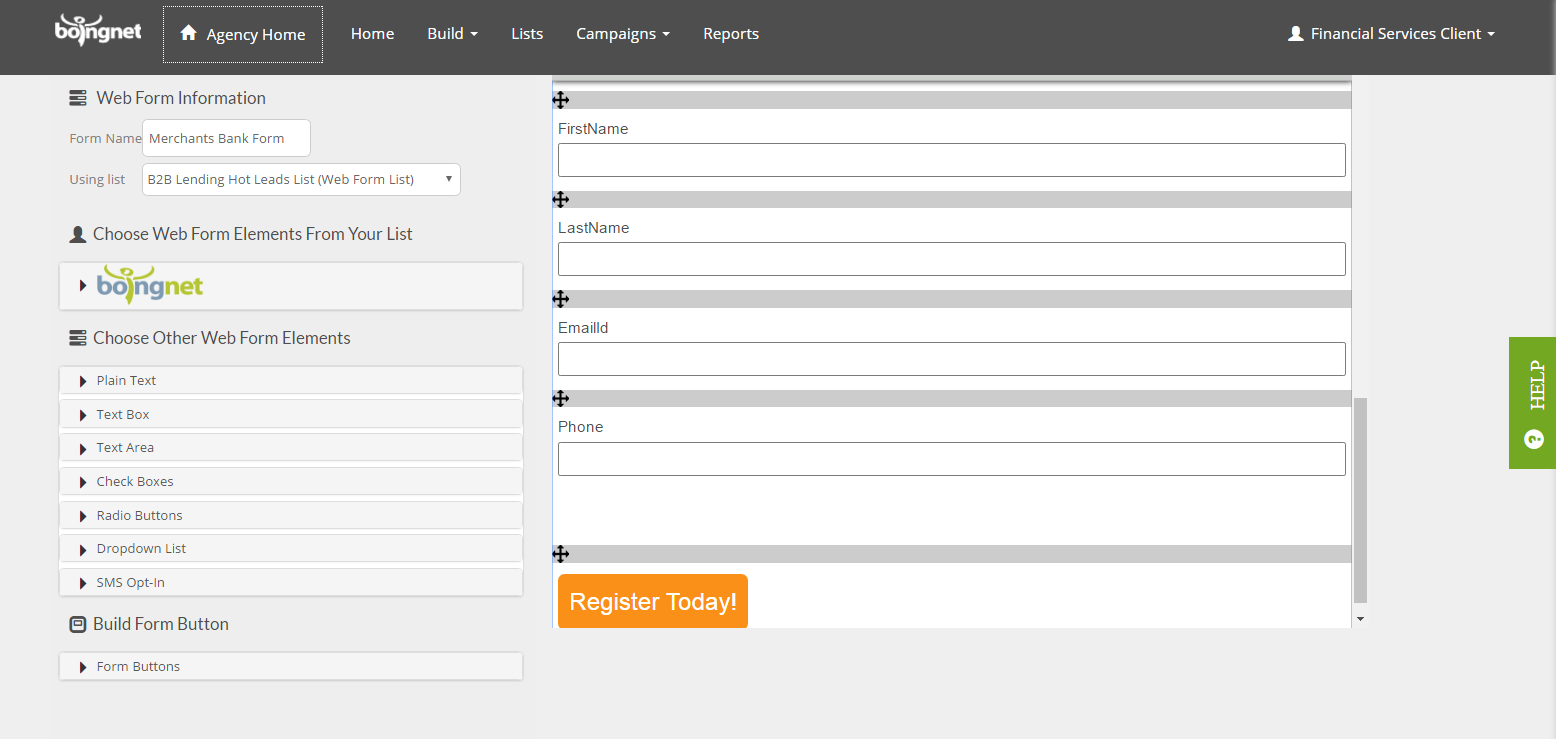
In the Form Name box, enter a name for your List Web Form – In the example above, we’ve used Merchants Bank Form.
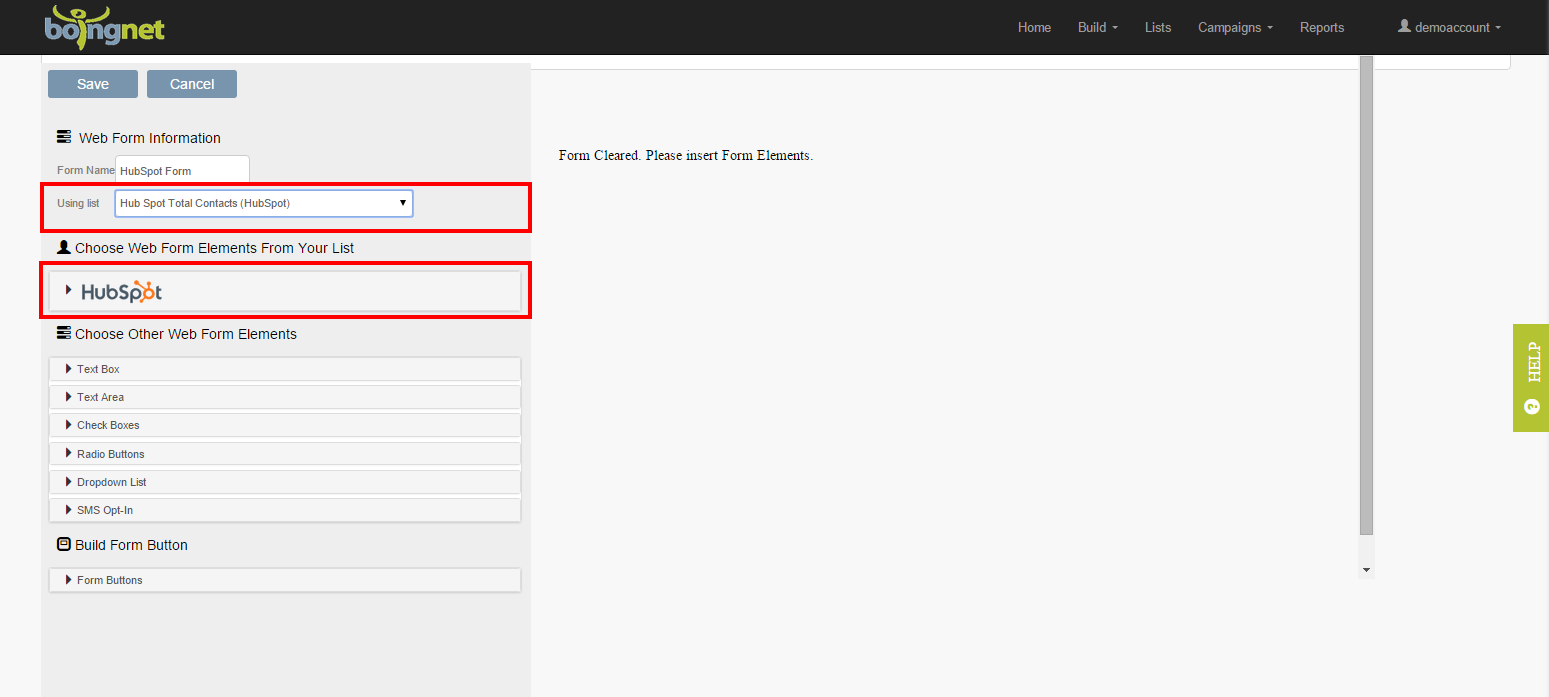
If your List Web Form will be used in a Personalized / pURL Campaign to update contact information on an Existing Contact List, then under ‘Using List‘, select the existing contact list from the dropdown menu. In the example above, we’ve selected B2B Lending Hot Leads List.
Once you have selected your list, click Boingnet and the Template Sidebar will display all the possible fields to add to your Boingnet List Web Form:
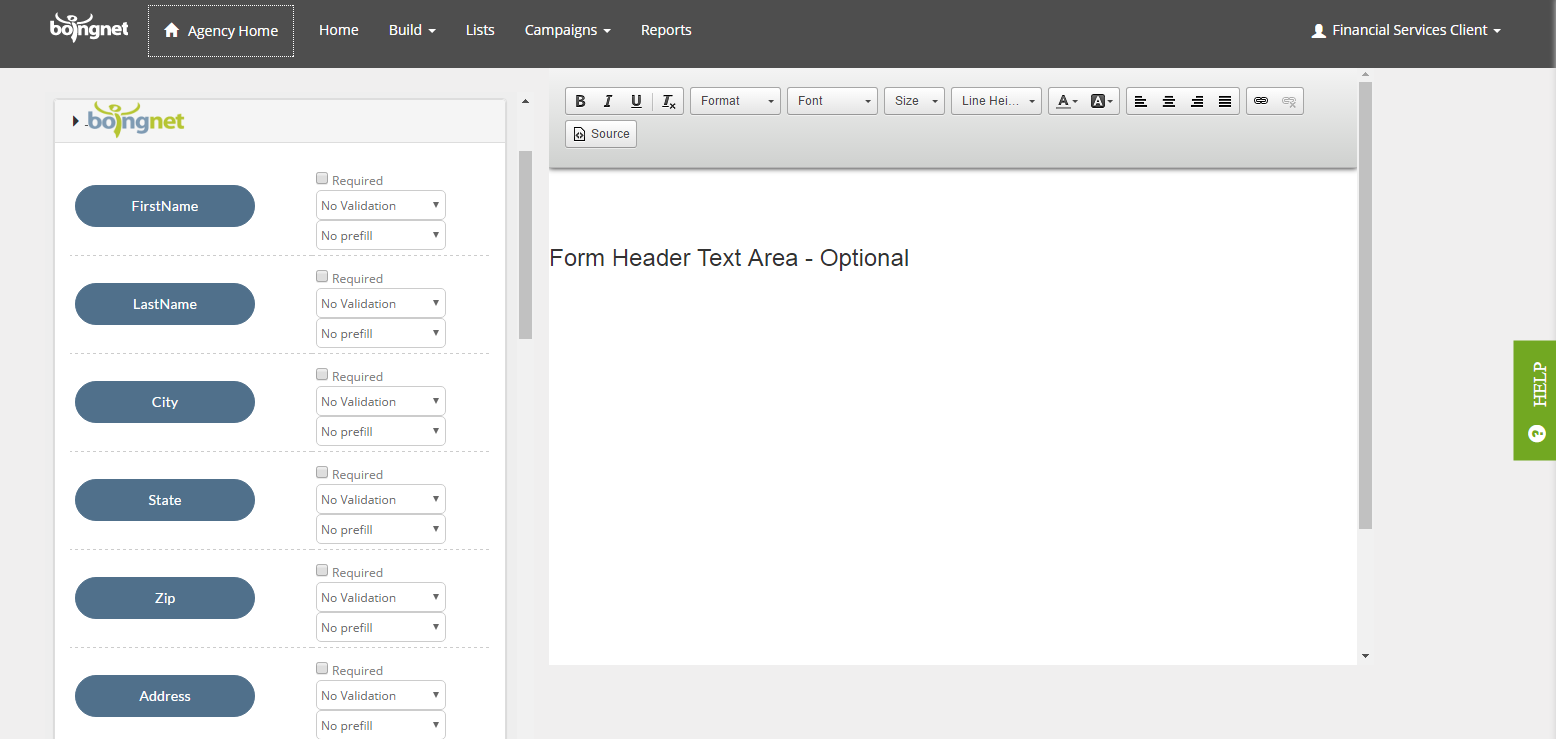
To select a field to add to your form:
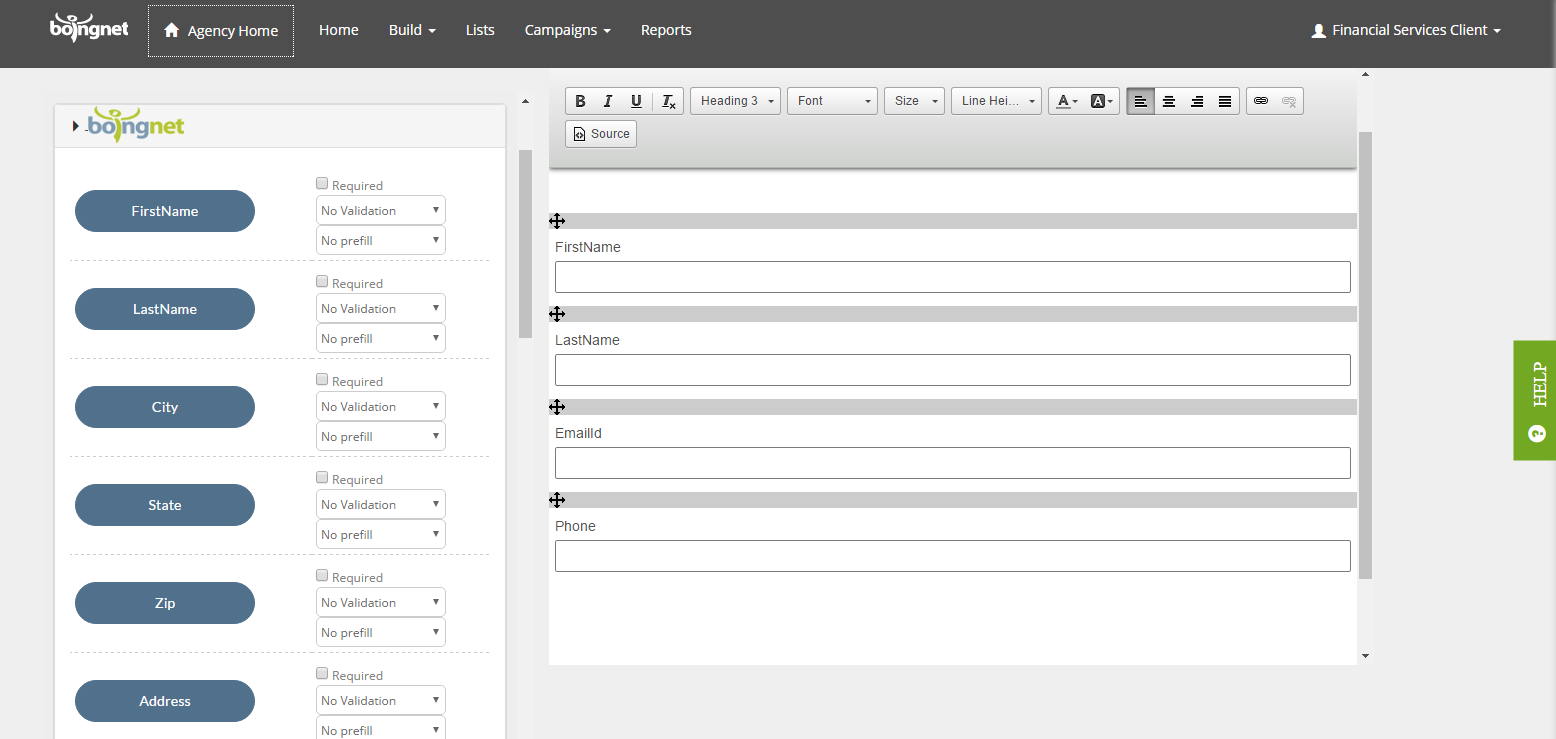
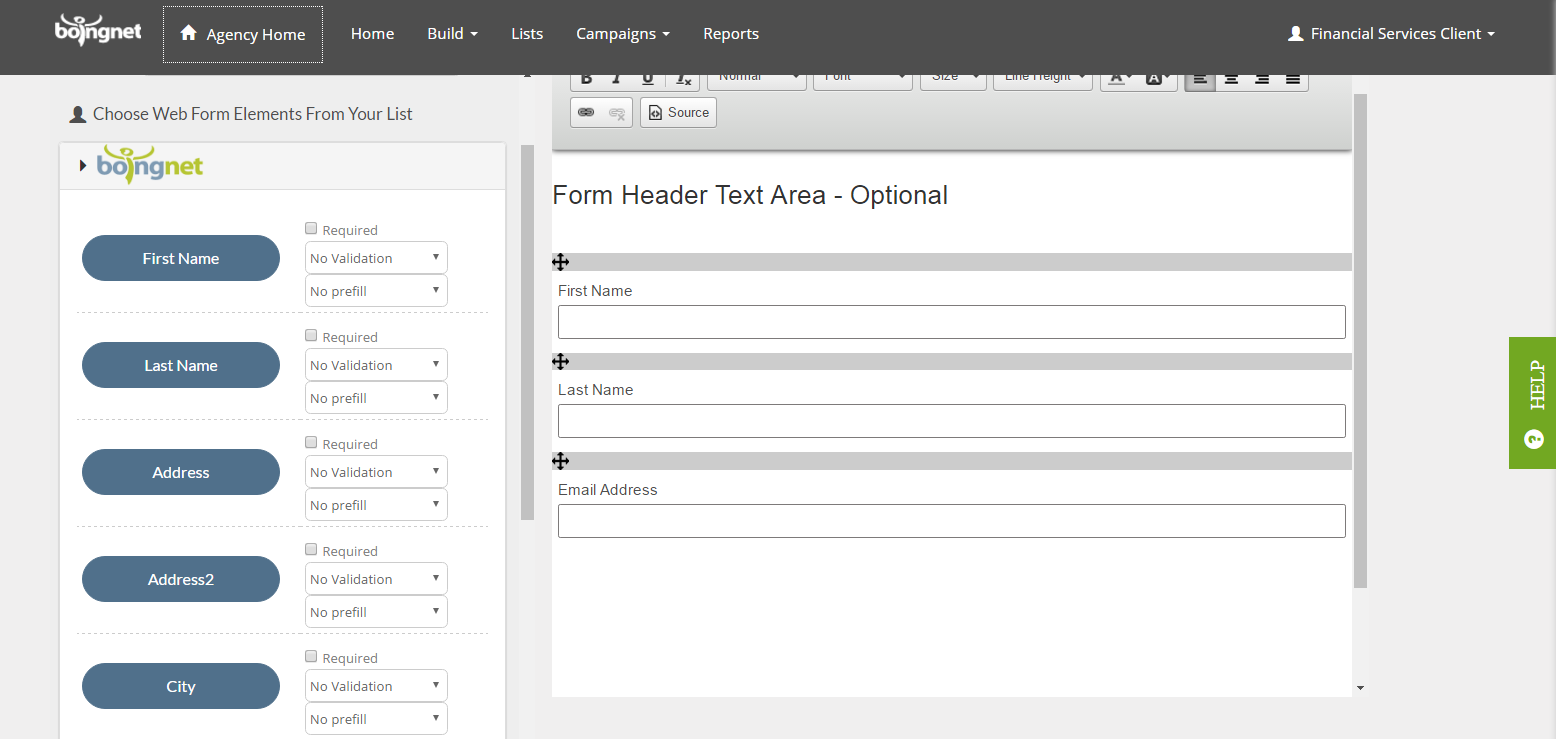
- Click on the button to insert it into your List Web Form – In the example below, we’ve inserted First Name, Last Name, Email and Phone.
- To make the field required, click the Required box.
- To prefill the field with data from your contact list, Select the field to use from the drop down menu under Prefill.
- To perform validation – to check for syntax on an email, or on a numeric entry, or on a Web URL, select the field type from the drop down menu under Validation.
Once you have entered all your form fields you’ll need to create a Submit button.
See Submit Button Instructions
Salesforce.com:
If the list you select originated in Salesforce.com, then this List Web Form will make updates to the list in Salesforce.com.
In the example below, we’ve selected the list Alec DK SalesForce. The (Salesforce) designation next to the list name indicates that this list was imported from Salesforce.

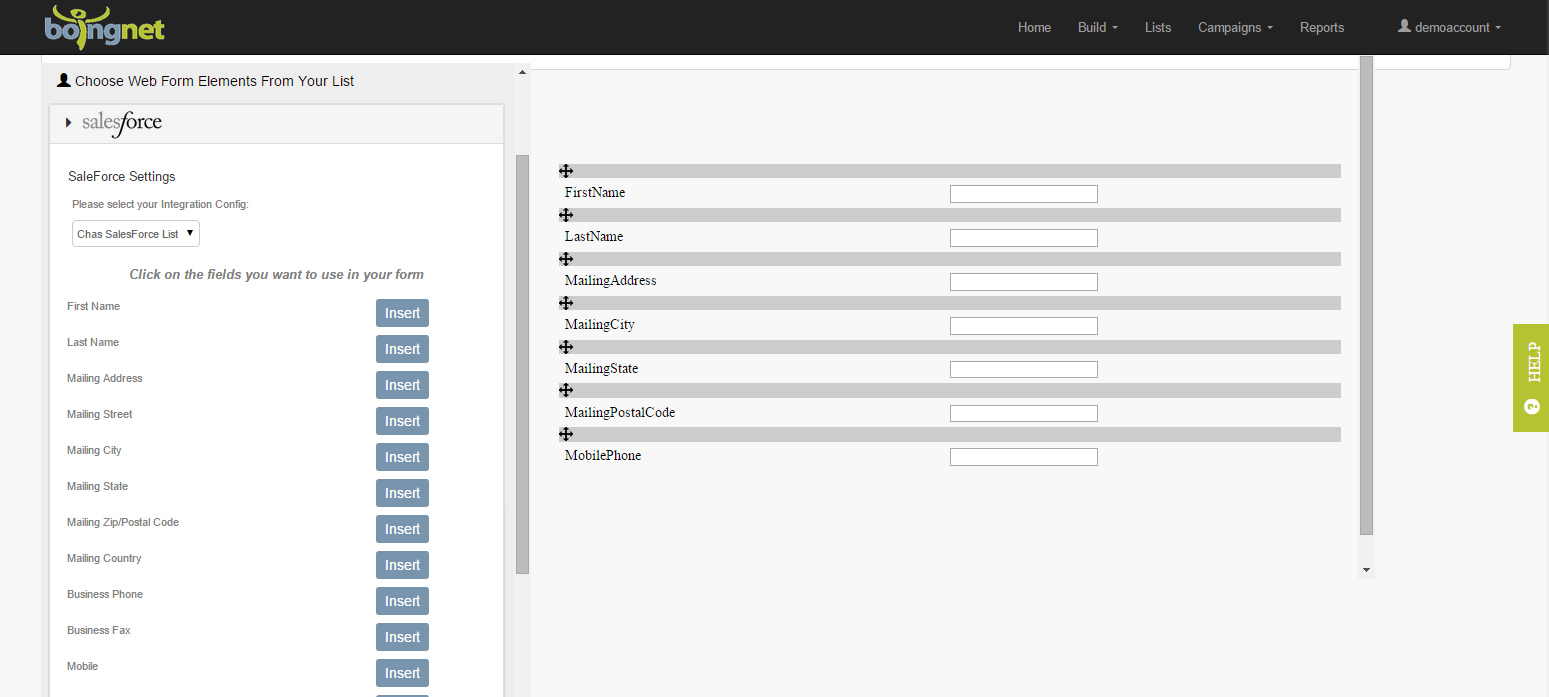
Once you have selected your list, click Salesforce and the Template Sidebar will display all the possible fields to add to your Salesforce.com List Web Form.
To select a field, click on Insert to the right of the field you want to insert into your List Web Form. In the example below, we’ve inserted First Name, Last Name, Street Address, City, State, Zip and Mobile Phone:
Once you have entered all your form fields you’ll need to create a Submit button.
See Submit Button Instructions
HubSpot:
If the list you select originated in HubSpot, then this List Web Form will make updates to the list in HubSpot.
In the example below, we’ve selected the list HubSpot Total Contacts. The (HubSpot) designation next to the list name indicates that it was imported from HubSpot.
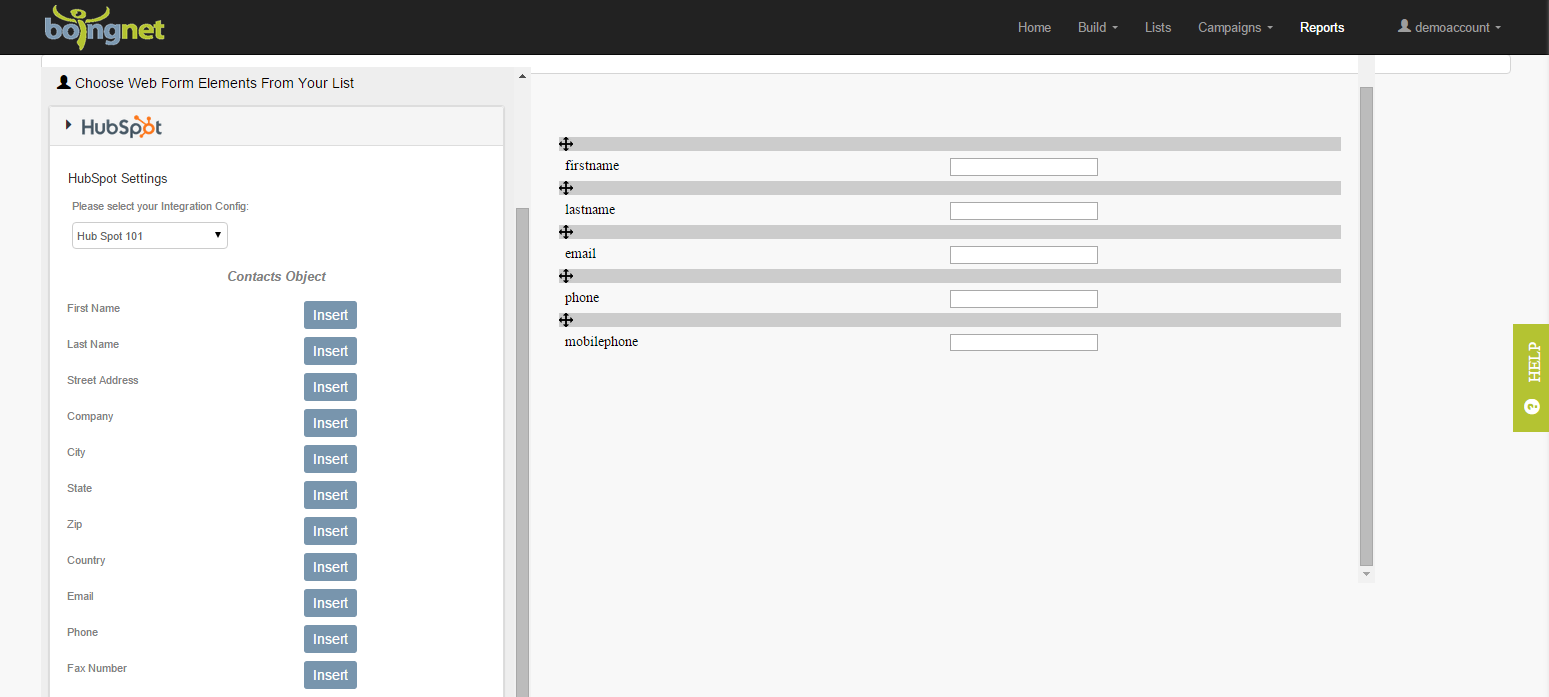
Once you have selected your list, click HubSpot and the Template Sidebar will display all the possible fields to add to your HubSpot List Web Form.
To select a field, click on Insert to the right of the field you want to insert into your List Web Form. In the example below, we’ve inserted First Name, Last Name, Email, Phone and Mobile Phone:
Once you have entered all your form fields you’ll need to create a Submit button.
See Submit Button Instructions
ADF XML:
If the list you select originated in ADF XML, then this List Web Form will make updates to ADF XML.
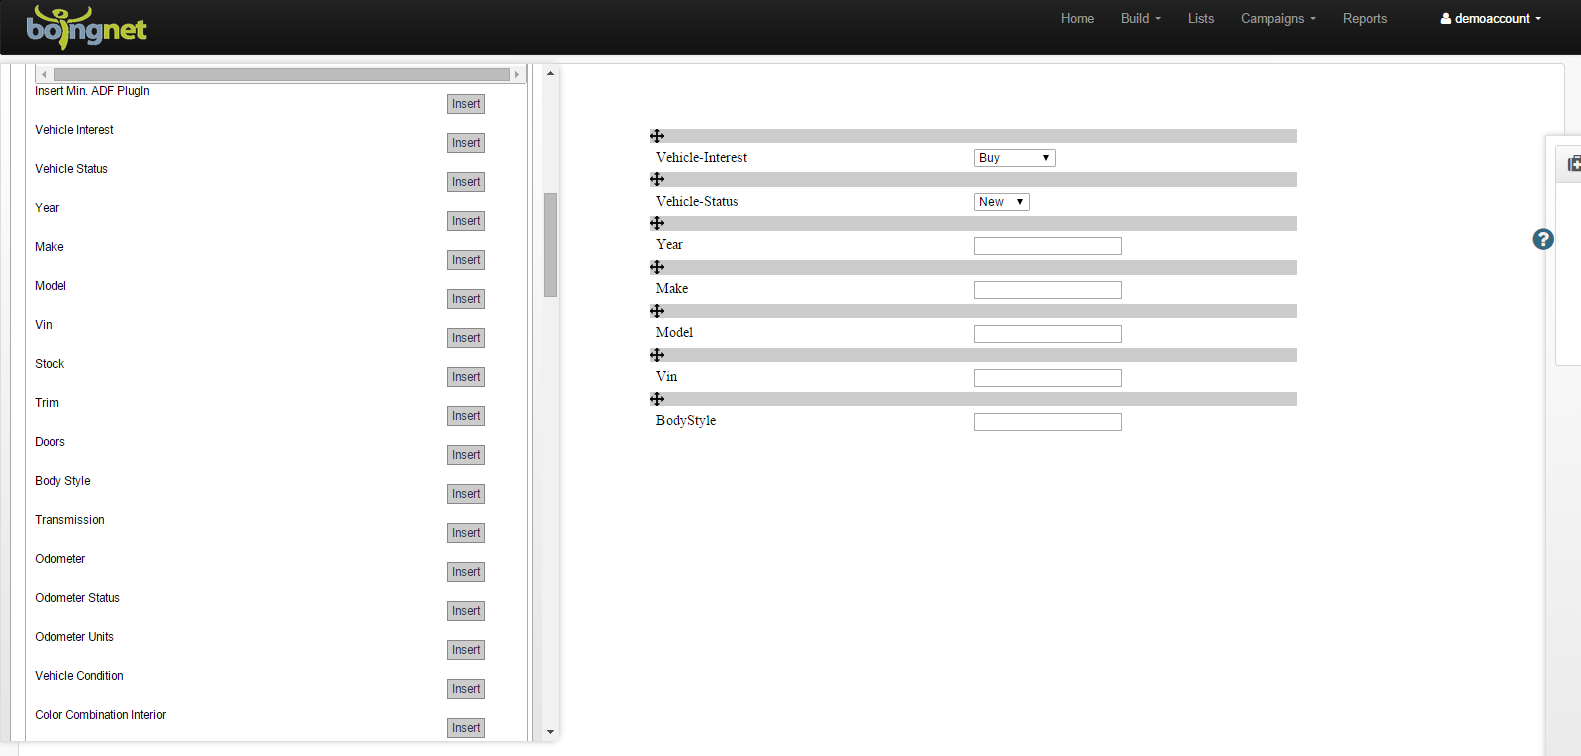
Once you have selected your list, click ADF XML and the Template Sidebar will display all the possible fields to add to your ADF List Web Form:
To select a field, click on Insert to the right of the field you want to insert into your List Web Form. In the example below, we’ve inserted Vehicle-Interest, Vehicle-Status, Year, Make, Model, Vin and Body-Style:
Once you have entered all your form fields you’ll need to create a Submit button.
See Submit Button Instructions
For Lead Generation Campaigns:
If your List Web Form will be used in a Lead Generation Campaign to add contacts to a New Boingnet Contact List:
- Enter the Form Name in the box provided – in the example below, we’ve entered B2B List Form.
- Leave ‘Using List‘ set at<<New>>.
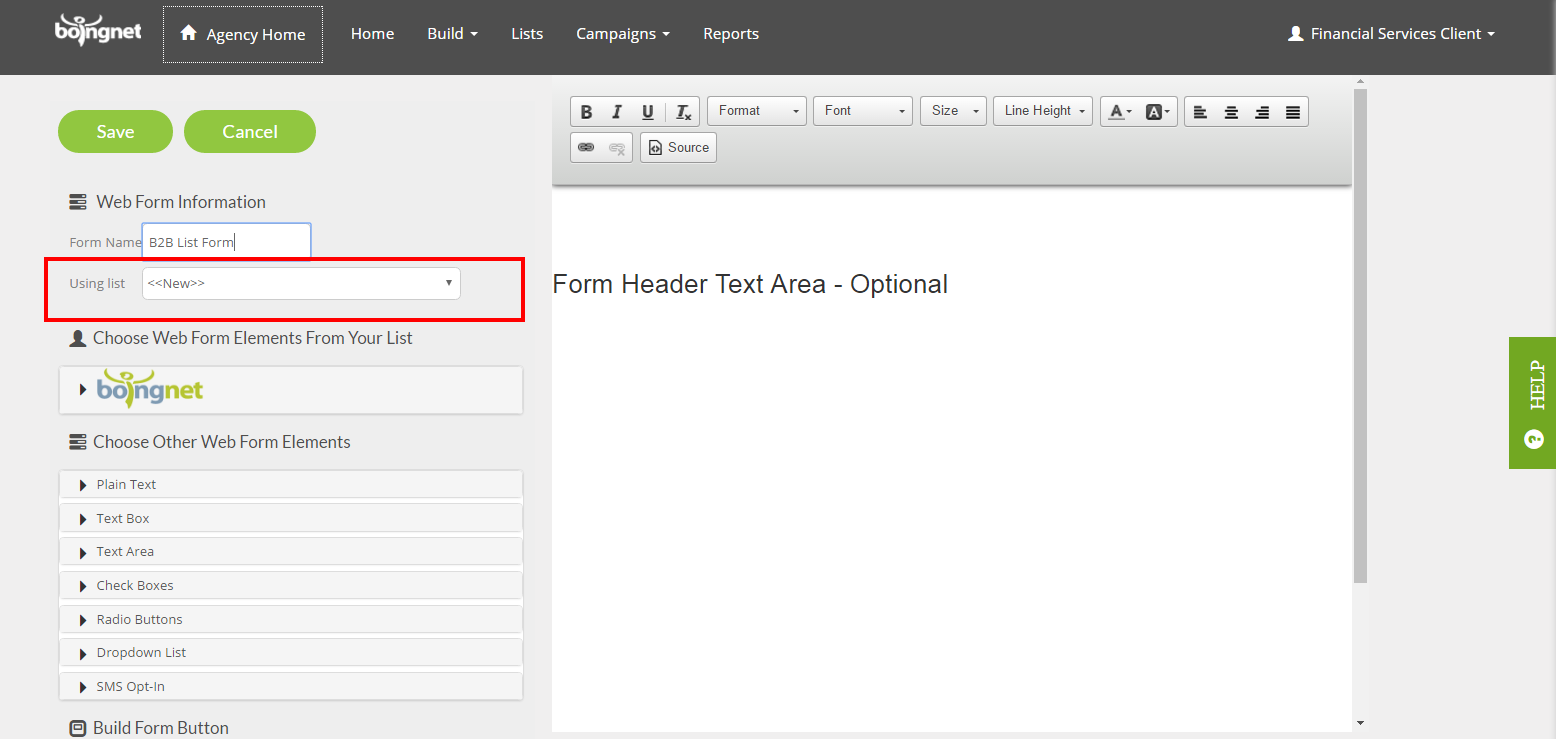
- Underneath Choose Web Form Elements from Your List, click on Boingnet.
- The Template Sidebar will display all the possible fields to add to your List Web Form including:
- Standard Boingnet contact fields – such as name, address, email, company, occupation, phone etc.
- Variable Data Fields that you can customize.
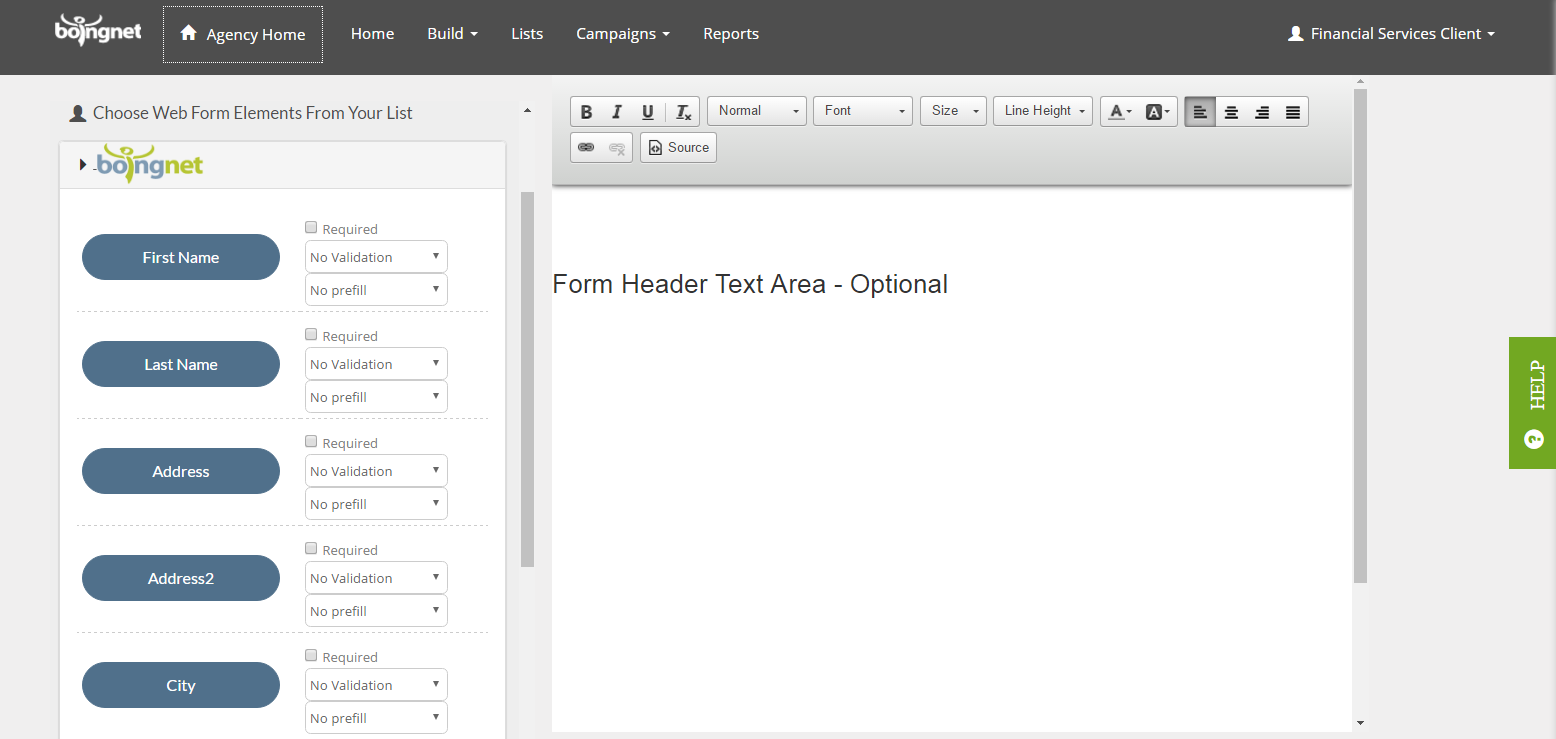
Select the fields to include on your form from the list provided as follows:
- Place your cursor in the area of the template where you’d like your first field inserted
- Click the appropriate button to select a field – for example, to insert First Name, click the First Name button.
- To make a field required, click the Required box.
- To validate the field, select a validation from the drop down menu.
- In the example below, we have inserted First Name, Last Name and Email into our form:
To add a custom field in one of the Variable Data fields – in this case Variable Data 1:
- Scroll down to the Variable Data 1 Field
- Enter a label for your field in the Label Variable Data 1 as box
- Click the Variable Data 1 button
- In the example below, we have entered Industry as a custom field on our form:

Once you have entered all your form fields you’ll need to create a Submit button.
Submit Button Instructions:
To create a Submit Button, place your cursor in your template where you’d like your button to go, and click Form Buttons on the Template Sidebar:
To Create a Form Button, click on Form Buttons and enter the following:
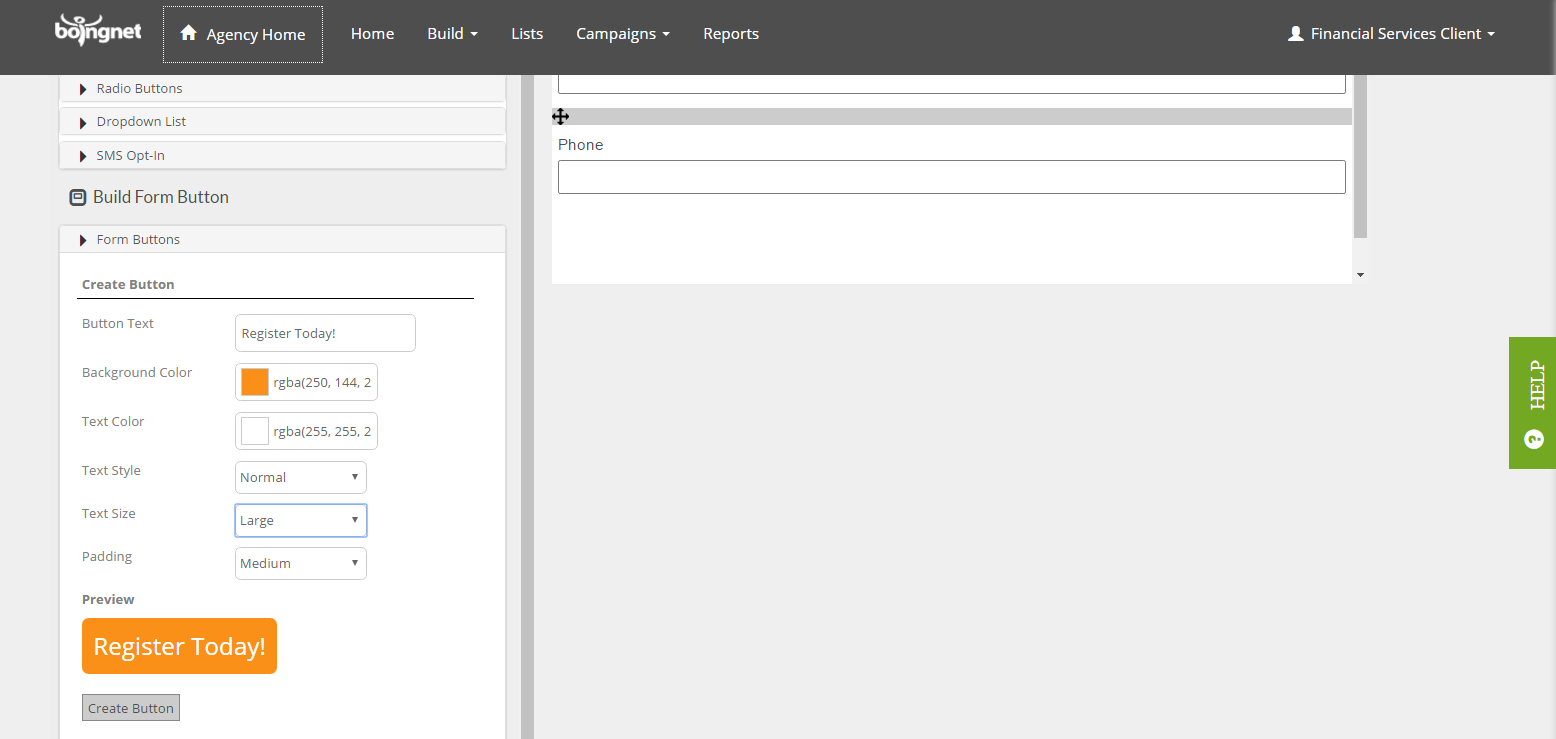
- Enter the text for you button in Button Text – we’ve entered ‘Register Today!’
- To select a button color, click the box to the right of Background Color. Choose a color from the right side of the box and a shade from the left side.
- To select Text Color – Click the box to the right of Text Color. Next, choose a color from the right side of the box and a shade from the left side.
- Text Style: Choose Normal or Bold
- Text Size: Choose Small, Medium, Large or Extra Large.
- Padding: Choose Small, Medium, Large or Extra Large.
- Click Insert to insert your Submit Button:
When you are done inserting your form fields and creating your submit button, click Save in the upper left corner to save your List Web Form.
Contact Our Support Forums for Help
We are perpetually seeking to evolve our product as well as our support process. If you didn't find your answer here take a moment to visit our support forums as well as submit your ideas on how we can bring Boingnet to the next level!
Support Forums