

Beautiful, Responsive Email Templates 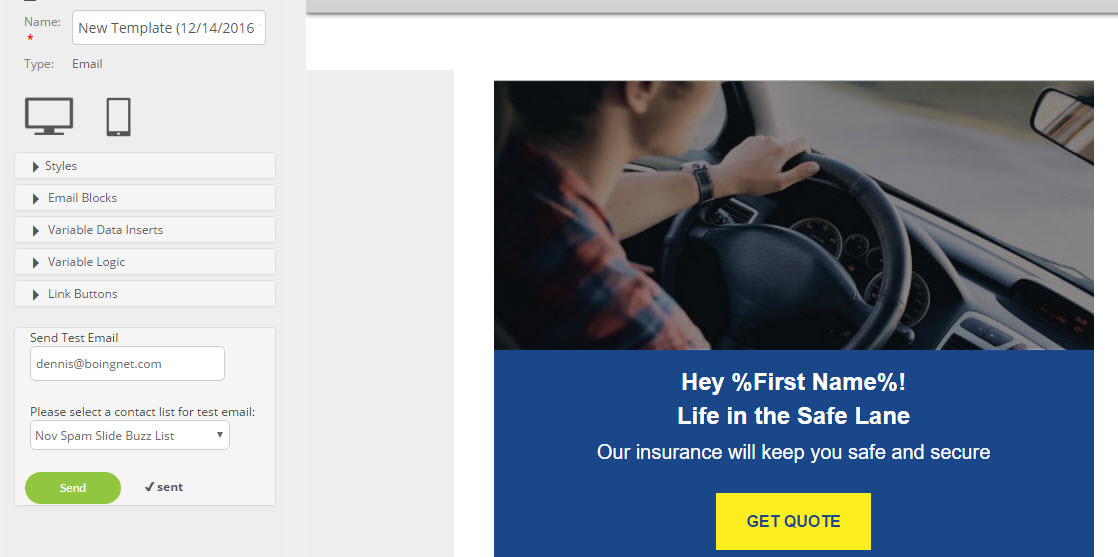
Use Boingnet’s email template creation process to design the content of your email to your contacts, including any images, calls to action, videos or product downloads.
- From the main navigation bar, click Build.
- Select Templates.
- Click on Create New Template
- On the next page, select the Email option:

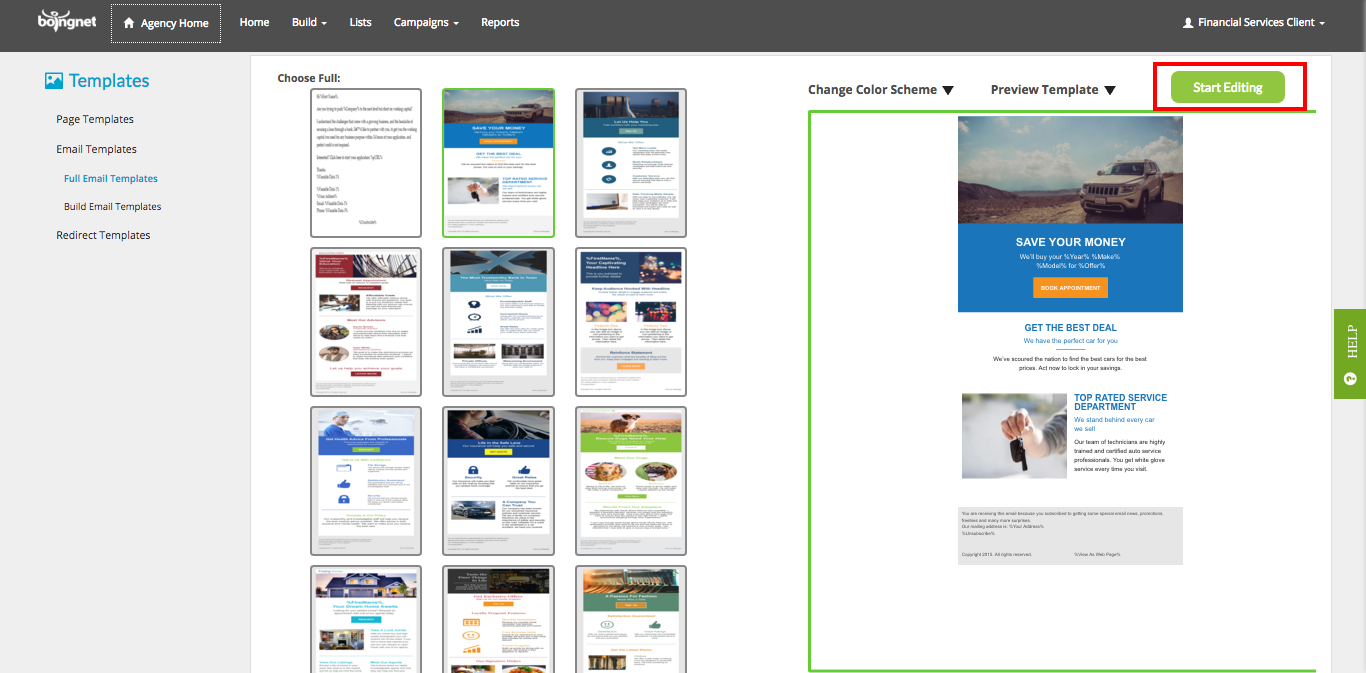
You’ll navigate to the following page. From here you have the option to select one of our pre-built email templates using the Full Email Templates tab on the left. You can also design your own layout by clicking the Build Email Templates tab.
If you decide you’d like to use one of our layouts, select it and then click Start Editing:
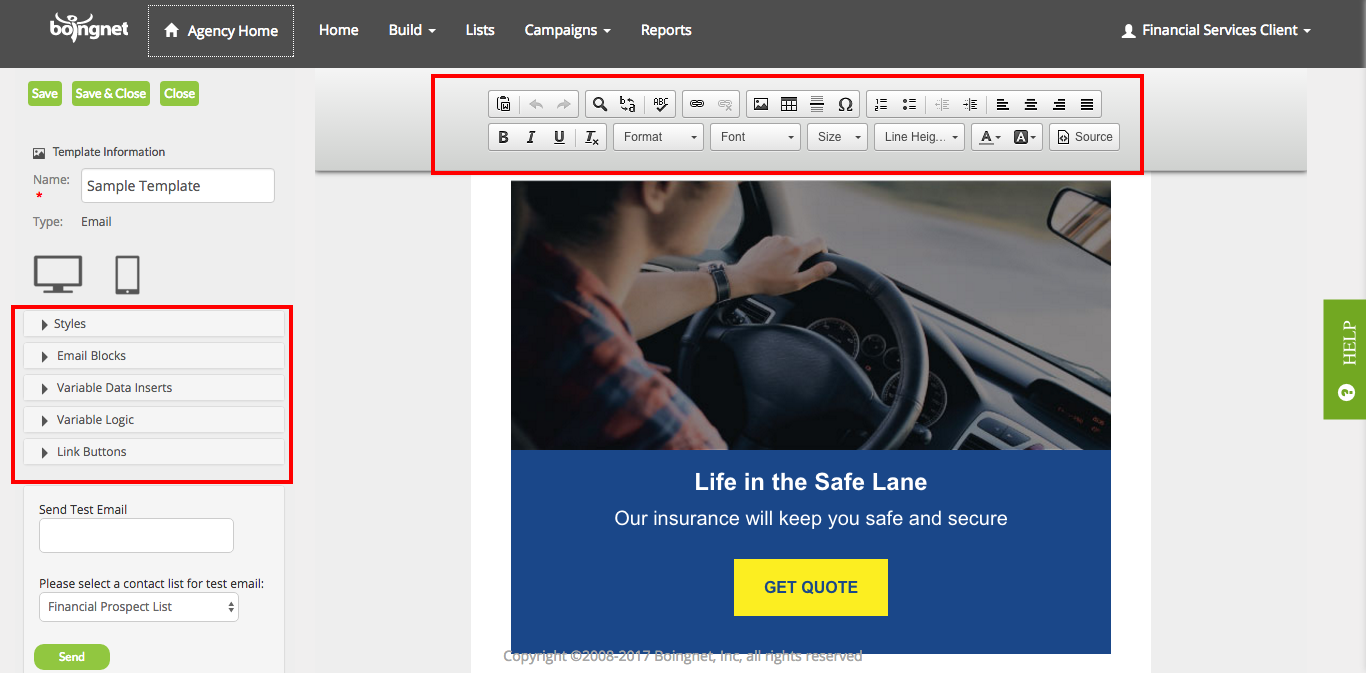
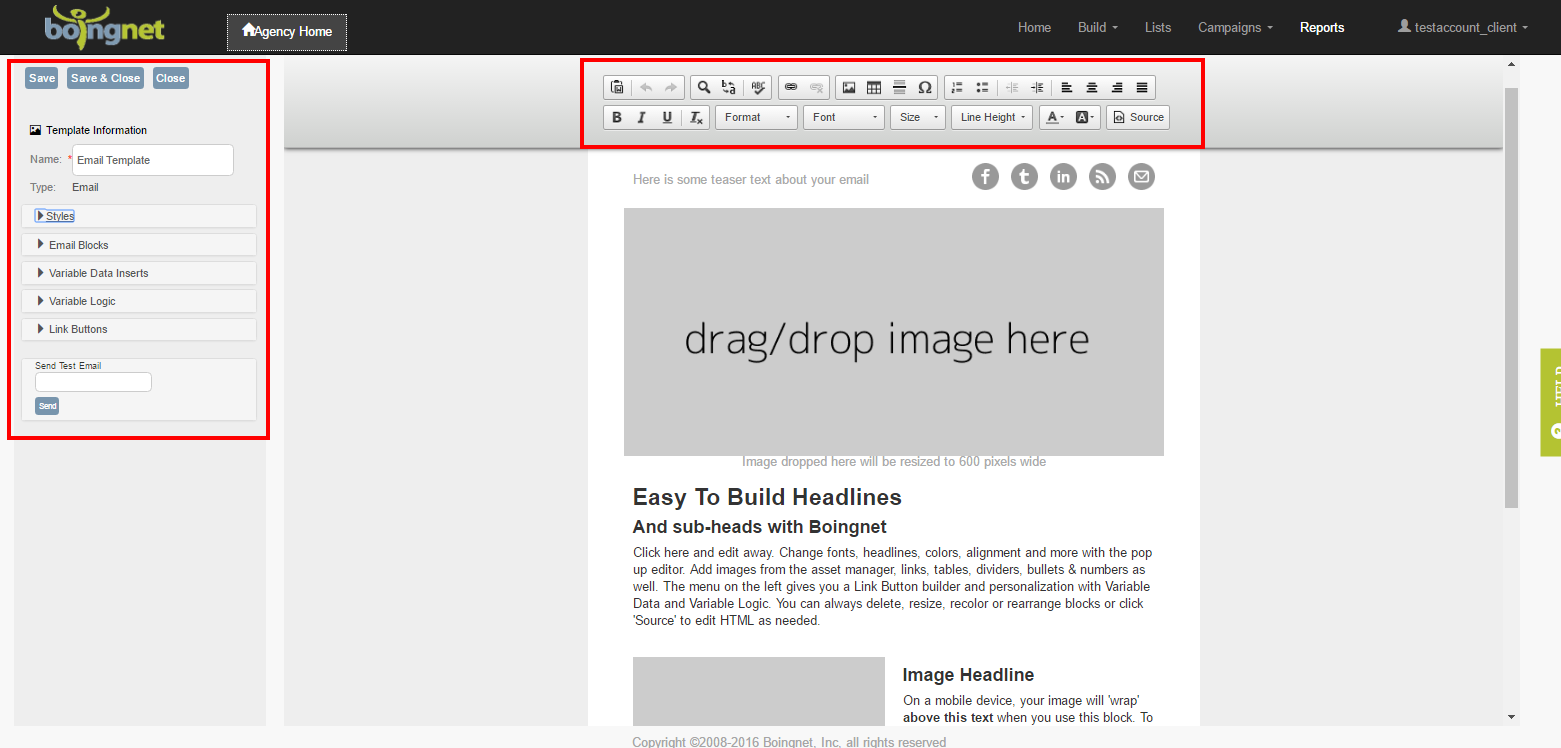
You’ll be able to edit this layout using the toolbar and the left sidebar. The toolbar will allow you to select fonts, bold and underline text and insert images and links. The left sidebar will allow you to select email styles, insert new email blocks and use variable data and logic. See below for more information:
If you choose to design your own layout, select the Build Email Template tab to navigate to the following page:
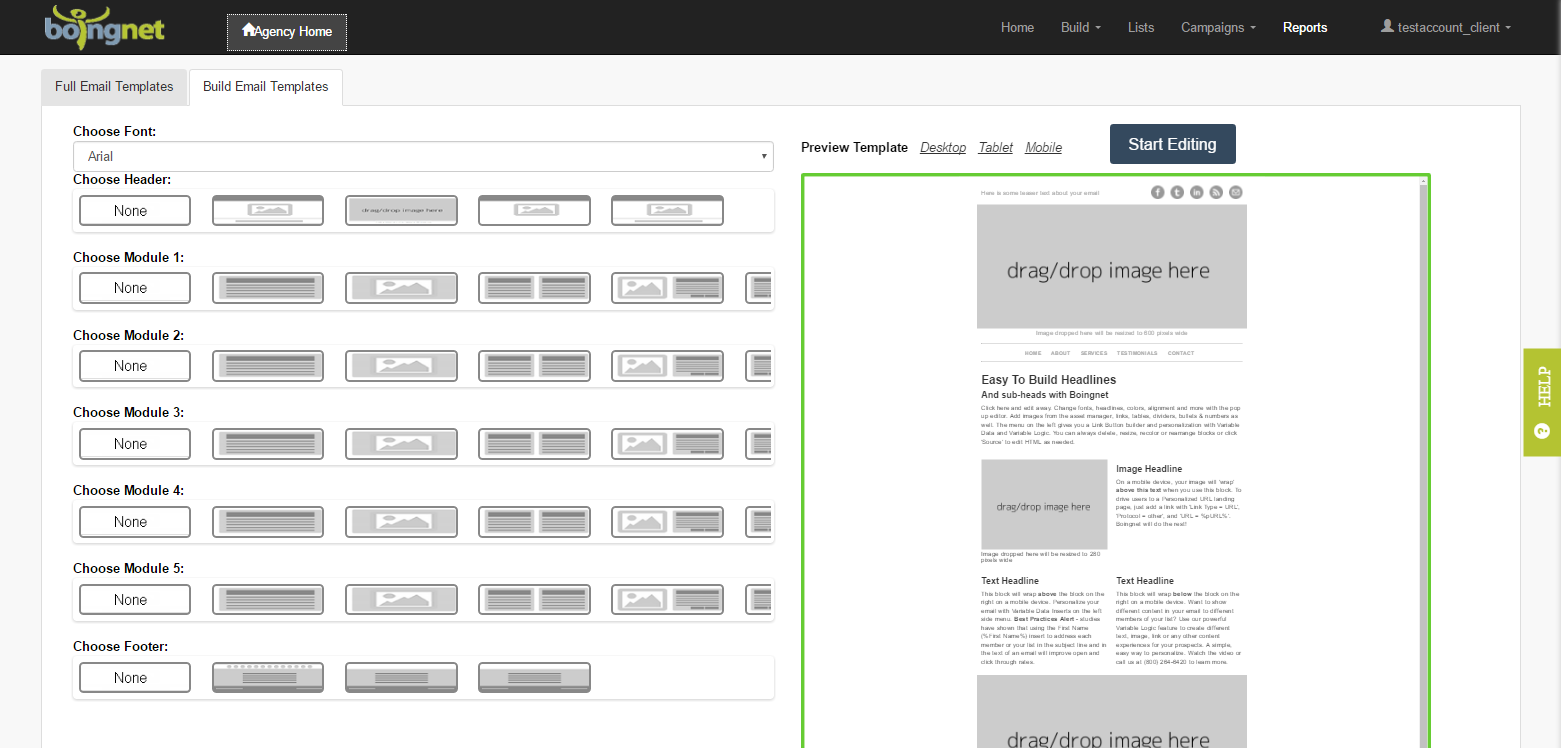
You can choose a number of layout elements including a header, up to 5 modules for the body and a footer. Displayed on the left side of the screen are sample layouts for each section of your email.
Choose Header: Click on the header layout you want for your email. You will notice that the right side of the screen gives you a preview of how your email layout will look.
Choose Module 1 – Module 5: Click on the layout you want for this portion of your email. Click on the right-hand arrow to see more layout choices. Note, you only need to choose a single body module to build an email. You have the option to add up to 5 different modules if you’d like.
Choose Footer: Click on the layout you want for the footer of your email.
In the following example, we’ve chosen a centered logo for our header, a single column text block, a double column image and text block and a footer:
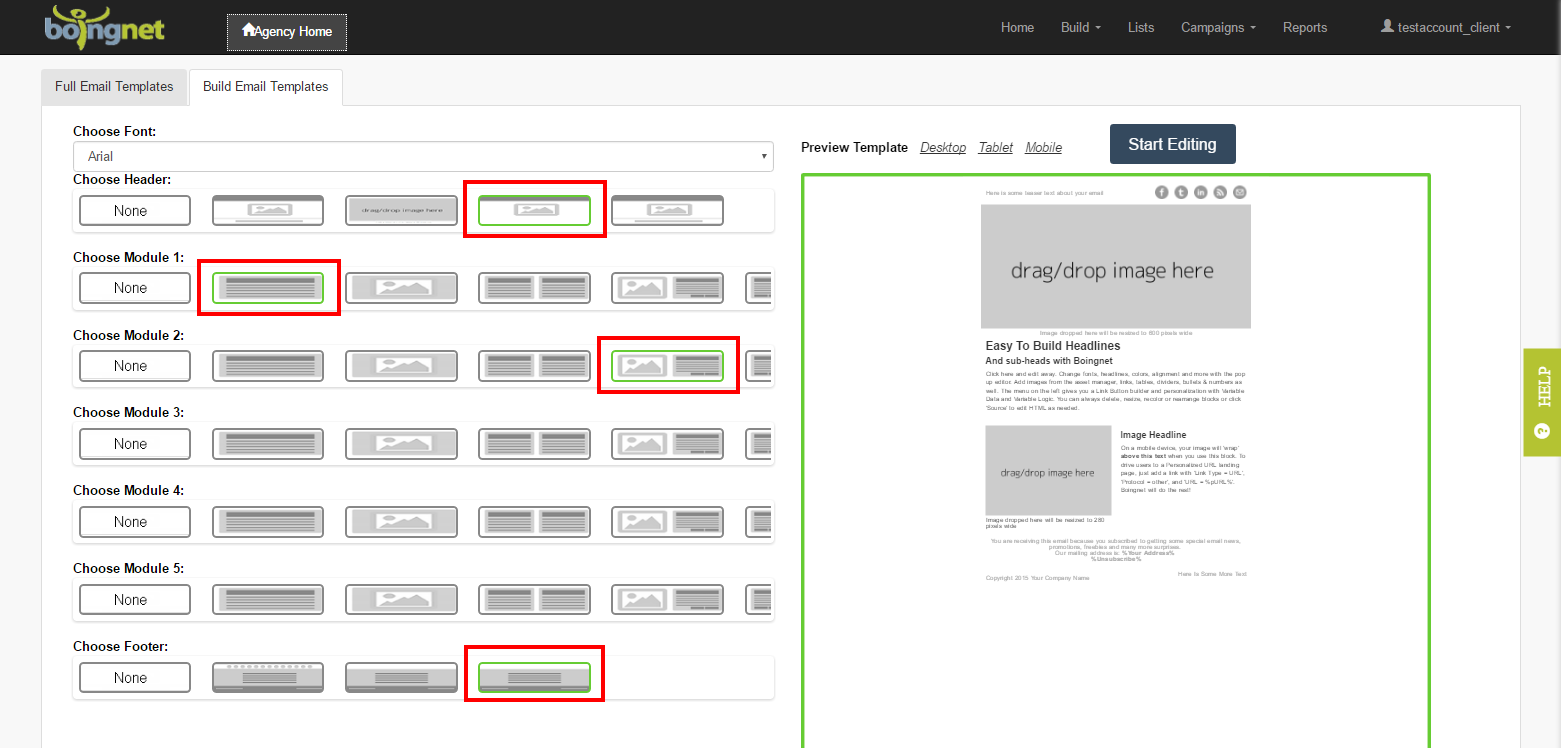
Notice that the right side of the page displays the options you have chosen on the left. When you have your layout defined, click the Start Editing button:
To add content to your email template, click the box you want to edit. When it is outlined in blue, you are ready to add to your template. Note: If you have text, images or other assets in a Word document that you’d like to add to your template, DO NOT copy them directly from Word into your template. Copy them first into Notepad and then into your template, you’ll get much better results that way.
Our template editor has two sidebars. The sidebar on the right is the Help Sidebar, and it allows easy access to relevant help articles from within the editor. The Template Sidebar on the left allows access to the following features:
Template Sidebar Features:
Name
Every template needs a unique name for identification. Enter a name in the text box and click Save, otherwise your template will be saved with a generic time stamp as a name.
Email Styles
The Styles option on the template sidebar allows you to define a background color and padding and also a foreground color and padding.
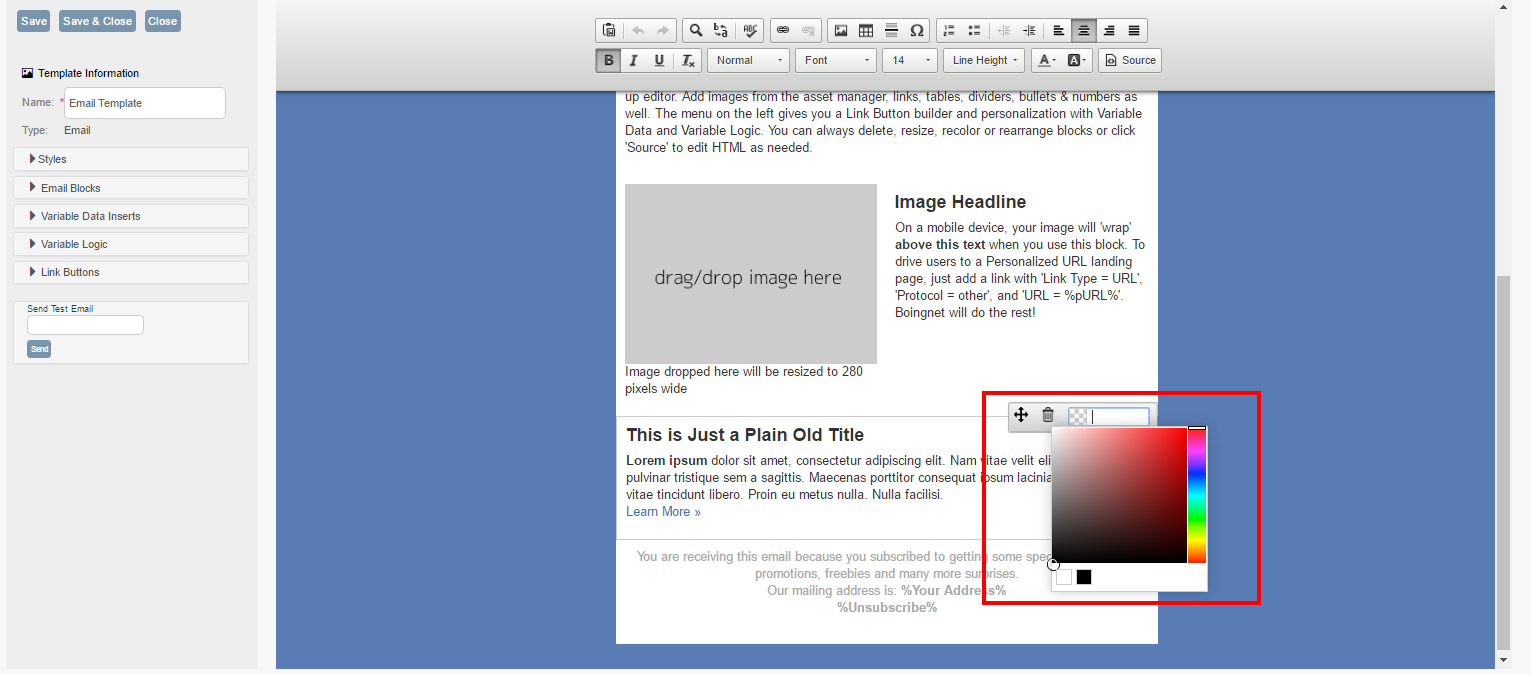
Background Color Editing:
To define a background color for your template, click Styles on the template sidebar to display the color picker wizard:
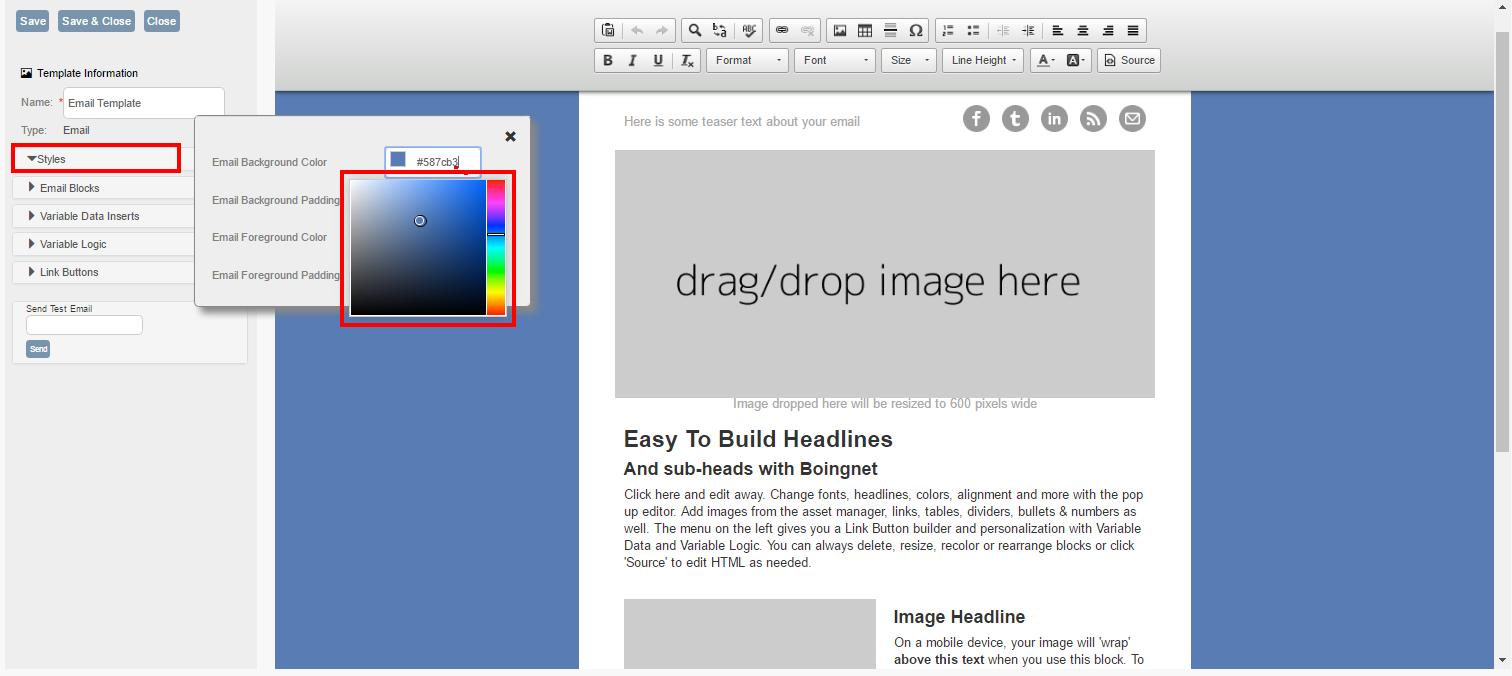
To select your background color – click on a color on the right side of the box, and then click on a shade from the left side of the box. You can easily change this color by repeating the process.
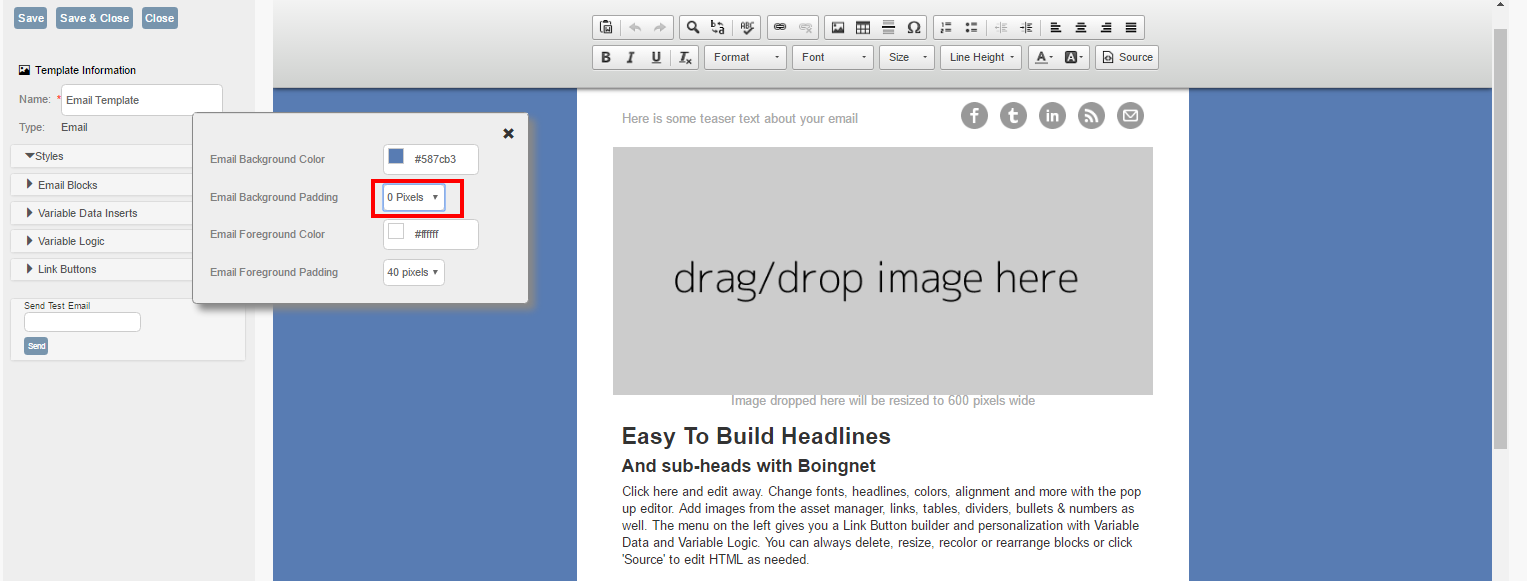
Background Padding:
To select a background padding amount, select the desired pixels of padding from the drop down menu:
Foreground Color Editing:
To define a foreground color, click on a color on the right side of the box, and then click on a shade from the left side of the box. You can easily change this color by repeating the process.
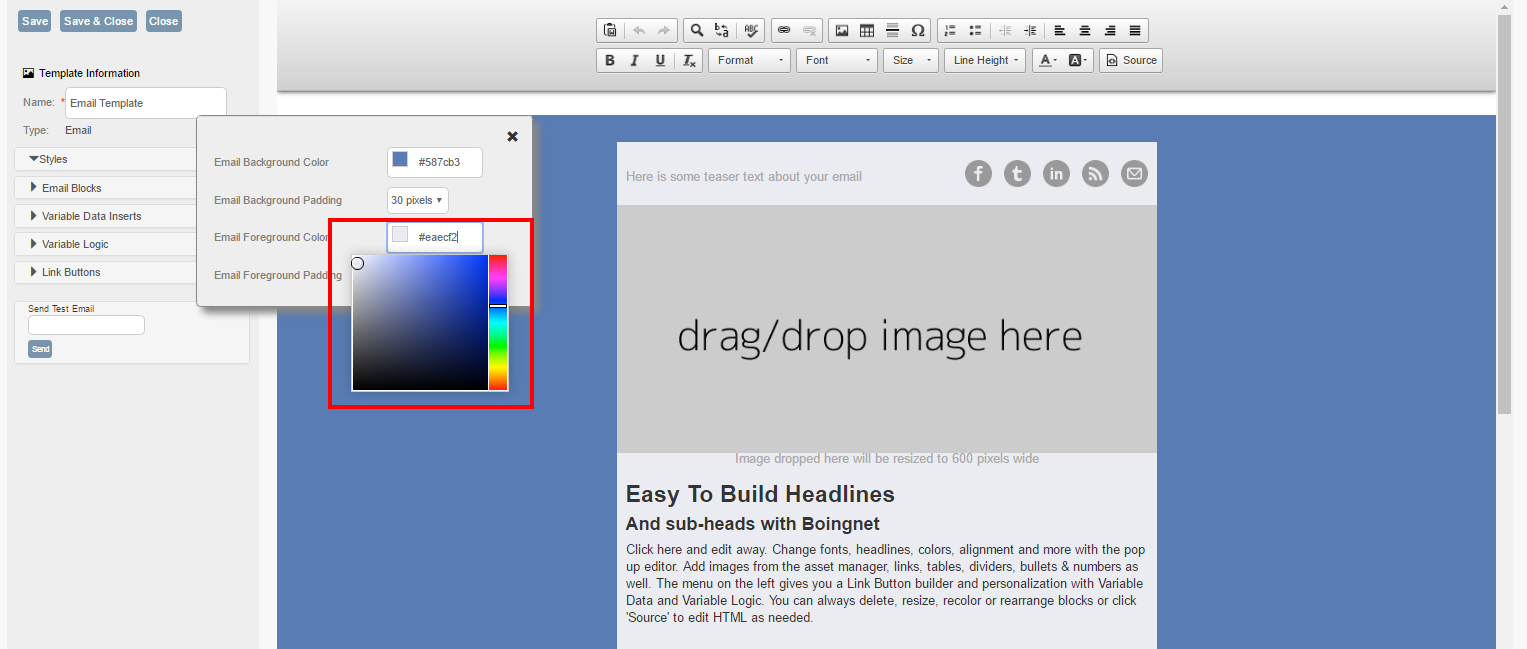
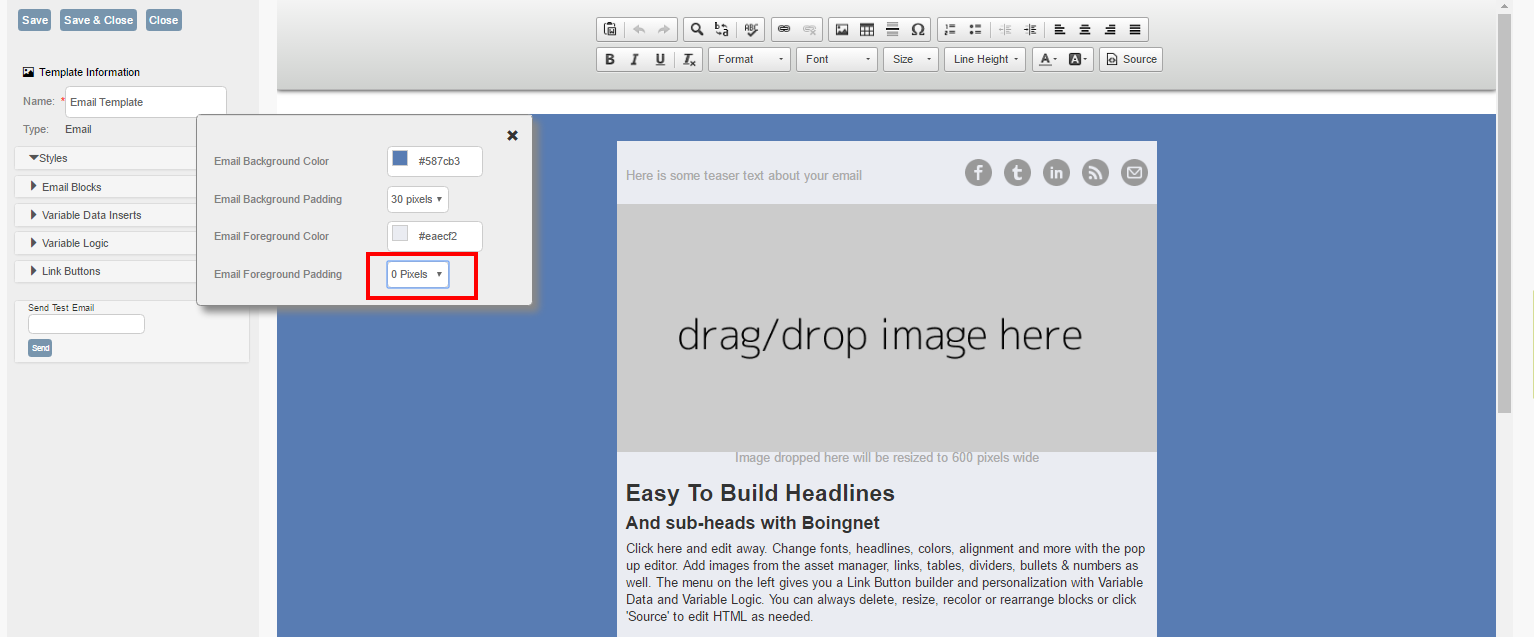
Foreground Padding:
You can also adjust the padding of your background or foreground color. To adjust the padding of your background color, select the number of pixels for the padding from the drop down list to the right of the background color picker:
Email Blocks:
You can easily add new blocks to your email layout by using the Email Blocks option on the template sidebar:
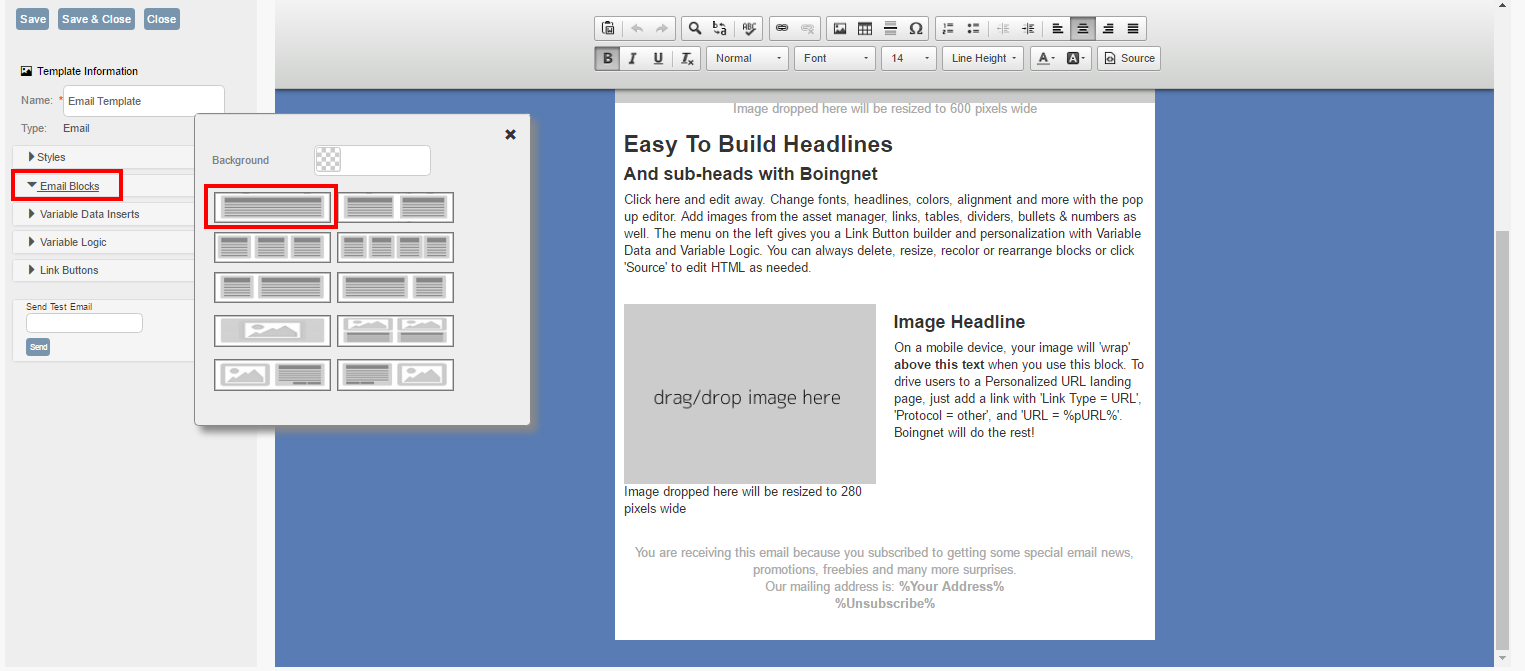
To insert a new block, click Email Blocks and then select the number and type of columns for that block. In this example, we’ve selected a one column text block:

Your new block will be inserted at the bottom of your template. Click on it to edit and to add text or new links etc.
To move the new block, click on it, then click and hold the arrow icon to move into desired position:

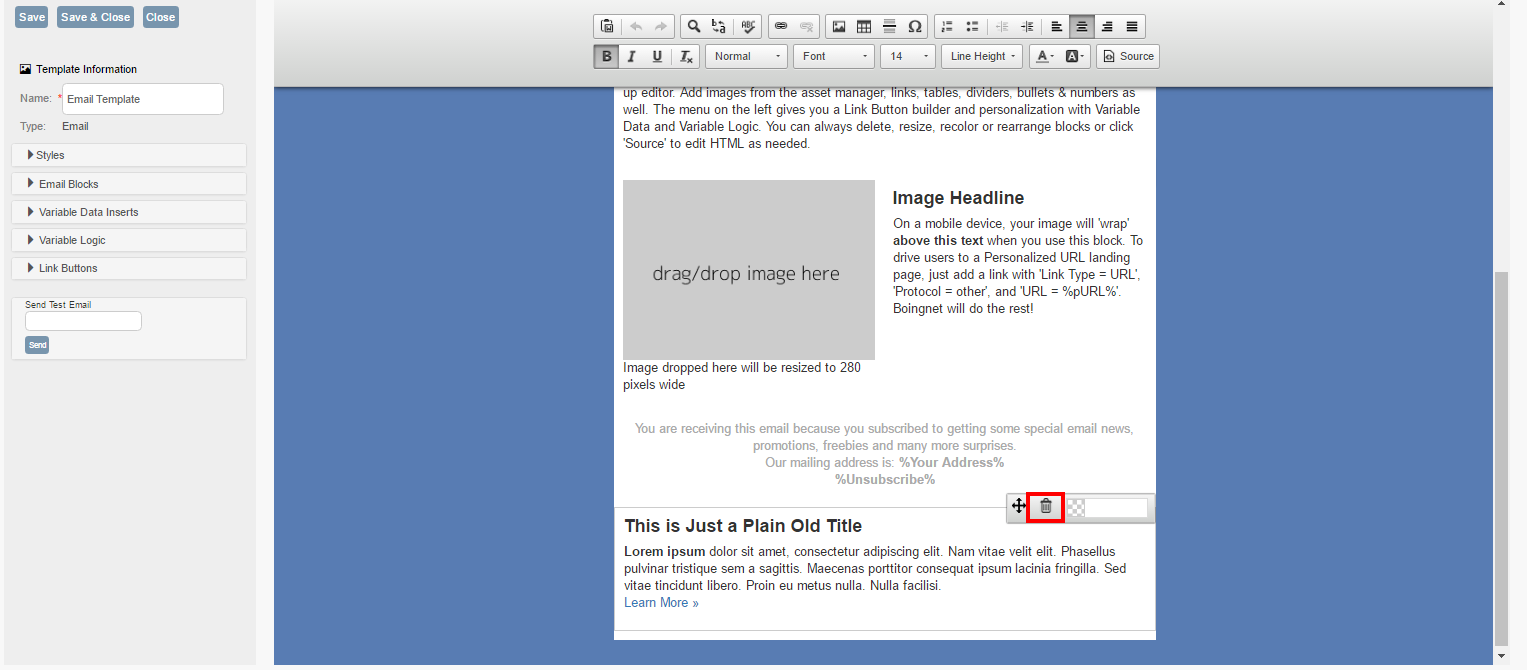
To delete the new block, click on the trash icon:
To define a background color for this block, click on the checkered box to display the color-picker:
You can personalize your email message by adding Variable Logic and Variable Data to your template. Inserting variable logic allows you to build email messages that displays different content to different viewers based on their unique information – such as state, city or company – contained in your contact list. Inserting variable data gives you the ability to add a personalized element to your email which will make your message to your viewer more interesting.
Variable Data Fields
Inserting Variable Fields allows you to display specific information about your customer – such as first name or last name – in your email, making your message much more personal and more readable.
Variable Logic
Inserting Variable Logic into your template allows you to conditionally display content based on a customer’s characteristic such as gender. For example, you might want to display different content in your email for male and female viewers. Or you might want to display different content for contacts in different states or zip codes.
Inserting Images:
You have two options for inserting images into your email templates. You can use the drag and drop option to insert an image from your desktop, or you can use the toolbar to insert images from your Asset Manager. For best results with either option, size your images to the desired width and height before inserting into your template.
Drag and Drop Management:
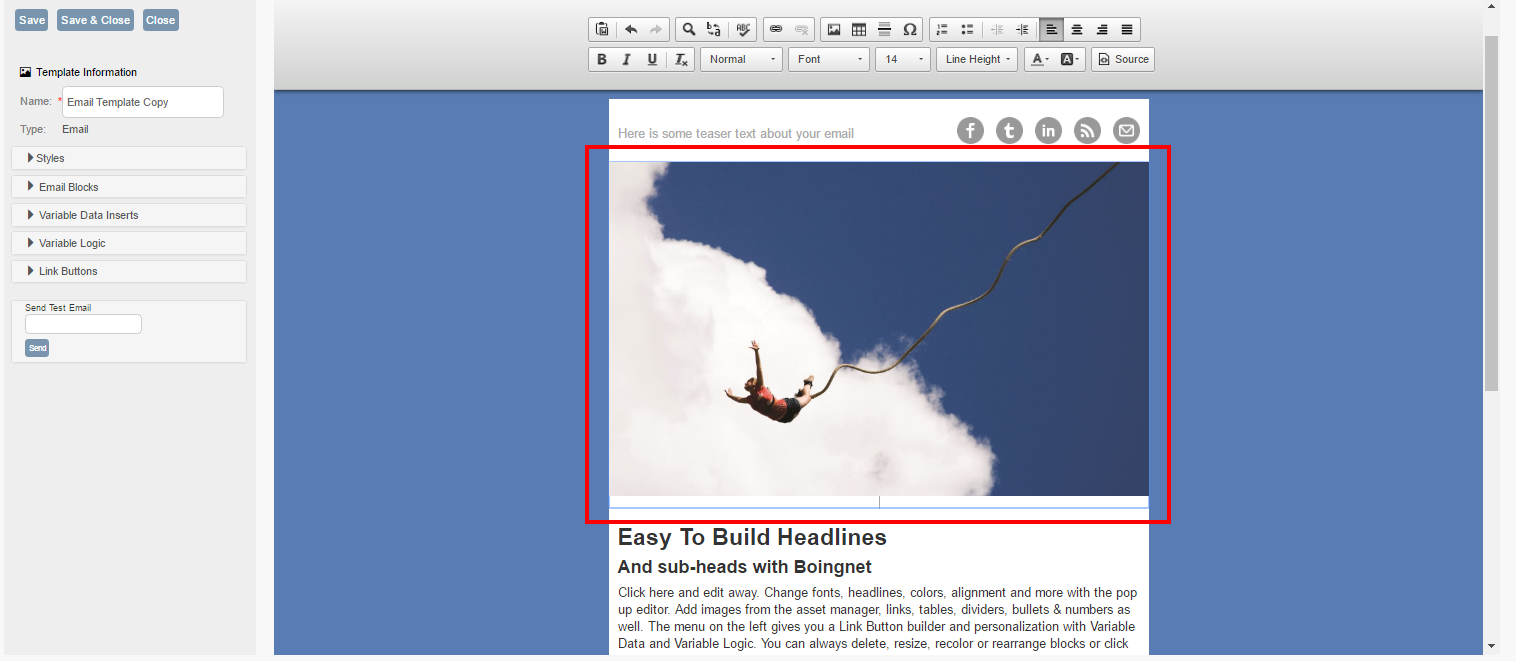
You can easily drag and drop images into the boxes marked ‘drag and drop image here‘:
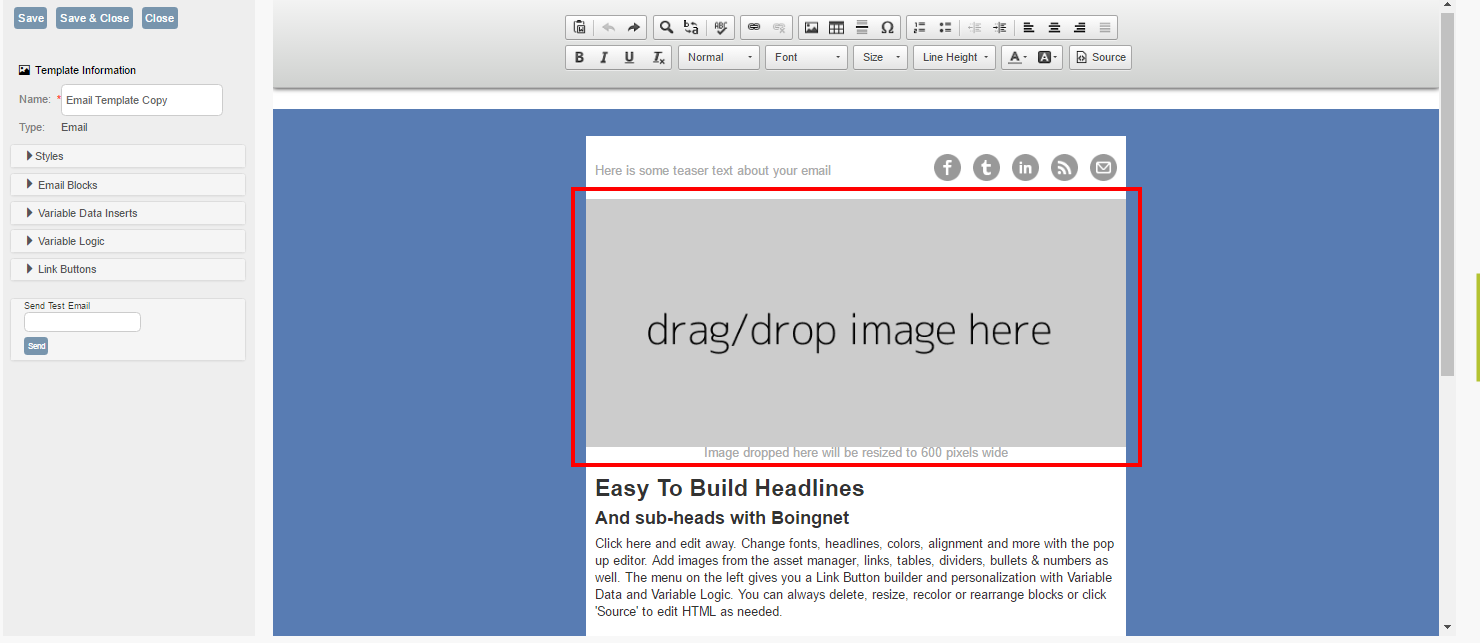
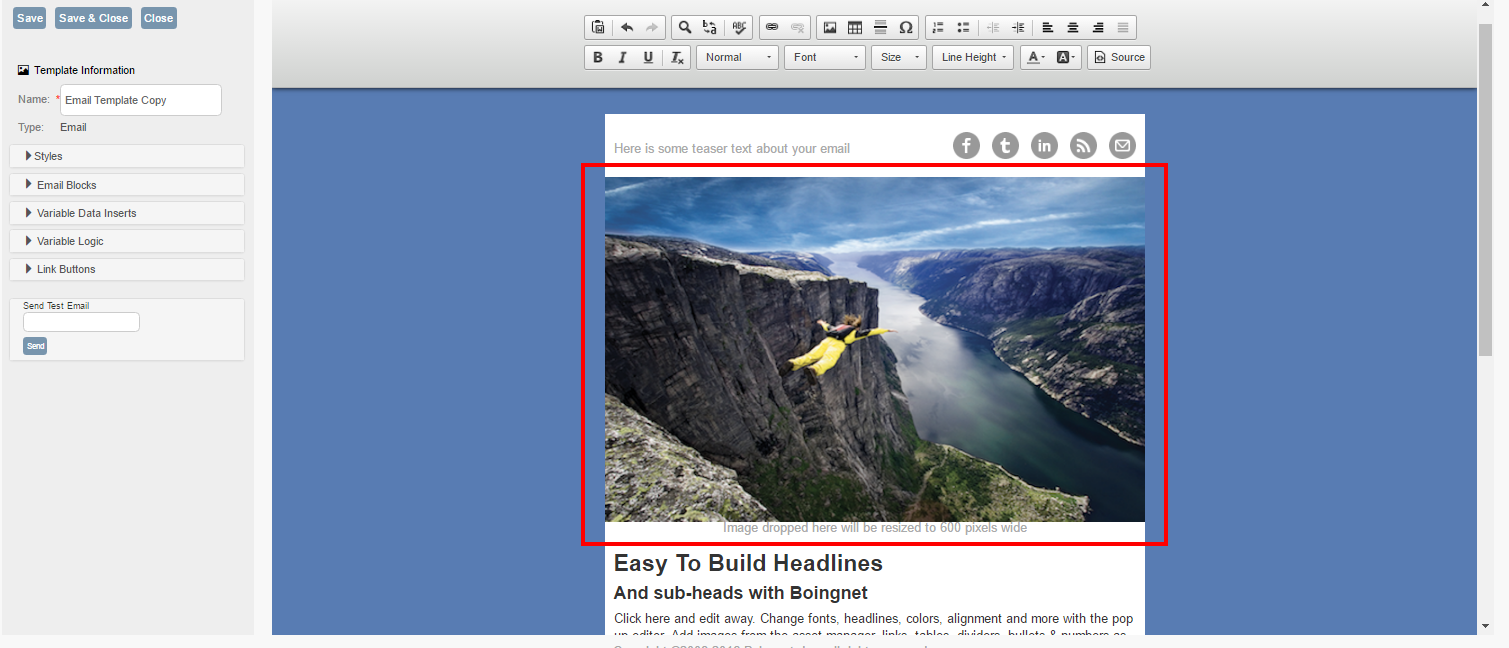
Simply drag the image and drop it into the appropriate box:
Insert Images from Asset Manager:
To insert an image that you have uploaded to your Asset Manager, select the image box and then click the image icon on the toolbar:
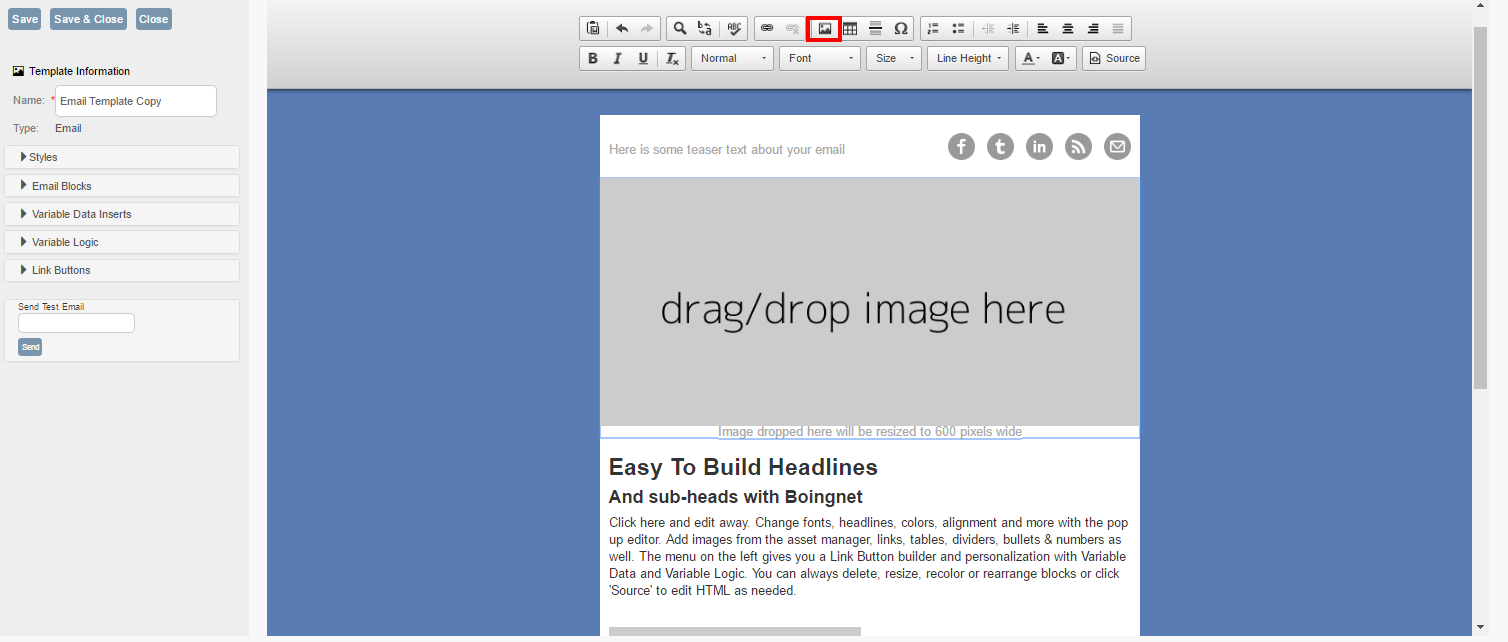
When the image properties box appears, click Browse Server to go to your Asset Manager:
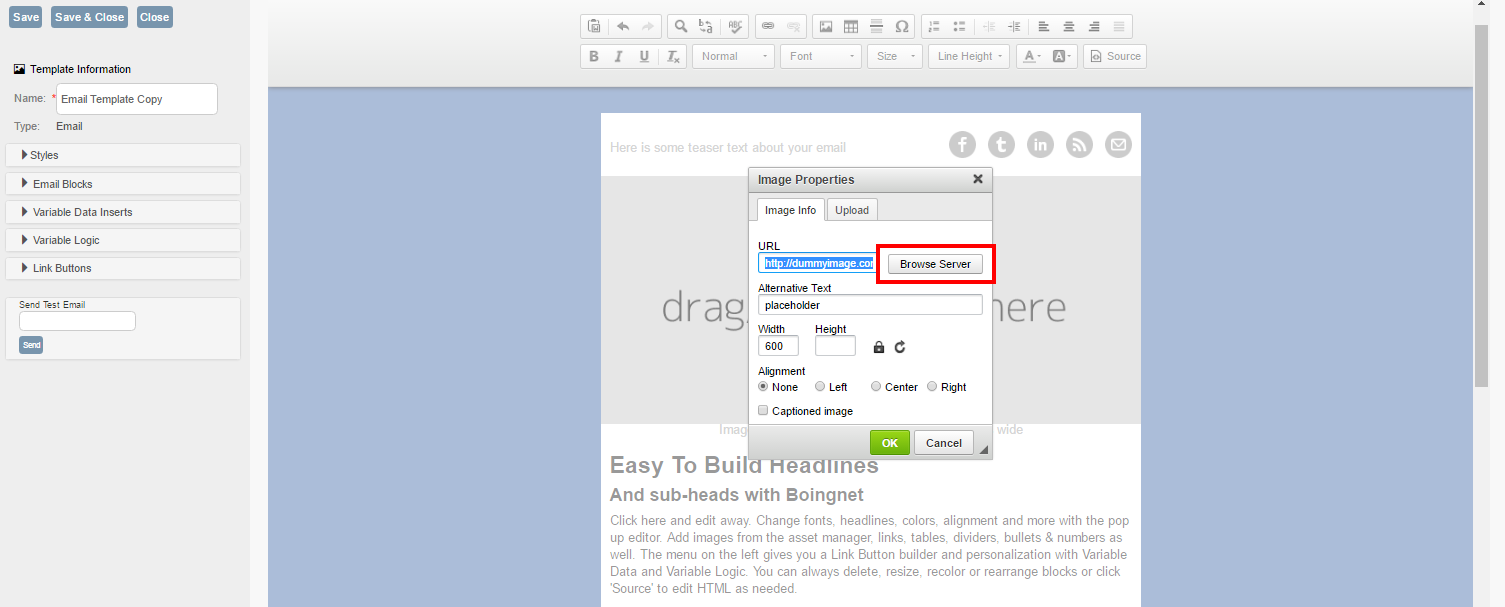
Once you have select the image to insert, double-click on it. You can adjust the width and height of the image from the images properties box. When done, click the green OK button and your image will be inserted:
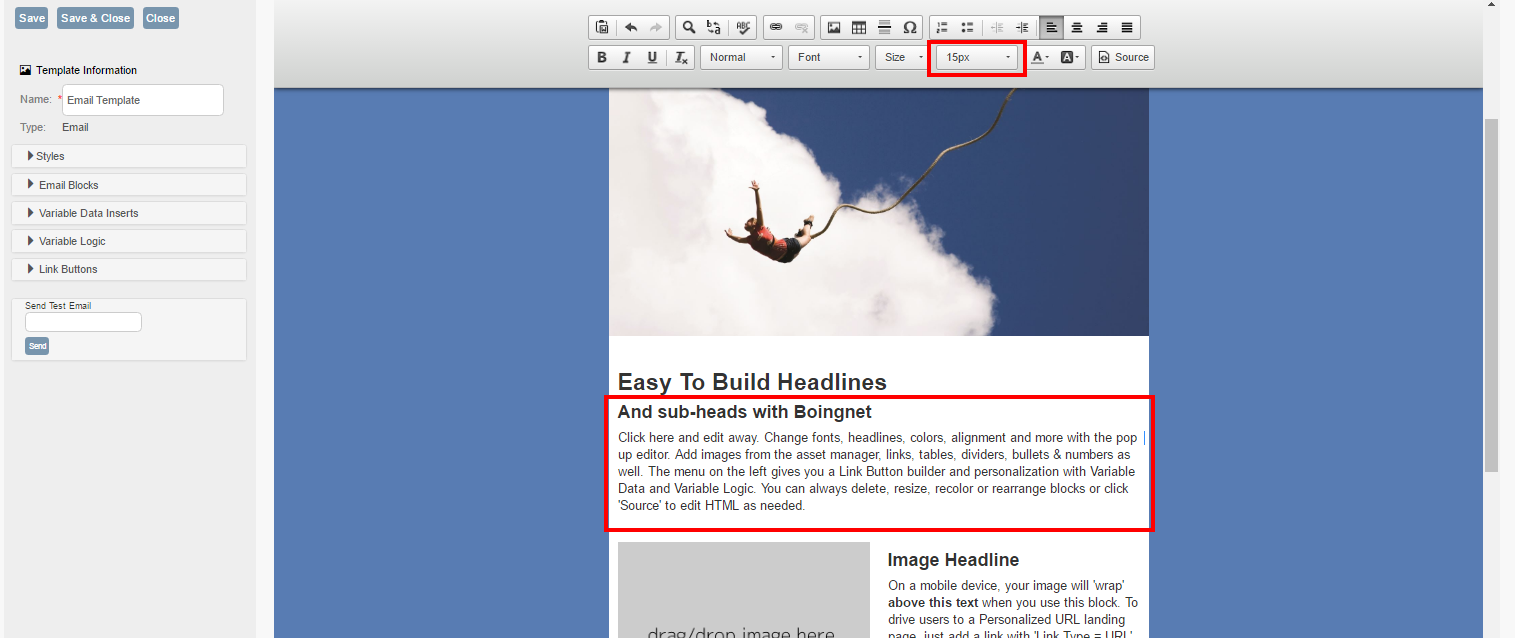
Line Height:
You can define a line height in pixels for your content. Simply select the paragraph of text you’d like to edit, and then select the line height from the toolbar. In the example below, we’ve chosen a line height of 15 pixels:
Find and Replace:
To find and replace within your template, click the find / replace icon on the toolbar:

Enter what you’d like to find in the first box, and what you’d like to replace it with in the second box:
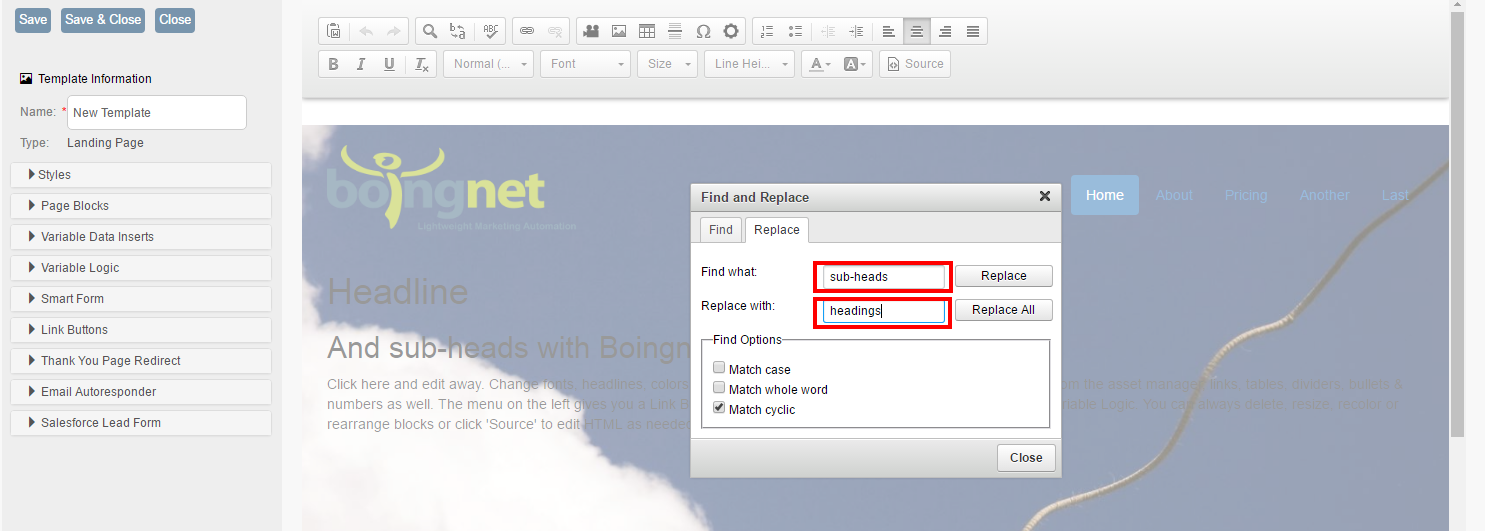
Click the Replace All button to make the change.
Spell Check:
To spell check a block within your template, select the block and then click the ABC icon on the toolbar:

The text within the page block will be checked for spelling errors. Any spelling errors will be displayed in red and correct option(s) will be displayed in a list below:
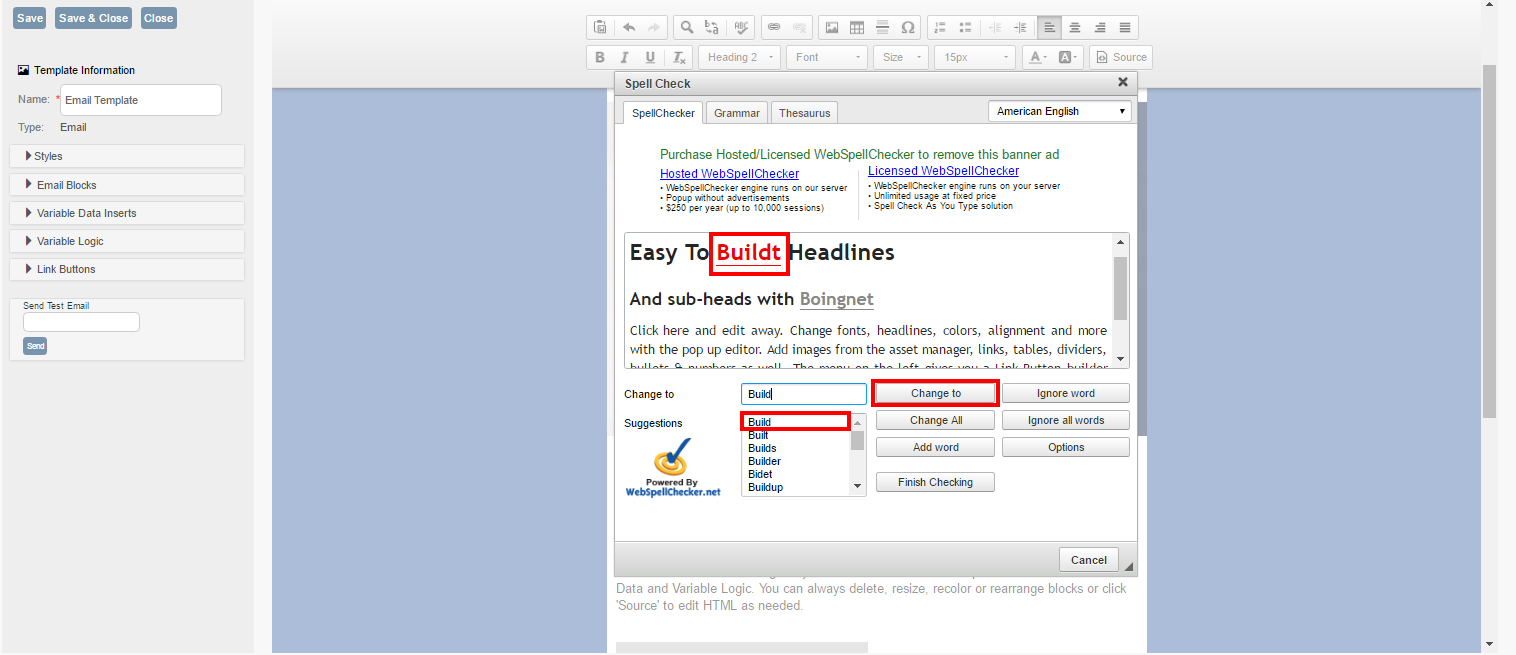
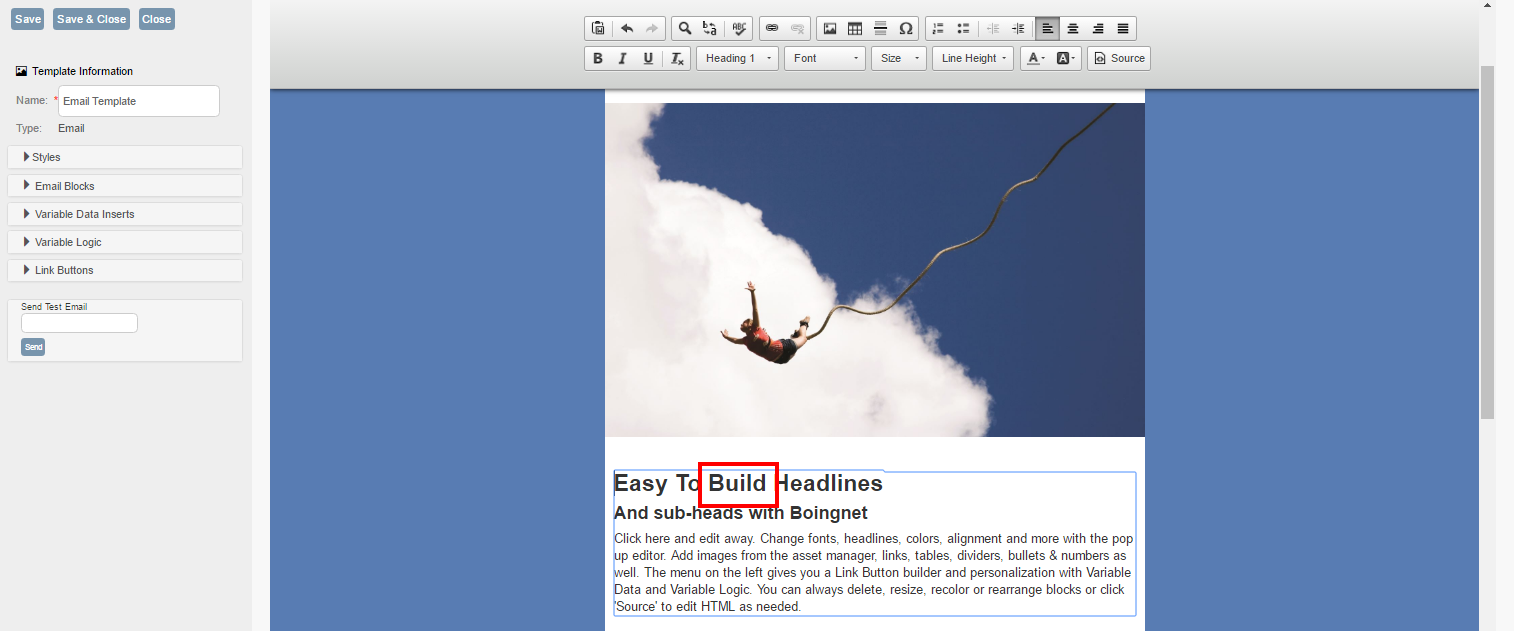
To select one of the options listed, click on it and then select Change To. To complete the edit, click Finish Checking:
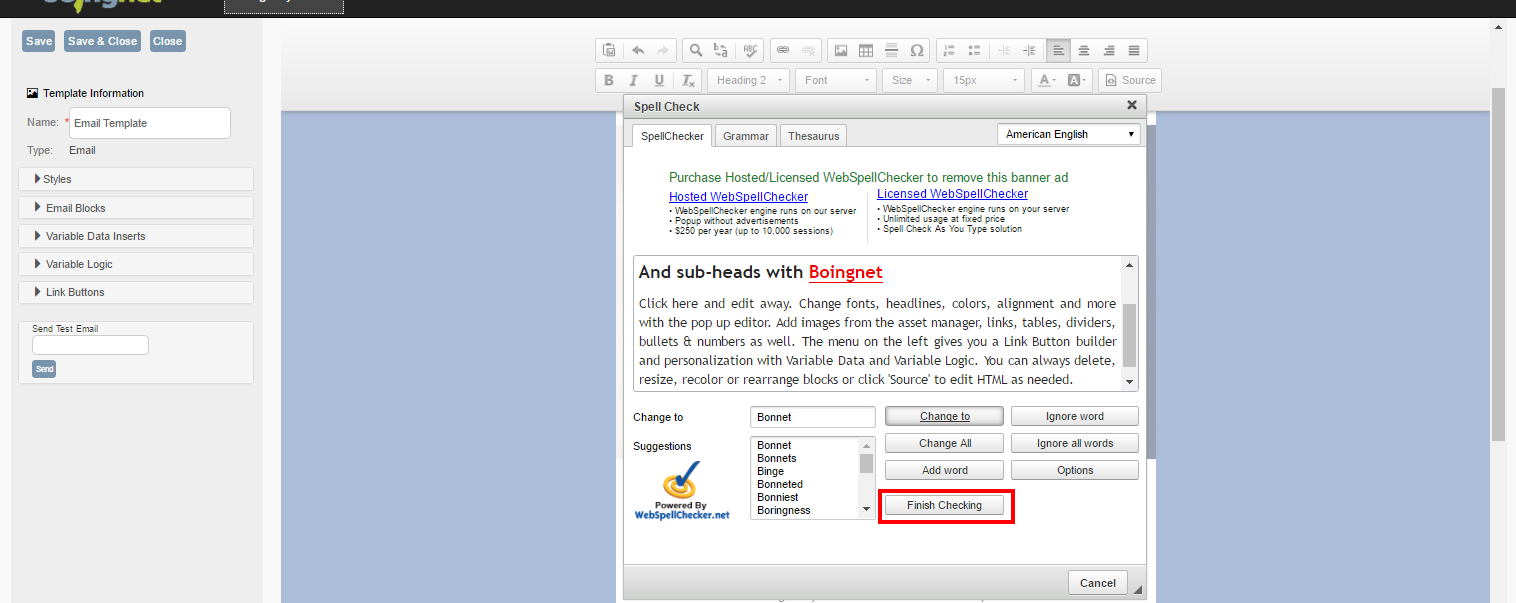
And the selected edit will be made:
Link Buttons
You can add beautiful custom link buttons to your email template. Note that this feature is for URL links only, not for pURL links.
On the template sidebar, select Link Buttons:
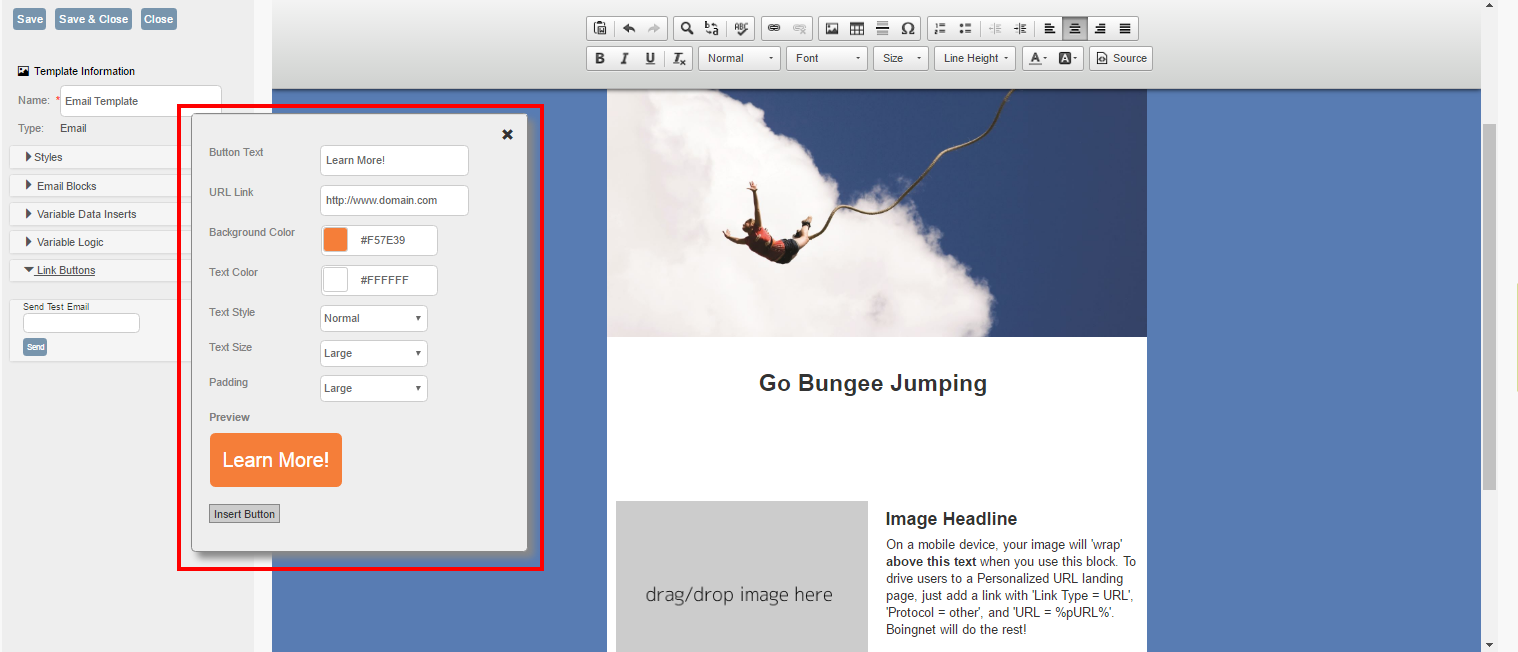
Design your Customized Link Button:
- Next to Button Text, enter the text you want to appear on your link button.
- Enter the URL you want your button to link to.
- Enter a Start Gradient Color in the first box. Select a color from the right side of the color box and a shade from the left side.
- Enter an End Gradient Color in the second box by repeating the process.
- Enter a Shadow Color in the third box.
- Enter a Text Color in the fourth box.
- Enter a Text Style.
- Enter a Text Size.
- Enter a Button Height.
- Enter a Button Width.
- Click Insert Button.

Once you have completed editing your email template click the Save button in the upper right corner.
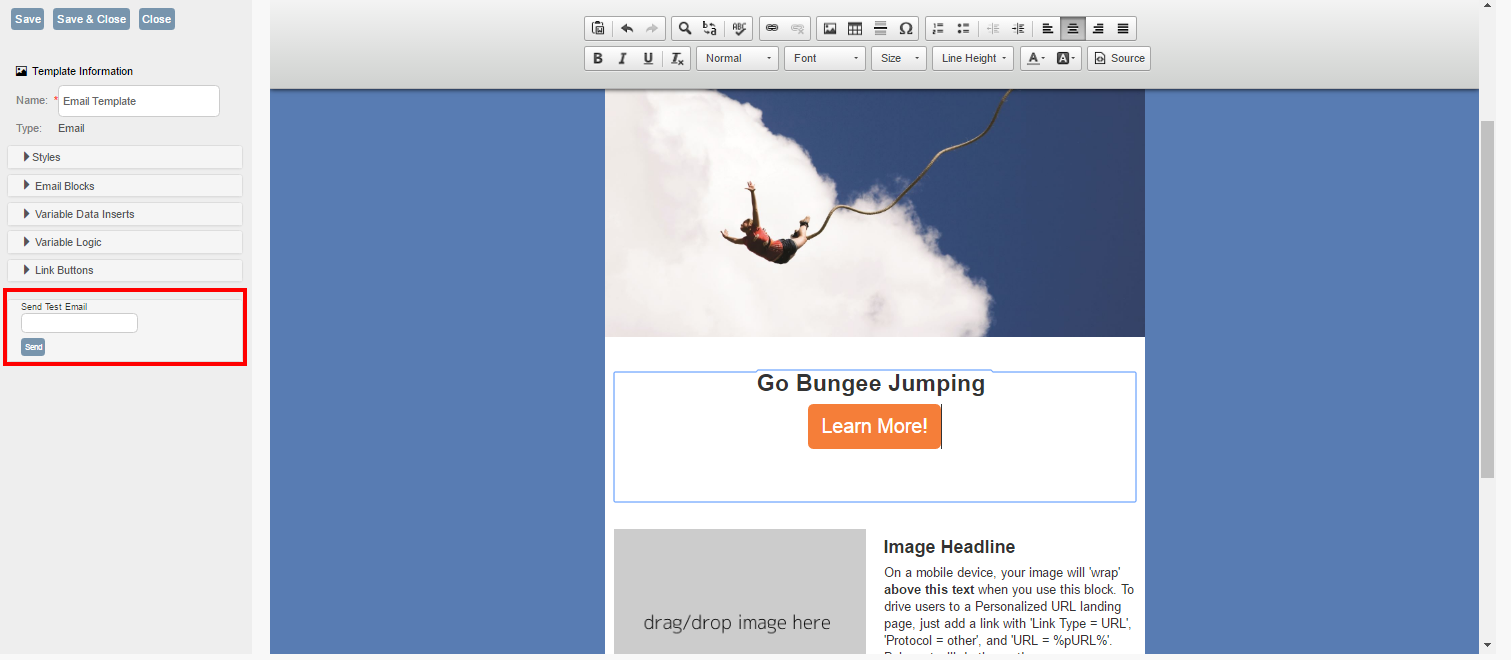
On-the-Spot Email Tests:
To send a quick email test, enter the email address in the box in the upper right corner, and then click Send. This will grab the template from your account and send it to the appropriate email address, it will not pull in Variable Data from a Contact List or display Variable Logic that you may have inserted.
Contact Our Support Forums for Help
We are perpetually seeking to evolve our product as well as our support process. If you didn't find your answer here take a moment to visit our support forums as well as submit your ideas on how we can bring Boingnet to the next level!
Support Forums