

Email Campaigns with Microsites and Landing Pages are easy in Boingnet
Email marketing remains one of the most effective tools marketers use to connect with their audience. Not only does email turn prospects into customers more efficiently than other media, it’s also highly cost effective. Studies show that customers prefer personalized communications, so you can make your email campaigns even more successful by making them more personal.
Using Boingnet to generate personalized emails and incorporating links to pURL (personal URL) landing pages or microsites is a great way to make your email stand out in the inbox. Boingnet’s pURLs give you an easy way to direct traffic to sites that are personalized and have clear calls to action, instead of directing it to the corporate home page where users become distracted and lost. Boingnet’s lightweight platform makes it easy to generate pURLs from your customer email lists, allowing you to deliver the personalization today’s customers expect without incurring the costs of other types of marketing campaigns. The Boingnet campaign creation process is simple and easy to follow:
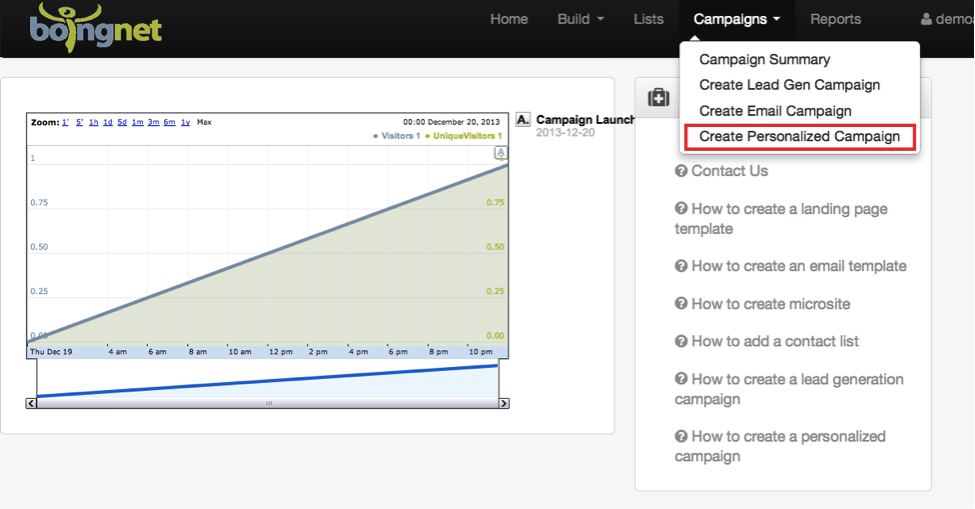
From the Home Page or main navigation bar, click Campaigns, then select Create Personalized Campaign.
You’ll navigate to the Edit Campaign page to set up your campaign metrics.
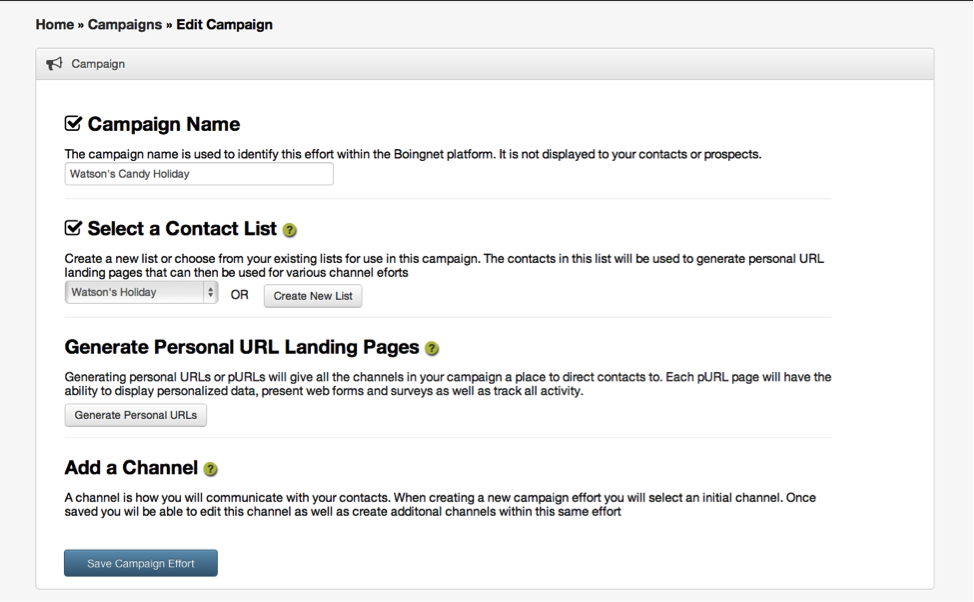
- Campaign Name: Enter a name for your campaign. This name just identifies your campaign within Boingnet for reporting purposes and will not be visible to your contacts.
- Select a Contact List: Select the contact list you’d like to use for this email from the drop down menu OR select Create New List to upload a new one. Visit our Add a Contact List page for step by step instructions.
- Click on the Generate Personal URLs button to set up the format of the pURLs for your campaign.
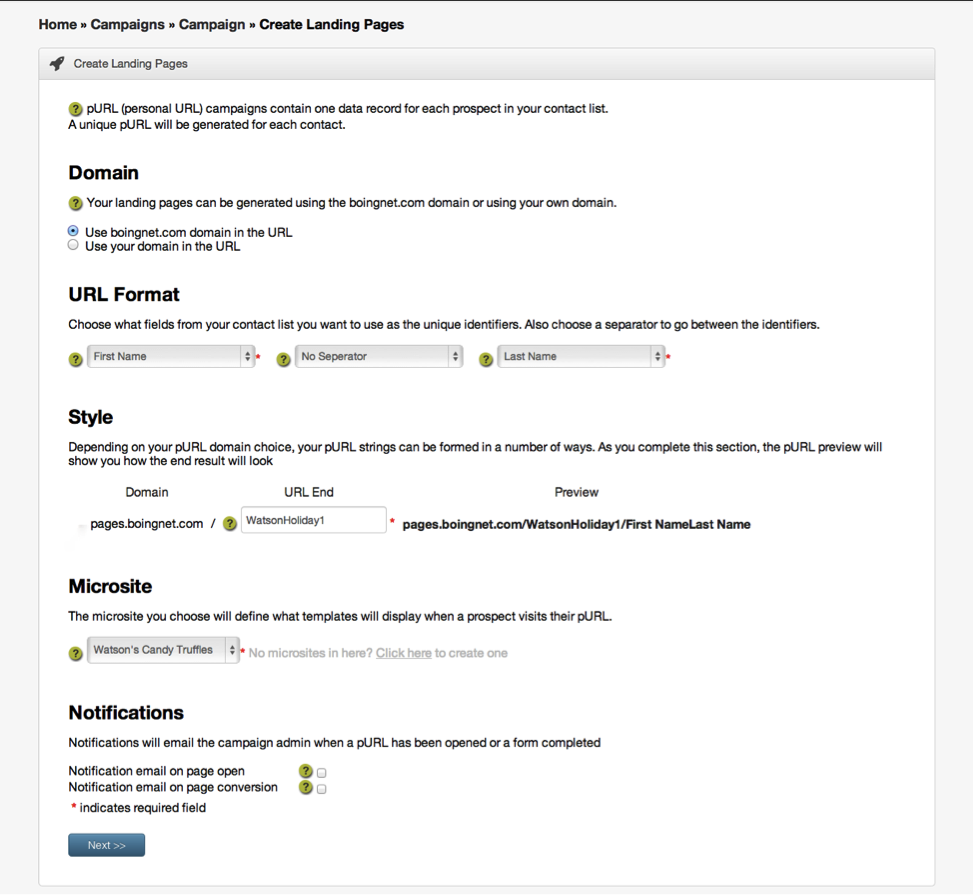
Domain Select the Domain you will be using for your campaign. You may use the boignet.com domain or your own domain in your pURLs.
URL Format Choose which fields from your contact list you want to include in your pURL name. Usually first name is selected as the first identifier and last name is selected for the last identifier. The separator between first and last identifier is optional.
Style Enter the URL start you wish to use in the URL Start box and the URL end you wish to use in the URL end box. For example, you might want to use your company name as the URL start and the name of this campaign as the URL end. Any combination of letters and numbers will work, just don’t use special characters or symbols in your URL. A preview of your pURL format will be displayed to the right.
Microsite Enter the microsite for your campaign, this will determine which template displays when your contact visits his or her pURL. If you have not yet created a Microsite, click on Click Here to create one. Visit our Create a Microsite page for step by step instructions.
Notifications If you wish to have the campaign administrator, sales or marketing notified when a contact opens his or her pURL, or when they complete a form and hit “Submit”, then click on the notification boxes. This is a great way to alert those who need to know that there is a hot lead expressing interest.
Click Next to get to Confirm Landing Page Details. Review all your campaign details to make sure everything is accurate and complete. 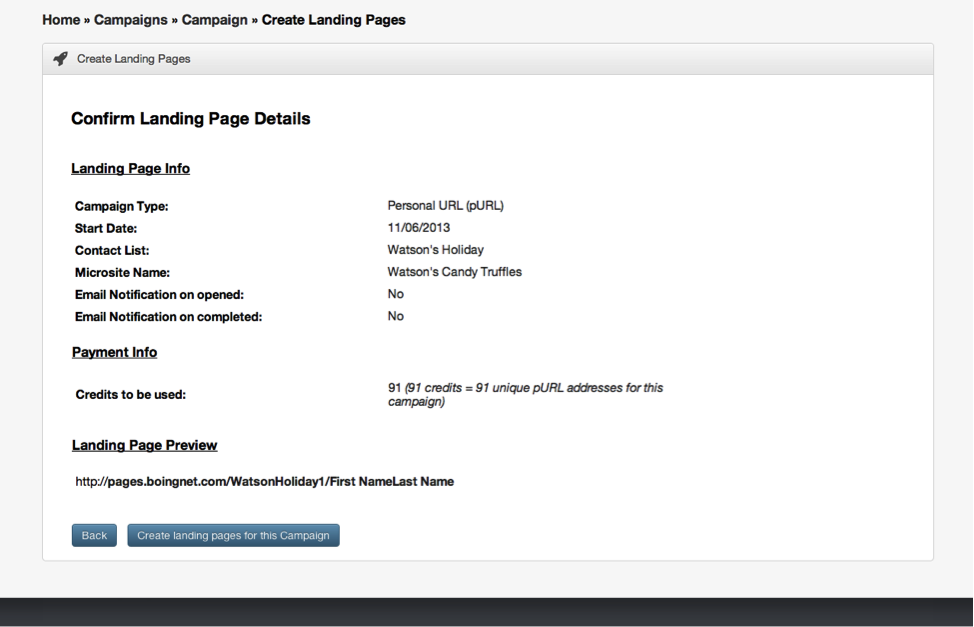 Click Create landing pages for this Campaign to generate your landing pages.
You’ll navigate to the following page where you can add your email channel:
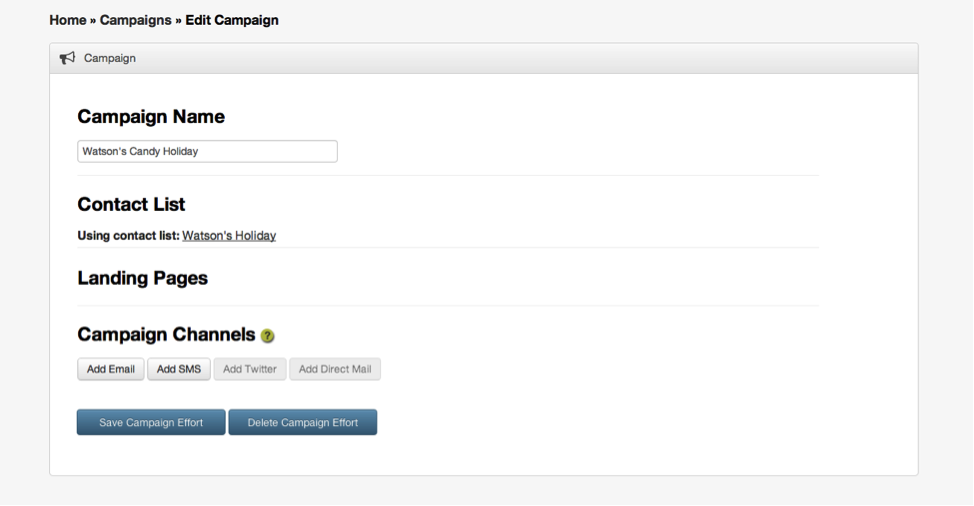 Under Campaign Channels, click Add Email to add an email channel. You will be directed to the next screen where you can define the email metrics for your campaign.
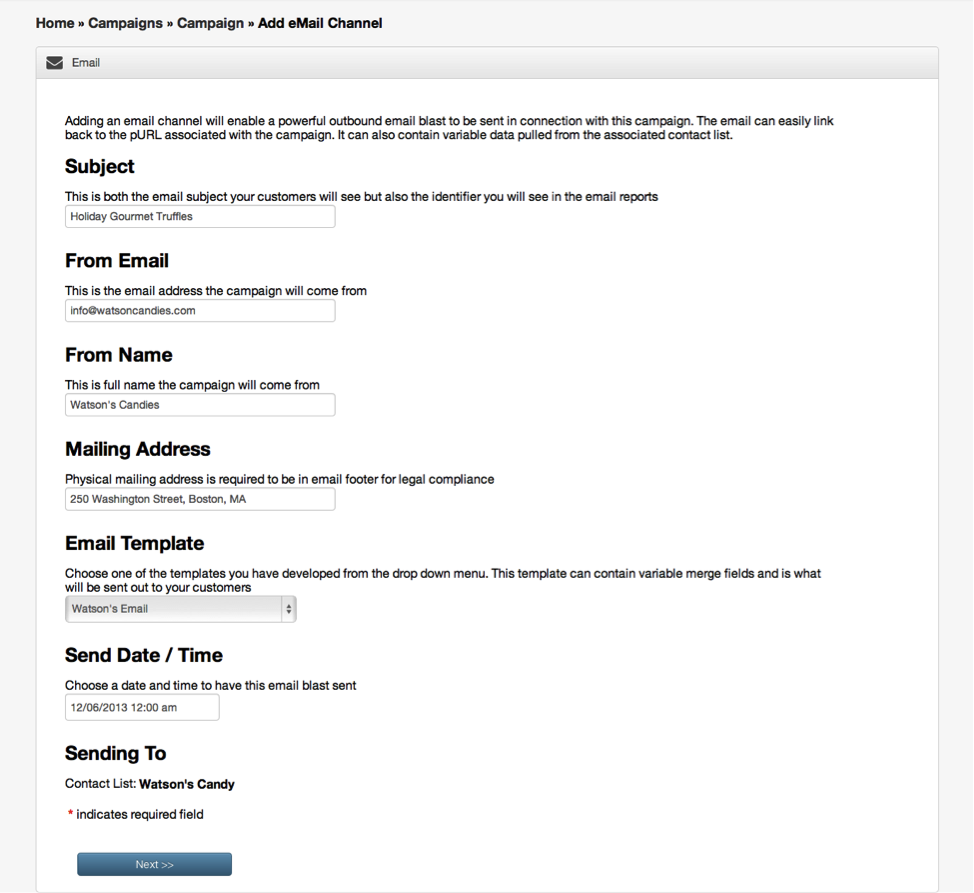 Subject: Enter the email subject you want your customers to see here. This will also be the identifier you see in your email reports.
From Email: This is the email address the campaign will come from.
From Name: This is the full company name the campaign will come from. Do not include commas in your name or some ESPs (Email Service Providers) will truncate your name. For example: ‘Candy Company, Inc’ will become ‘Inc’.
Mailing Address: Enter your company’s physical mailing address – this is required to be in an email footer for legal compliance.
Email Template: Choose your email template from the drop down menu. If you have not yet created your template, visit the following pages for more information:
Send Date/Time: Choose the date and time for the email blast to be sent.
Sending To: Make sure the correct contact list is displayed here. 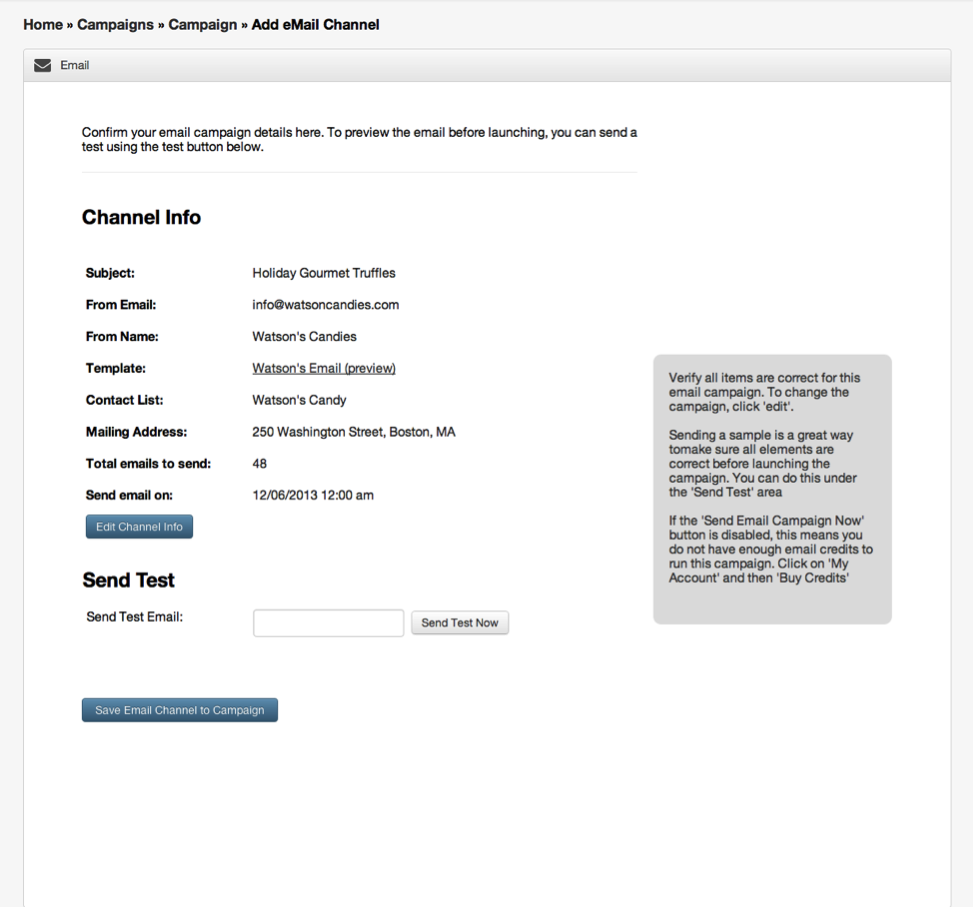 Review all the information on the Add Email Channel Confirmation page.
Click Save Email Channel to Campaign. Your email campaign is now complete and ready to launch on the date and time you specified.
If you want to send a follow up email to recipients on your contact list that did not open your first email, or visit their pURL, you do not need to create a separate email campaign. You can accomplish this by Adding a Drip Campaign to your existing campaign.
Contact Our Support Forums for Help
We are perpetually seeking to evolve our product as well as our support process. If you didn't find your answer here take a moment to visit our support forums as well as submit your ideas on how we can bring Boingnet to the next level!
Support Forums