

Manage Marketing Campaign Domains In Boingnet
Landing pages, microsites and PURLs have to have a domain associated with them in order to render properly. A properly configured domain will serve up traffic beautifully. An improperly configured domain won’t work at all.
Getting domains established for your campaigns is therefore really important!
There are 2 different types of domains that can be used with Boingnet:
Vanity domains (or vanity URLs) are domains that are used exclusively for marketing campaigns. They don’t have to sort through traffic trying to hit other web pages, like a brand’s primary domain. We’ve created a software tool that makes finding and setting up vanity domains super easy.
Tryboingnet.com is an example of a vanity domain – we acquired it for marketing campaigns.
External domains are domains that have been acquired outside of Boingnet, through domain registrars like GoDaddy, Network Solutions & others. They are often used as primary website domains. In order to use an external domain, a technician needs to log into the registrar and modify settings.
Boingnet.com is an example of an external domain – it is hosted at GoDaddy.
How to Configure Vanity or External Domains in Boingnet
Over the years, working through thousands of campaigns, we’ve discovered that marketers typically don’t like to mess around with the technical settings of external domains. Also, at larger clients, marketers often don’t want to wait around for an IT person to be provisioned to make the change.
That’s why we developed a simple, fast & not technical process to find and configure vanity domains from within the Boingnet platform.
You can easily search for, purchase and manage vanity domains and email settings that will then be automatically configured for landing page, microsite, pURL (personal URL) and email marketing campaigns. You won’t need to log into domain registrars to configure email DNS settings, or to edit CNAME records. For your email campaigns, your DNS records are automatically set up with the proper SPF and DKIM authentication. No more need to add ‘wildcards’ for your pURL campaigns, your domain will automatically point to our IP address so Boingnet can host your landing pages. You can also set up ‘external’ domains that you have purchased elsewhere to be used in your Boingnet campaigns.
Below are step by step instructions on how to search for, buy and configure a vanity domain in Boingnet.
To add an external domain that you have purchased elsewhere, see Add an External Domain to Your Boingnet Account further down in this article, or download the Quick Reference Guide:
To Purchase and Register Domains using Boingnet:
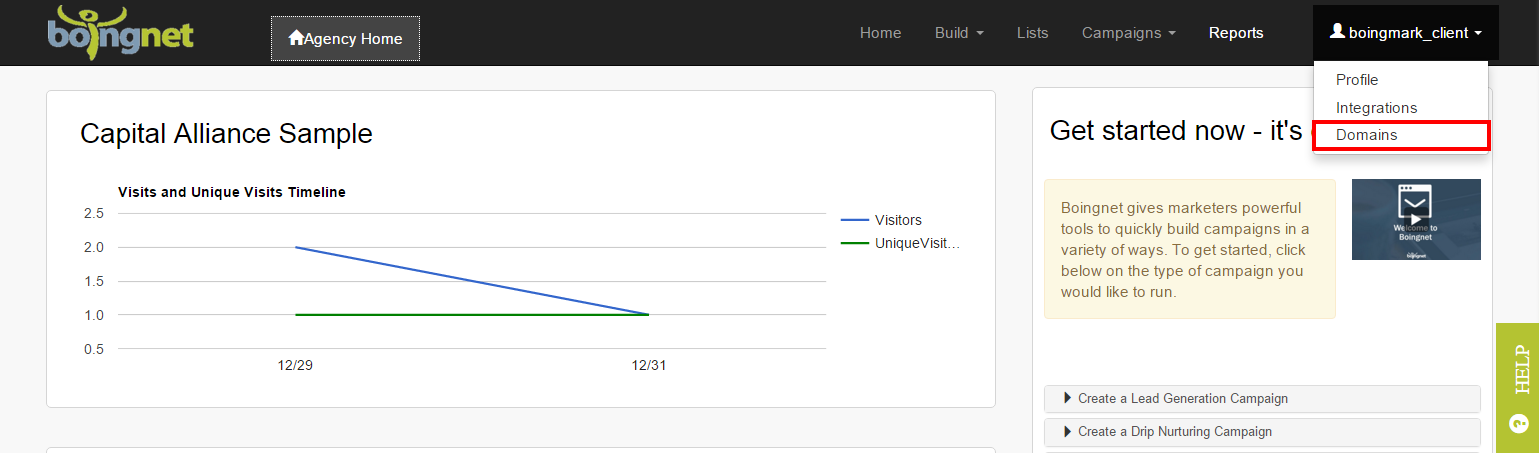
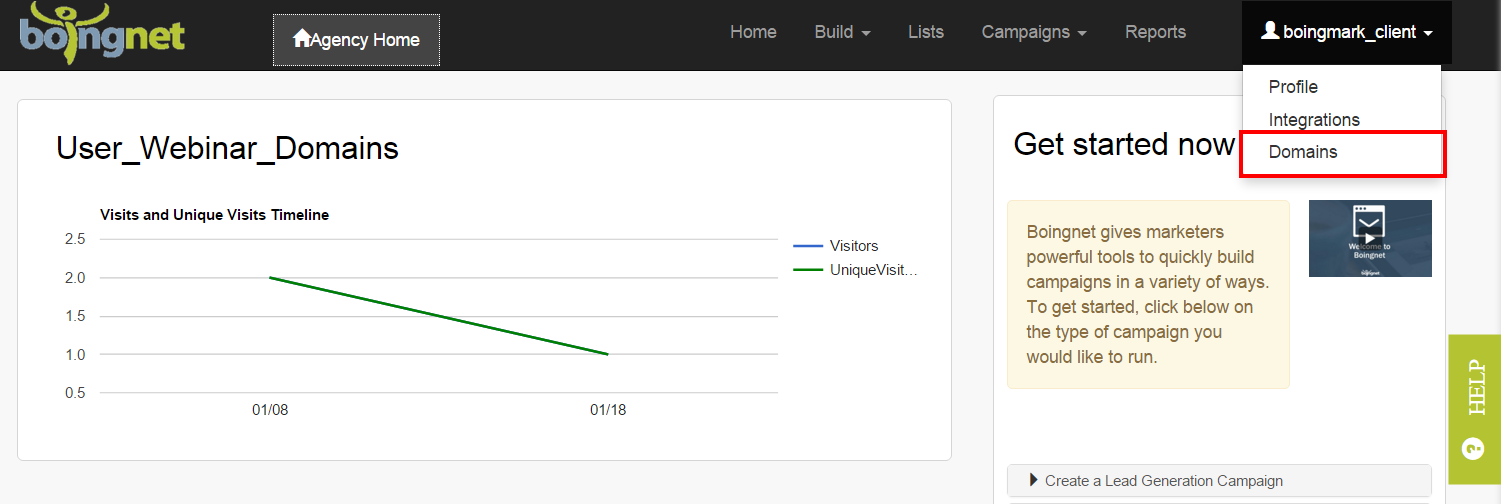
From the Home page, click on your account name in the upper right corner, then select Domains:
Next, search to see if the domain you have in mind is available. Enter the domain name in the first box, and select the extension from the menu in the second box, and then click Search:

In the example below, we have entered ‘marketingdomains.com’ to see if it is available:
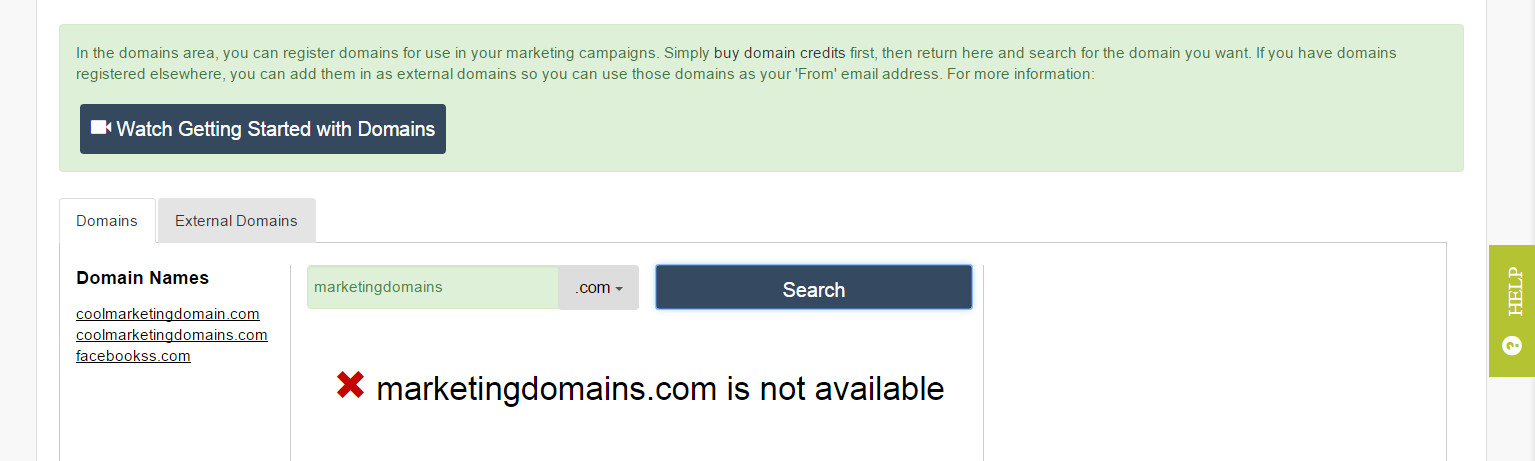
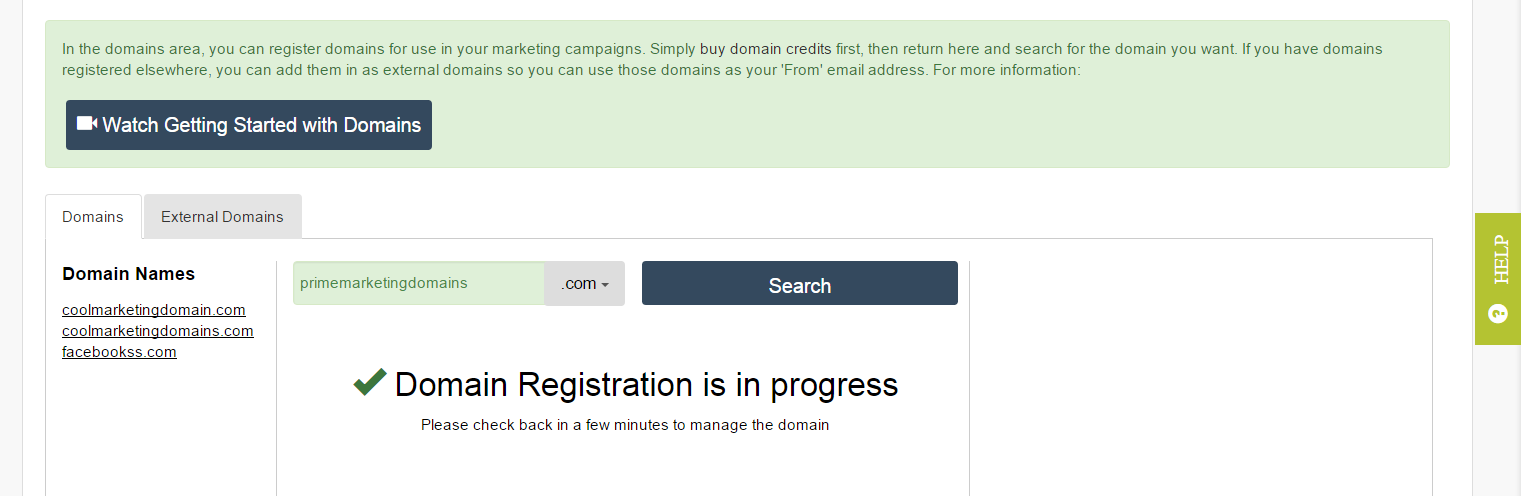
That domain has already been purchased, so we need to make another selection. Let’s try primemarketingdomains.com:
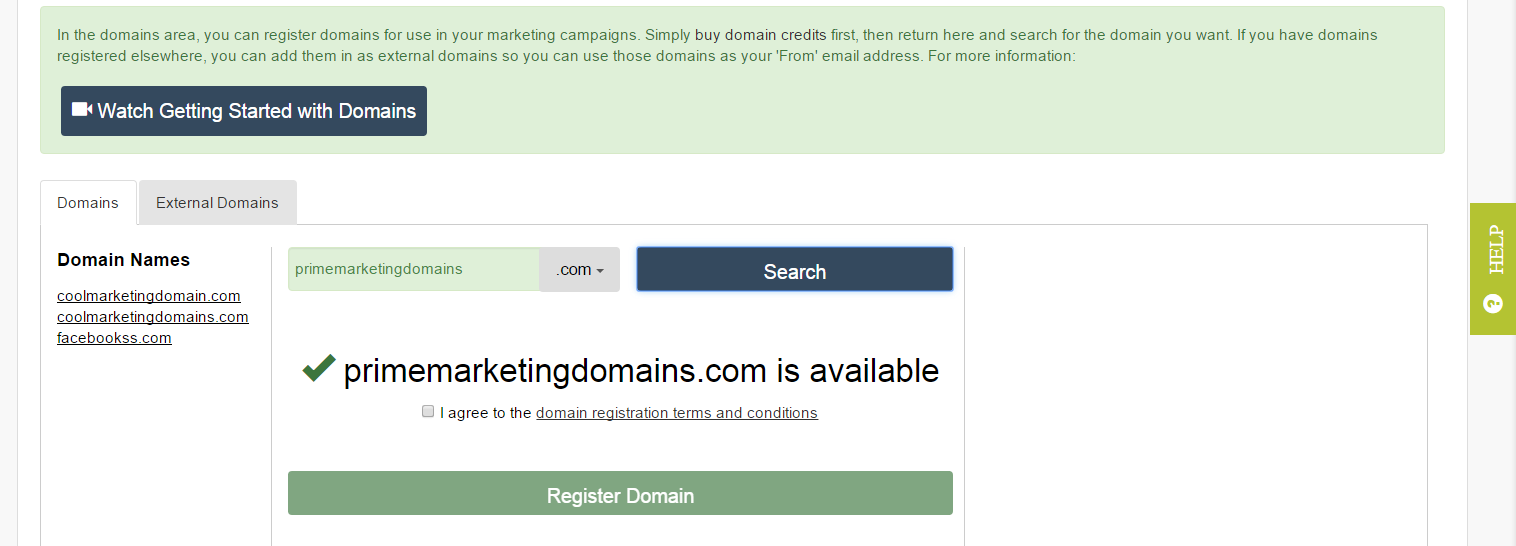
This domain, primemarketingdomains.com is available, so check the terms and conditions box and click Register Domain. You’ll receive a message asking you to confirm the registration, click Confirm Register Domain to proceed:
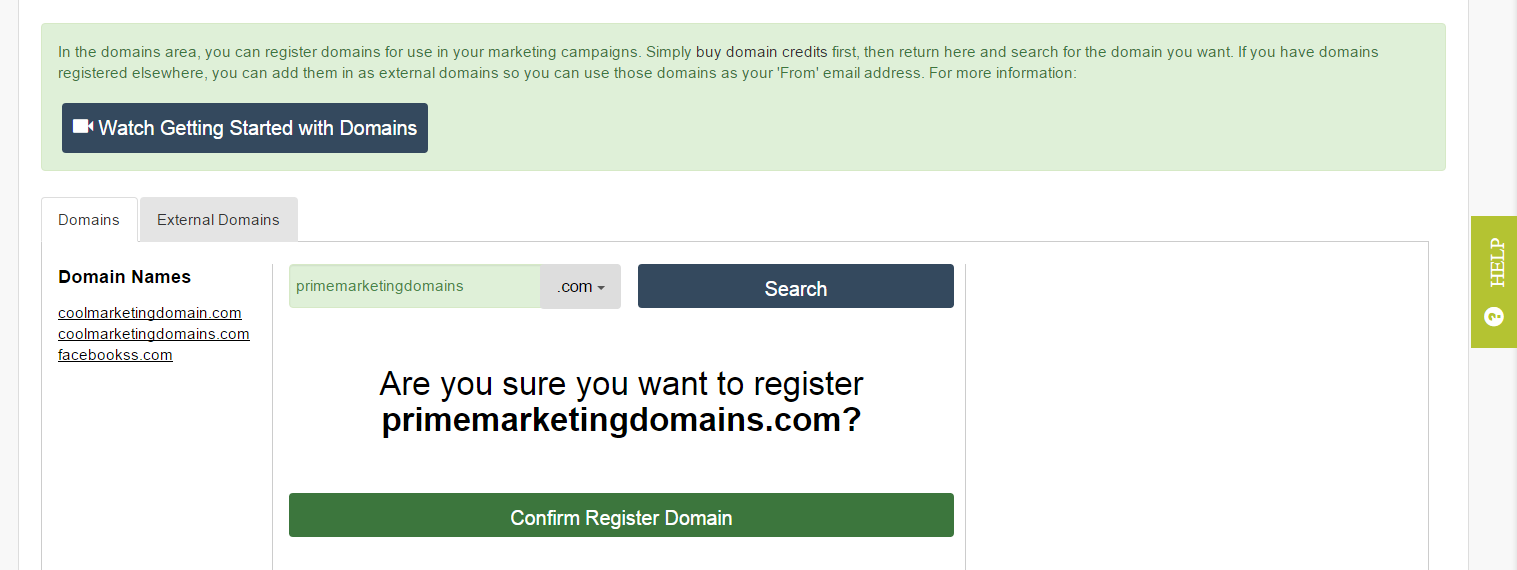
You’ll receive a message telling you that your domain is being registered:
Once your domain has been registered, it will appear on your account’s domain page under Domains and you’ll be ready to use it for pURL, Lead Generation and Email campaigns.
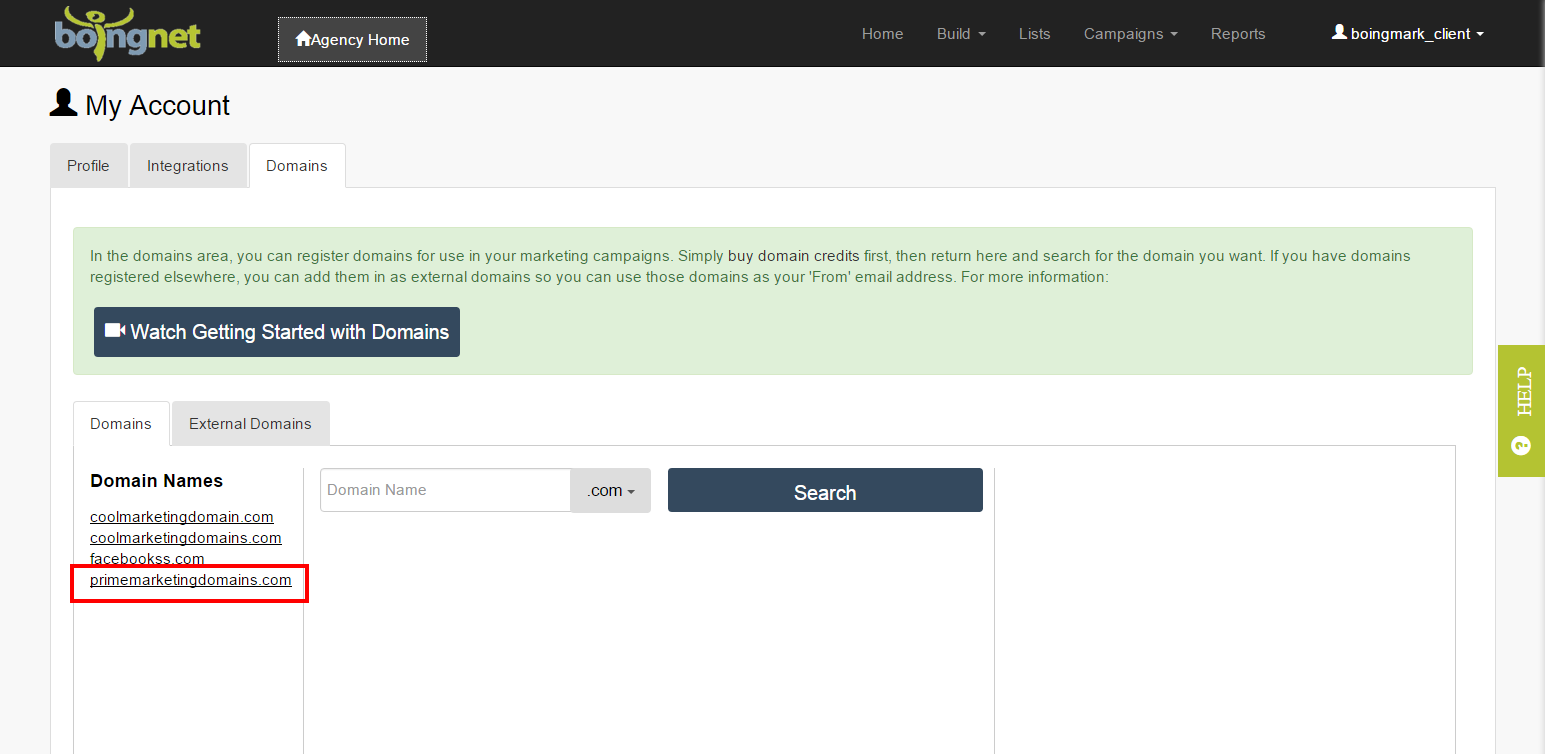
You can now manage your domains and email settings that you’ve purchased in Boingnet easily.
To Add an External Domain to Your Boingnet Account.
To use a domain you have registered outside of Boingnet, you must complete the following steps:
- Step 1 – Add that external domain to your Boingnet account.
- Step 2 – Point that domain to Boingnet’s IP address. How you do this depends on the type of Boingnet campaign you’ll be creating. See separate instructions below for pURL Campaigns, Lead Generation Campaigns, and for pointing a Sub-Domain to Boingnet.
- Step 3 – See the help article Configure Your Email DNS Settings to configure your external domain for email campaigns.
Download External Domain Quick Reference Guide
Step 1:
To add an external domain to your Boingnet account, click on your account name in the upper right corner, and then select Domains:
On the Domains Page, select the External Domains Tab. Next, enter the Domain Name in the box provided and click Add:
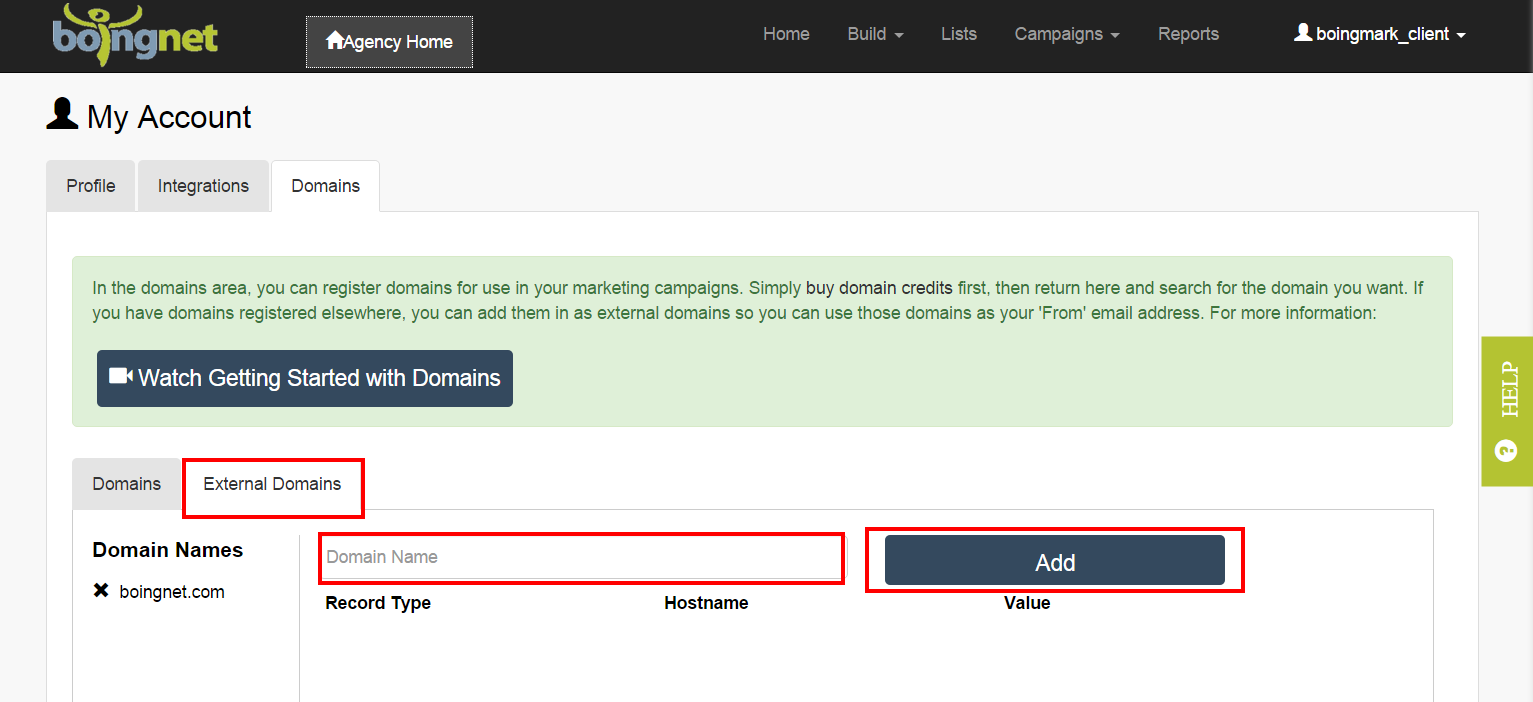
You’ll receive a message that your domain has been successfully added to your account.
Step 2:
To Point a Domain for a pURL Campaign:
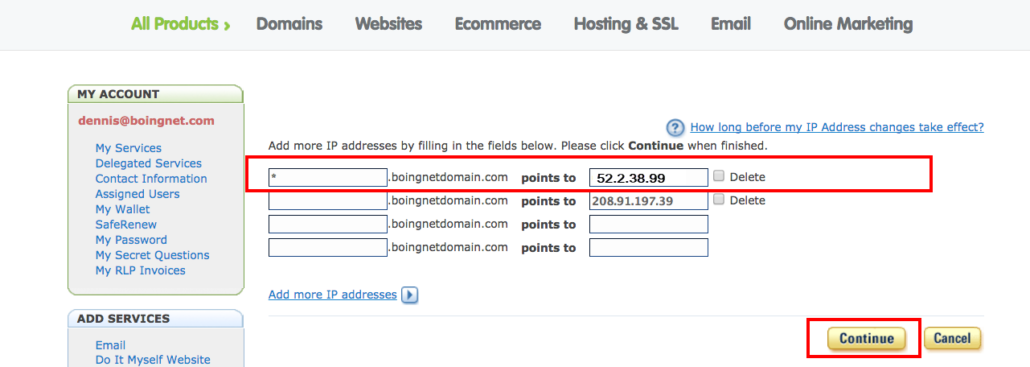
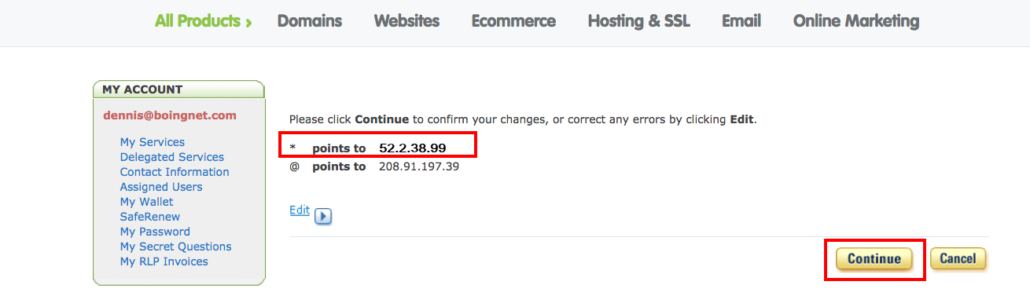
In order to point a domain to Boingnet for a pURL Campaign, you’ll need to add an ‘A‘ Record with a Host value of ‘*’ to your domain registrar’s DNS Zone File. This will point everything except subdomains that are already assigned to our IP address:
Log in to your hosting company’s admin dashboard, navigate to your domain’s DNS settings, and add an ‘A’ Record with the following values.
- Host: *
- Points to: 52.2.38.99
- TTL: 1 Hour
Below you will be able to view what your ‘A’ Record should look like when entered into the dashboards of some popular web hosts including Godaddy, Network Solutions, and Register.com. Note that the new and correct IP address for Boingnet is “52.2.38.99“. Click below to watch a video:
Godaddy
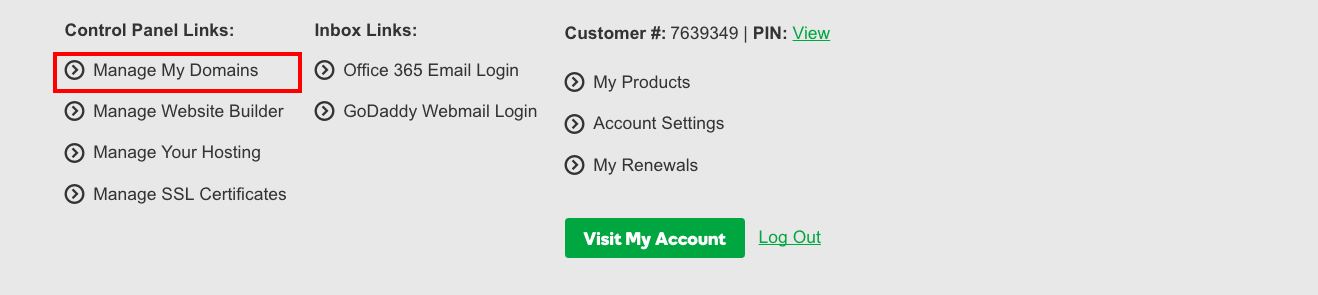
- After logging into Godaddy, Click your User ID in the upper right corner.
- Next, click Manage My Domains:
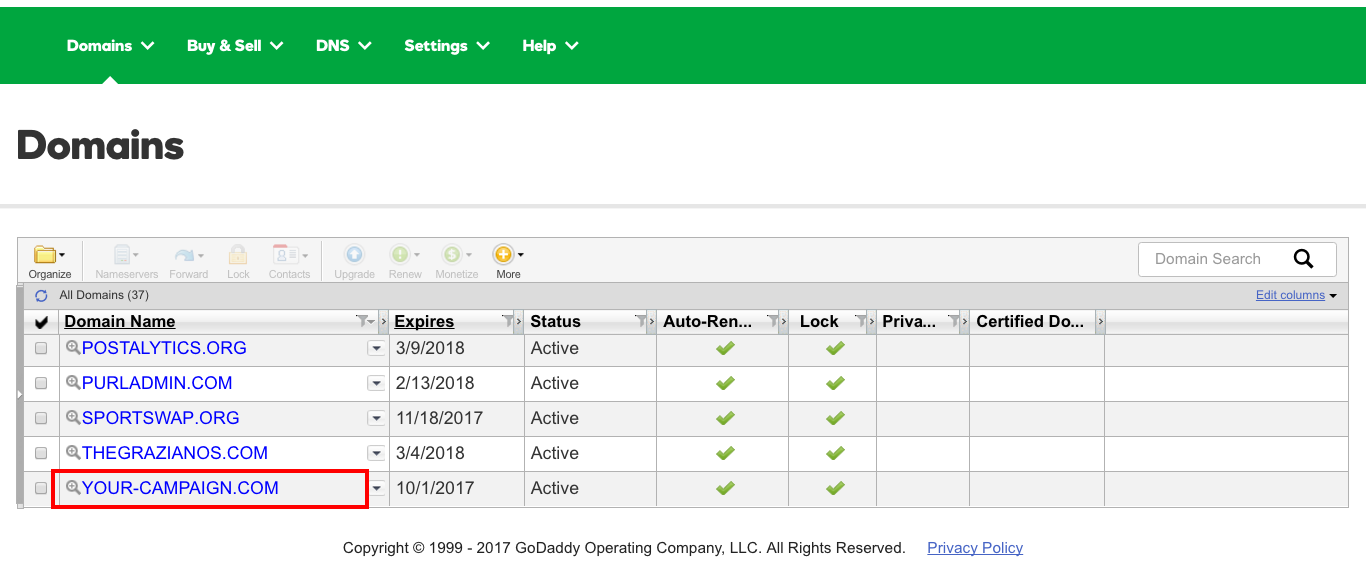
Find the domain you’d like to manage and select it – in this example, we’re editing the YOUR-CAMPAIGN.COM domain:
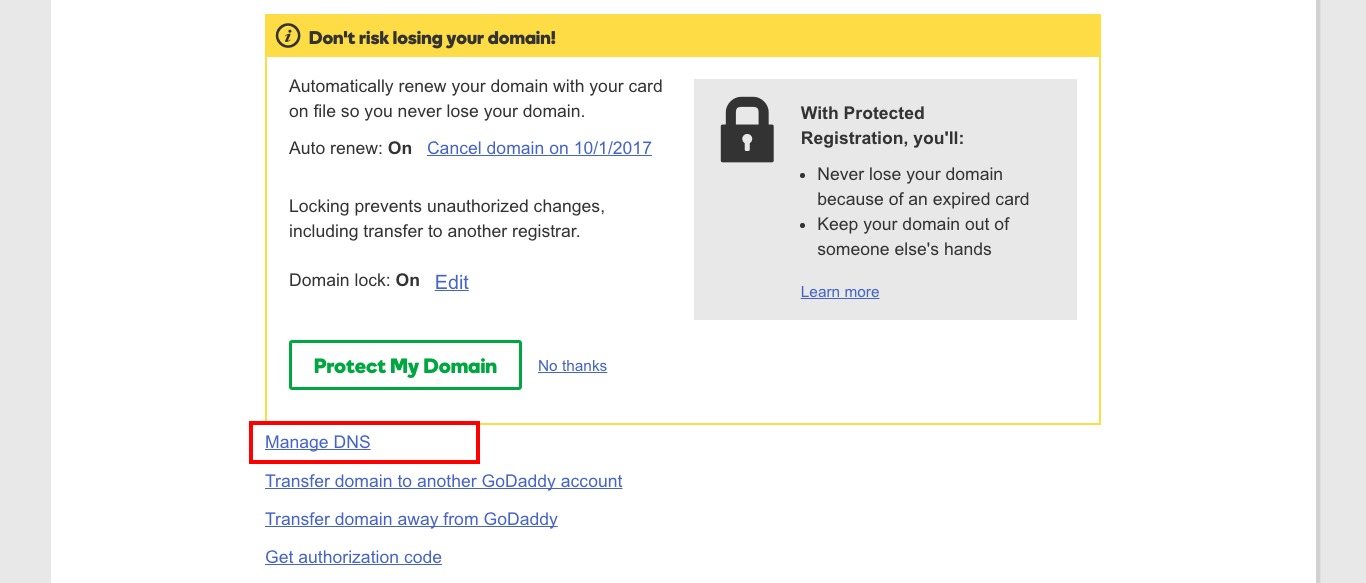
On the Domain Settings Page, scroll down and click on Manage DNS:
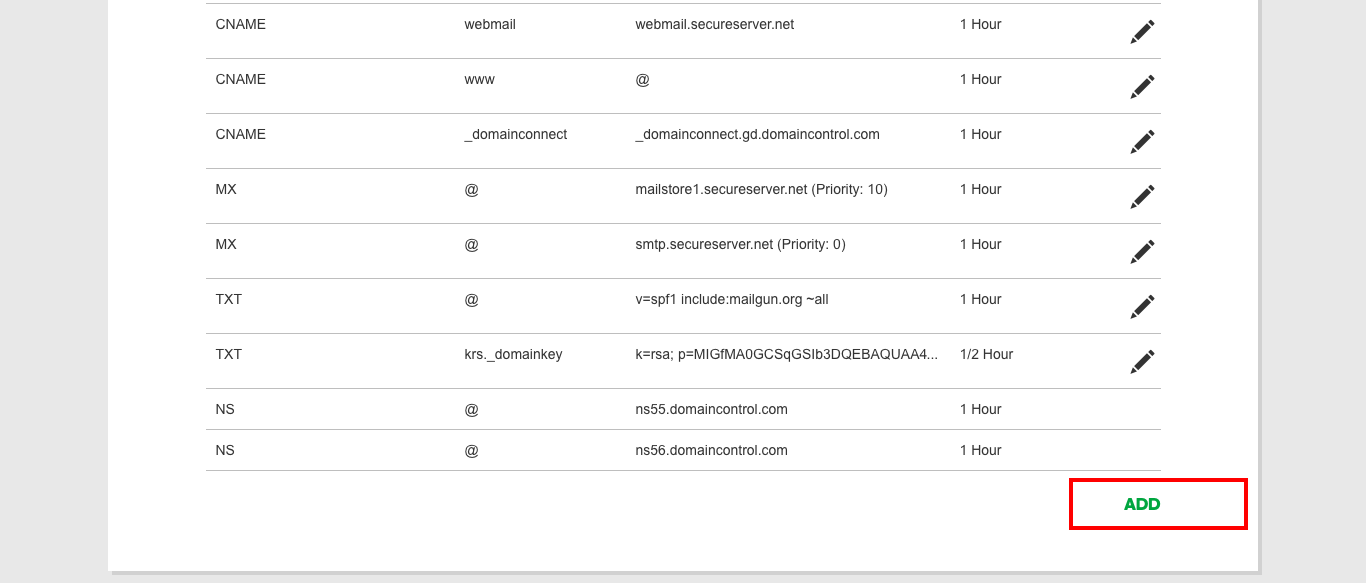
Your DNS Records for this domain will display:
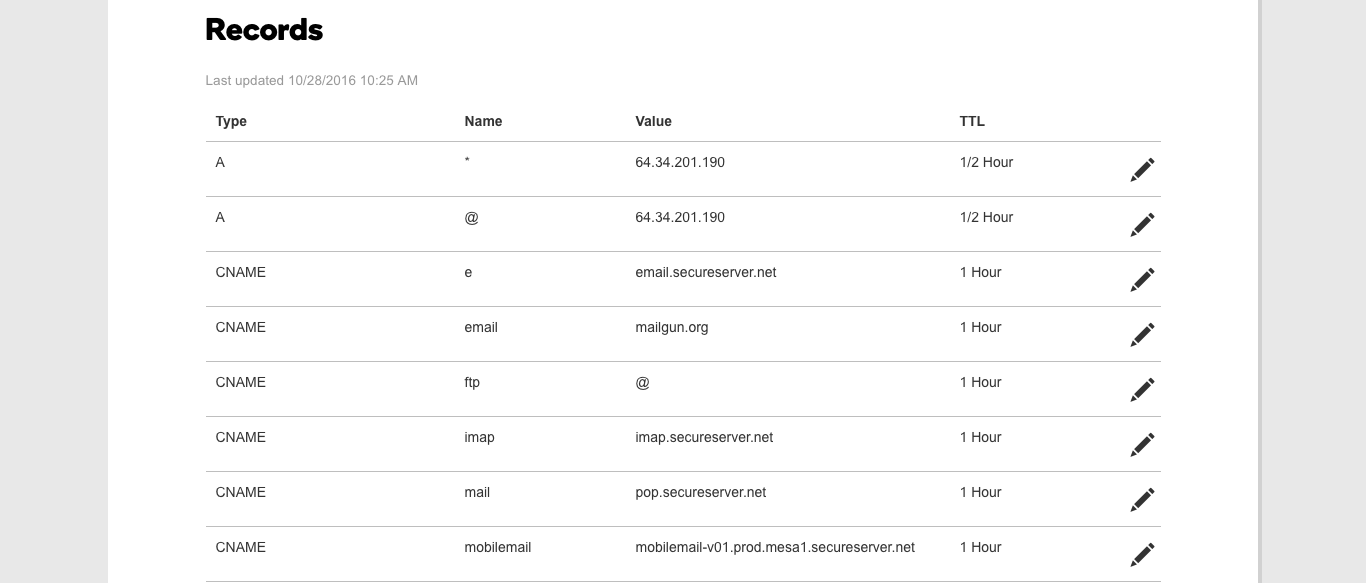
Scroll to the bottom and click Add:
Next, select ‘A’ from the drop down list under Type:
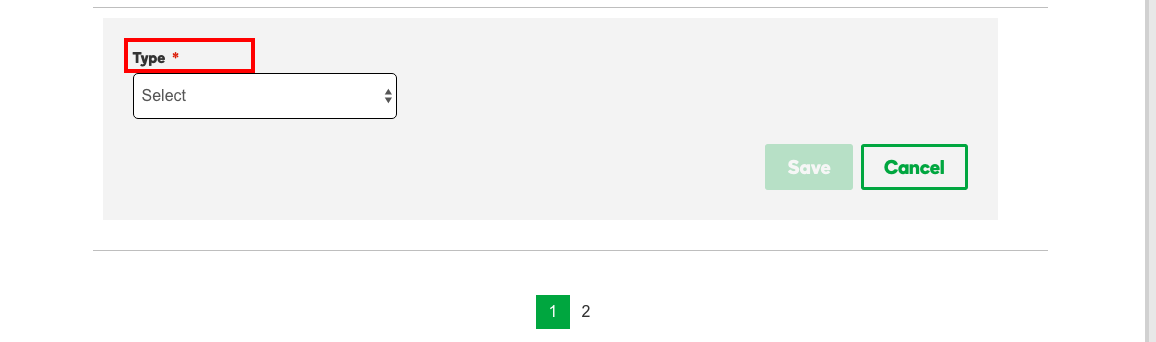
And then enter the following:
- Host = ‘*’
- Points To: 52.2.38.99
- TTL: 1 Hour:
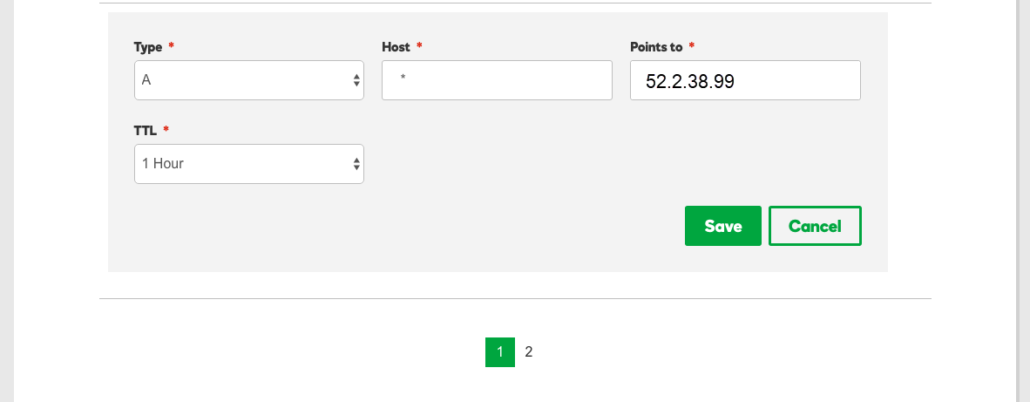
Click Save
Keep in mind that it takes most domain registrars 24-48 hours to make these changes.
Network Solutions:
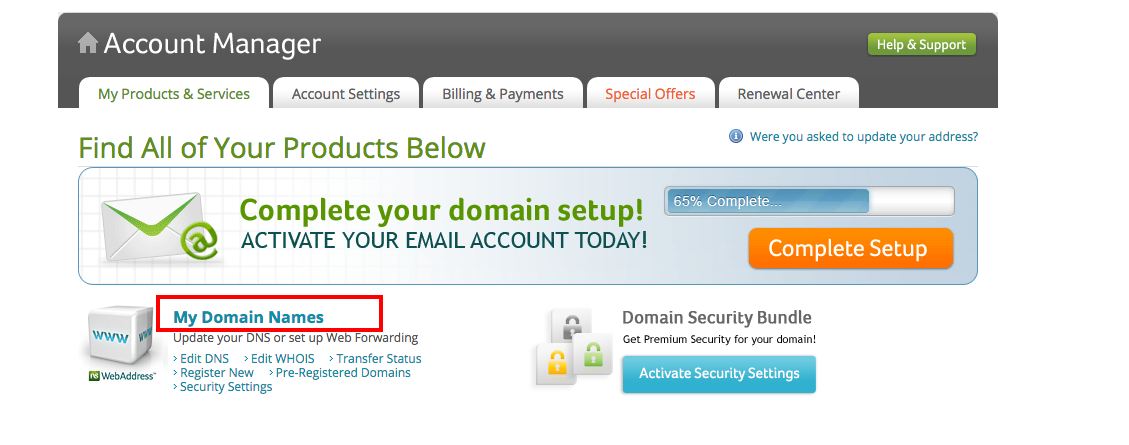
After logging into Network Solutions, click on My Domain Names:
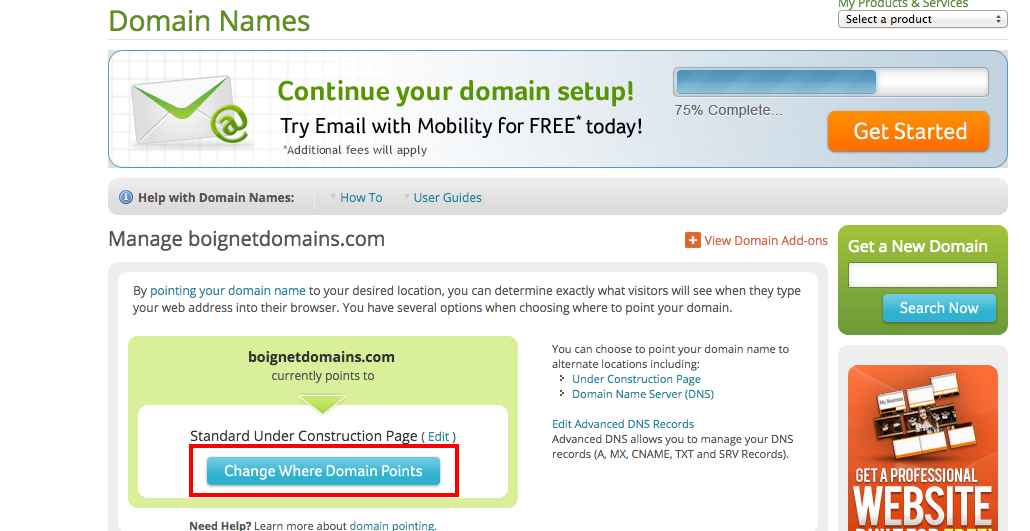
Next, click on Change Where Domain Points:
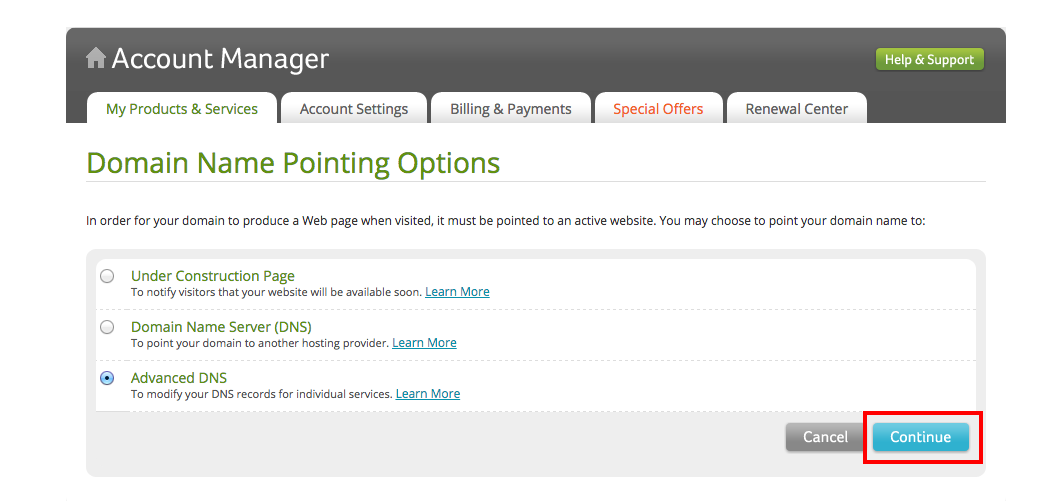
On the next page, select Advanced DSN and click Continue:
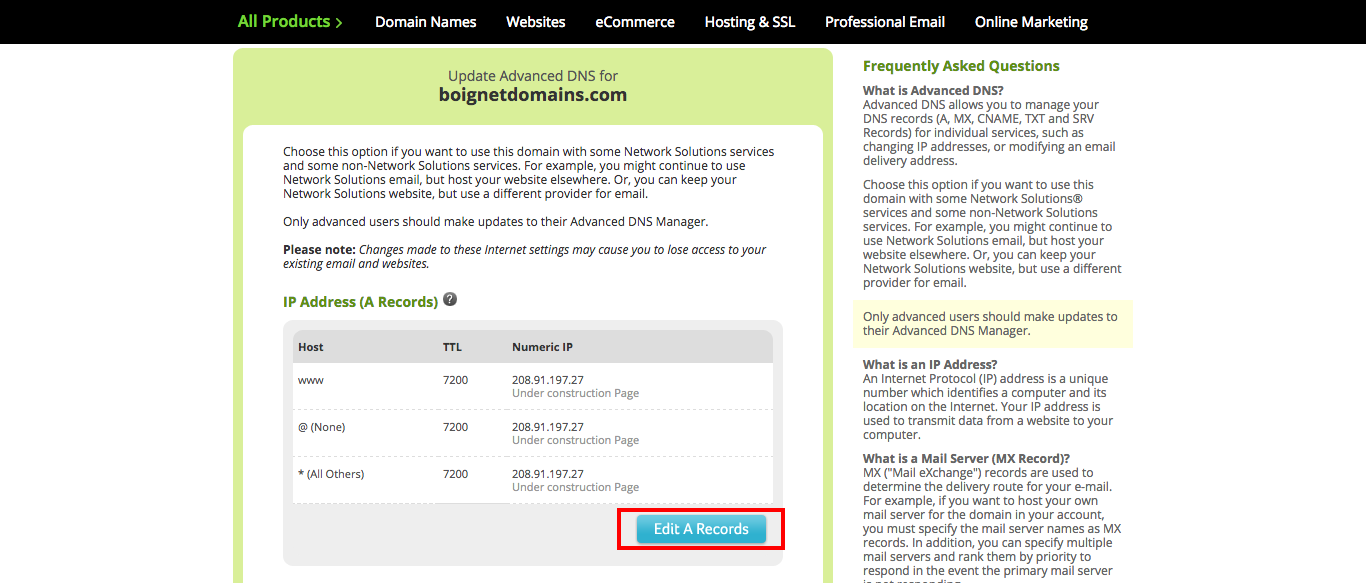
On the next page, click on Edit A Records:
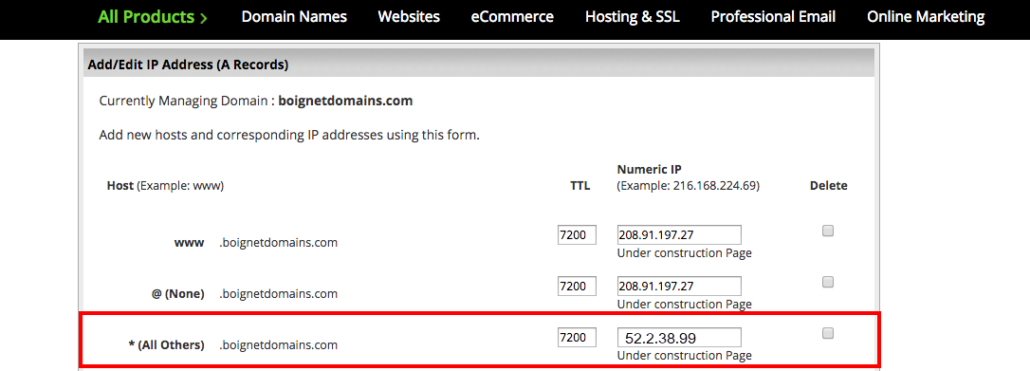
On the next page, find the * Host record and update the Numeric IP address with the following:
52.2.38.99
Do not edit the other A records.
Scroll down to the bottom of the page and click Continue:
You’ll be asked to confirm your updates, click Save Changes:
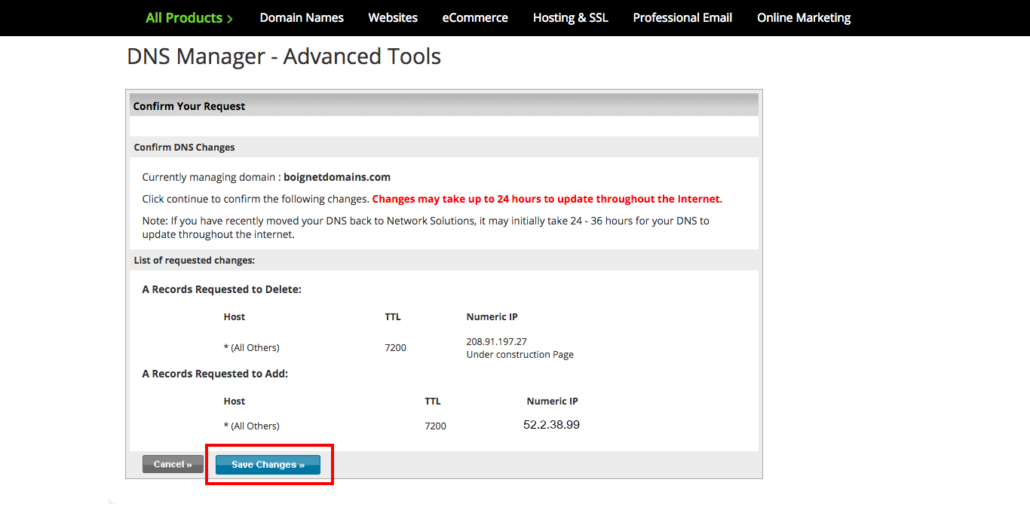
Please note that it may take Network Solutions 24 hours to process this update.
Register.com:
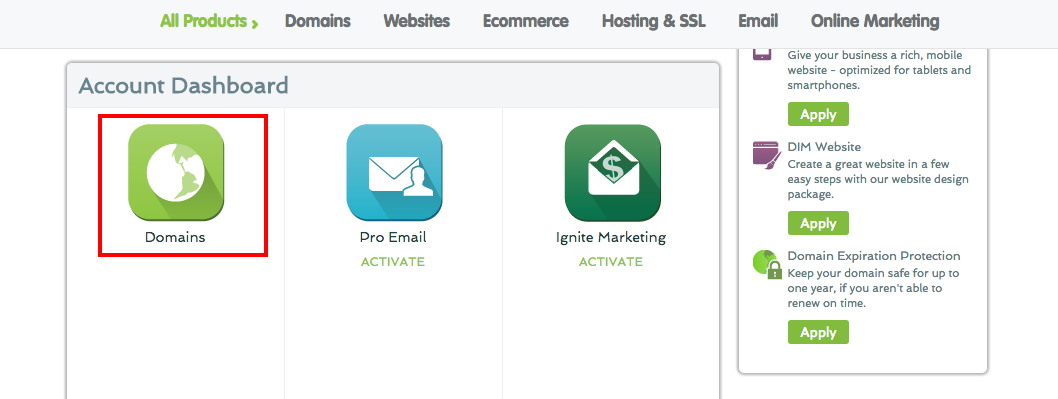
Login to your Register.com account. Hover over Domains and then select Manage:
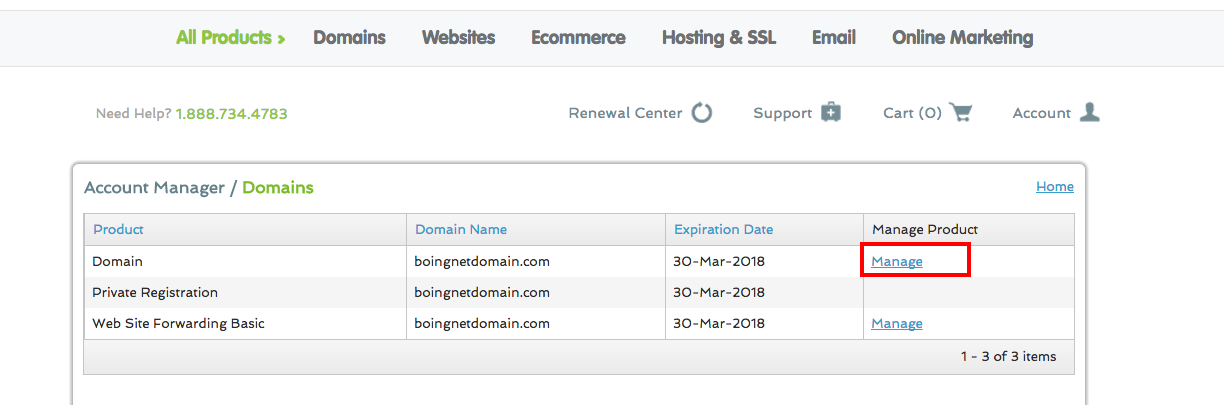
On the next page, click Manage:
On the next page, scroll down to Advanced Technical Settings and click the Edit arrow next to Edit IP Address Records:
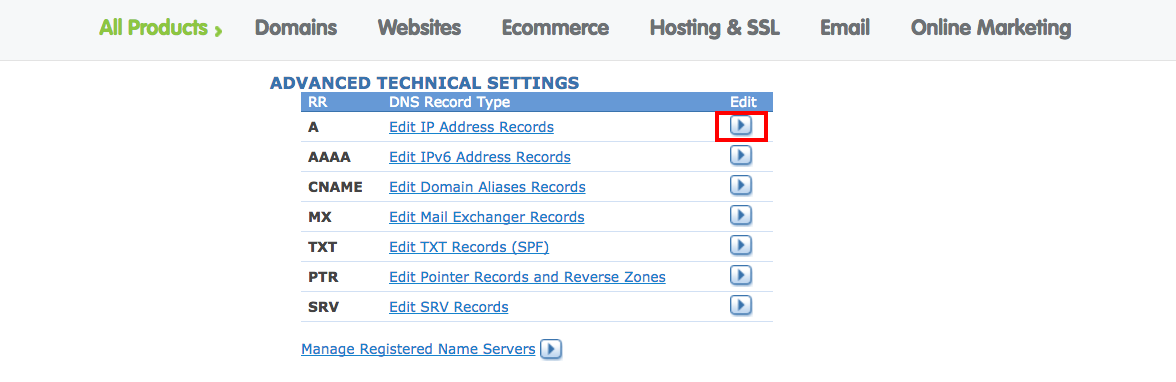
Enter the following IP address in the box provided for the * record:
52.2.38.99
Click Continue:
You’ll navigate to a confirmation page. Double check that you have pointed the * record to our 52.2.38.99 IP address and then click Continue:
Please keep in mind that it will take approximately 24-48 hours for Register.com to make these updates.
To Point a Domain for a Lead Generation Campaign:
A Boingnet Lead Generation Campaign will create a URL beginning with ‘www‘. In order to point a domain to Boingnet for a Lead Generation Campaign, you’ll need to add an ‘A‘ Record with a Host value of ‘@’ to your domain registrar’s DNS Zone File. This will point only the ‘www‘ to our IP address.
Follow instructions above for GoDaddy etc and add an ‘A’ Record with the following values.
- Host: @
- Points to: 52.2.38.99
- TTL: 1 Hour
To Point a Sub-Domain to Boingnet:
To point a sub-domain to Boingnet, log in to your domain registrar’s dashboard and add an ‘A’ Record with the following values. In the example below, we’re pointing a sub-domain on GoDaddy.
- After logging into Godaddy, Click the green Manage button to the right of Domains.
- Click on the domain you would like to edit.
- Click the DNS Zone File Tab.
- Click Add Record.
- In the Add Zone Record box that pops up – enter the following;
- Under Record Type, Select A (Host)
- Host = ‘sub-domain name’
- Points To: 52.2.38.99
- TTL: 1 Hour
- Click Finish
For example, if we want to add a sub-domain called ‘marketing‘ to a domain called ‘your-campaign.com‘, we need to add the following A Record to the your-campaign.com domain:
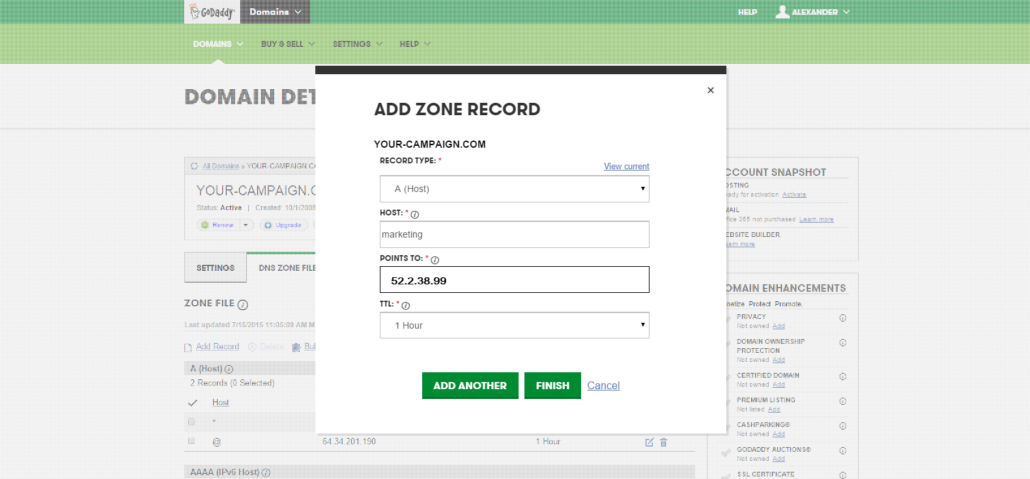
This will point the marketing.your-campaign.com domain to Boingnet’s IP address.
Click Save to save all of your changes. Please keep in mind that it takes most domain registrars 24-48 hours to make these changes.
Contact Our Support Forums for Help
We are perpetually seeking to evolve our product as well as our support process. If you didn't find your answer here take a moment to visit our support forums as well as submit your ideas on how we can bring Boingnet to the next level!
Support Forums